Adding a New Prescription to eMAR – Care Control Learning Hub

Adding a New Prescription to eMAR

This guide will cover how to add a new prescription onto the eMAR application.

1

On the eMAR home screen, select Prescription Change from the 5 available options.

2

Next, select a service user from the list and press Continue.

3

A list will be displayed showing all the current prescriptions for the service user selected. On the tool bar at the bottom of the screen, press Add New Prescription.

4

A blank form will be displayed. Begin by choosing the medication for the prescription. This can be done by typing in the dedicated Search bar.

5

Next, choose a Start Date and Start Time for the new prescription. You can also select an End Date or leave this as Ongoing. To build the dose and time schedule, press the Build button.

6

A new window will open with some options for which medication round this prescription is required for, as well as the minimum and maximum dose for each administration.


There are also options for administration every hour, or at specific times if this is necessary. You can also select how often this schedule will repeat. It could be every day (default), on certain weekdays, or every X number of days.

To save the schedule, press Save Details.

Note: for medication which requires multiple schedules, please see the relevant guide we have on Building Complex Schedules.


If this prescription is a PRN, this can be ticked, and a PRN Protocol can be added. A Minimum & Maximum dosage can also be set.

7

The next section is in relation to the Prescription Detail. Tick the boxes if:

  • The medication needs to be administered with food
  • The medication can be administered on an empty stomach
  • The medication can be self-administered by the service user


The prescription text will be auto-built based on the medication and the dosage set. However, this can be manually edited by pressing the blue Edit button. A prescription photo can also be added by tapping on the camera icon.

8

The Stock Level of the medication can be added next. Enter the number of doses currently available.


A Reason for Medication can also be added. Press the blue Edit button in the text box.


The final section of the form relates to evidence and checking for the prescription. Select an Evidence option from the drop-down list; by default, this is MAR Sheet. Next, the staff members checking the prescription can be chosen. The first is under the name of the staff member creating the prescription, and the second can be added by pressing Select.


The GP Name and Signature can be added if relevant and an option for Two Staff Administering can be selected if required.


After completing the information in the form, select Continue in the bottom right corner of the screen. A reviewing window will open, so double check all the information here is correct. Again, press Continue.

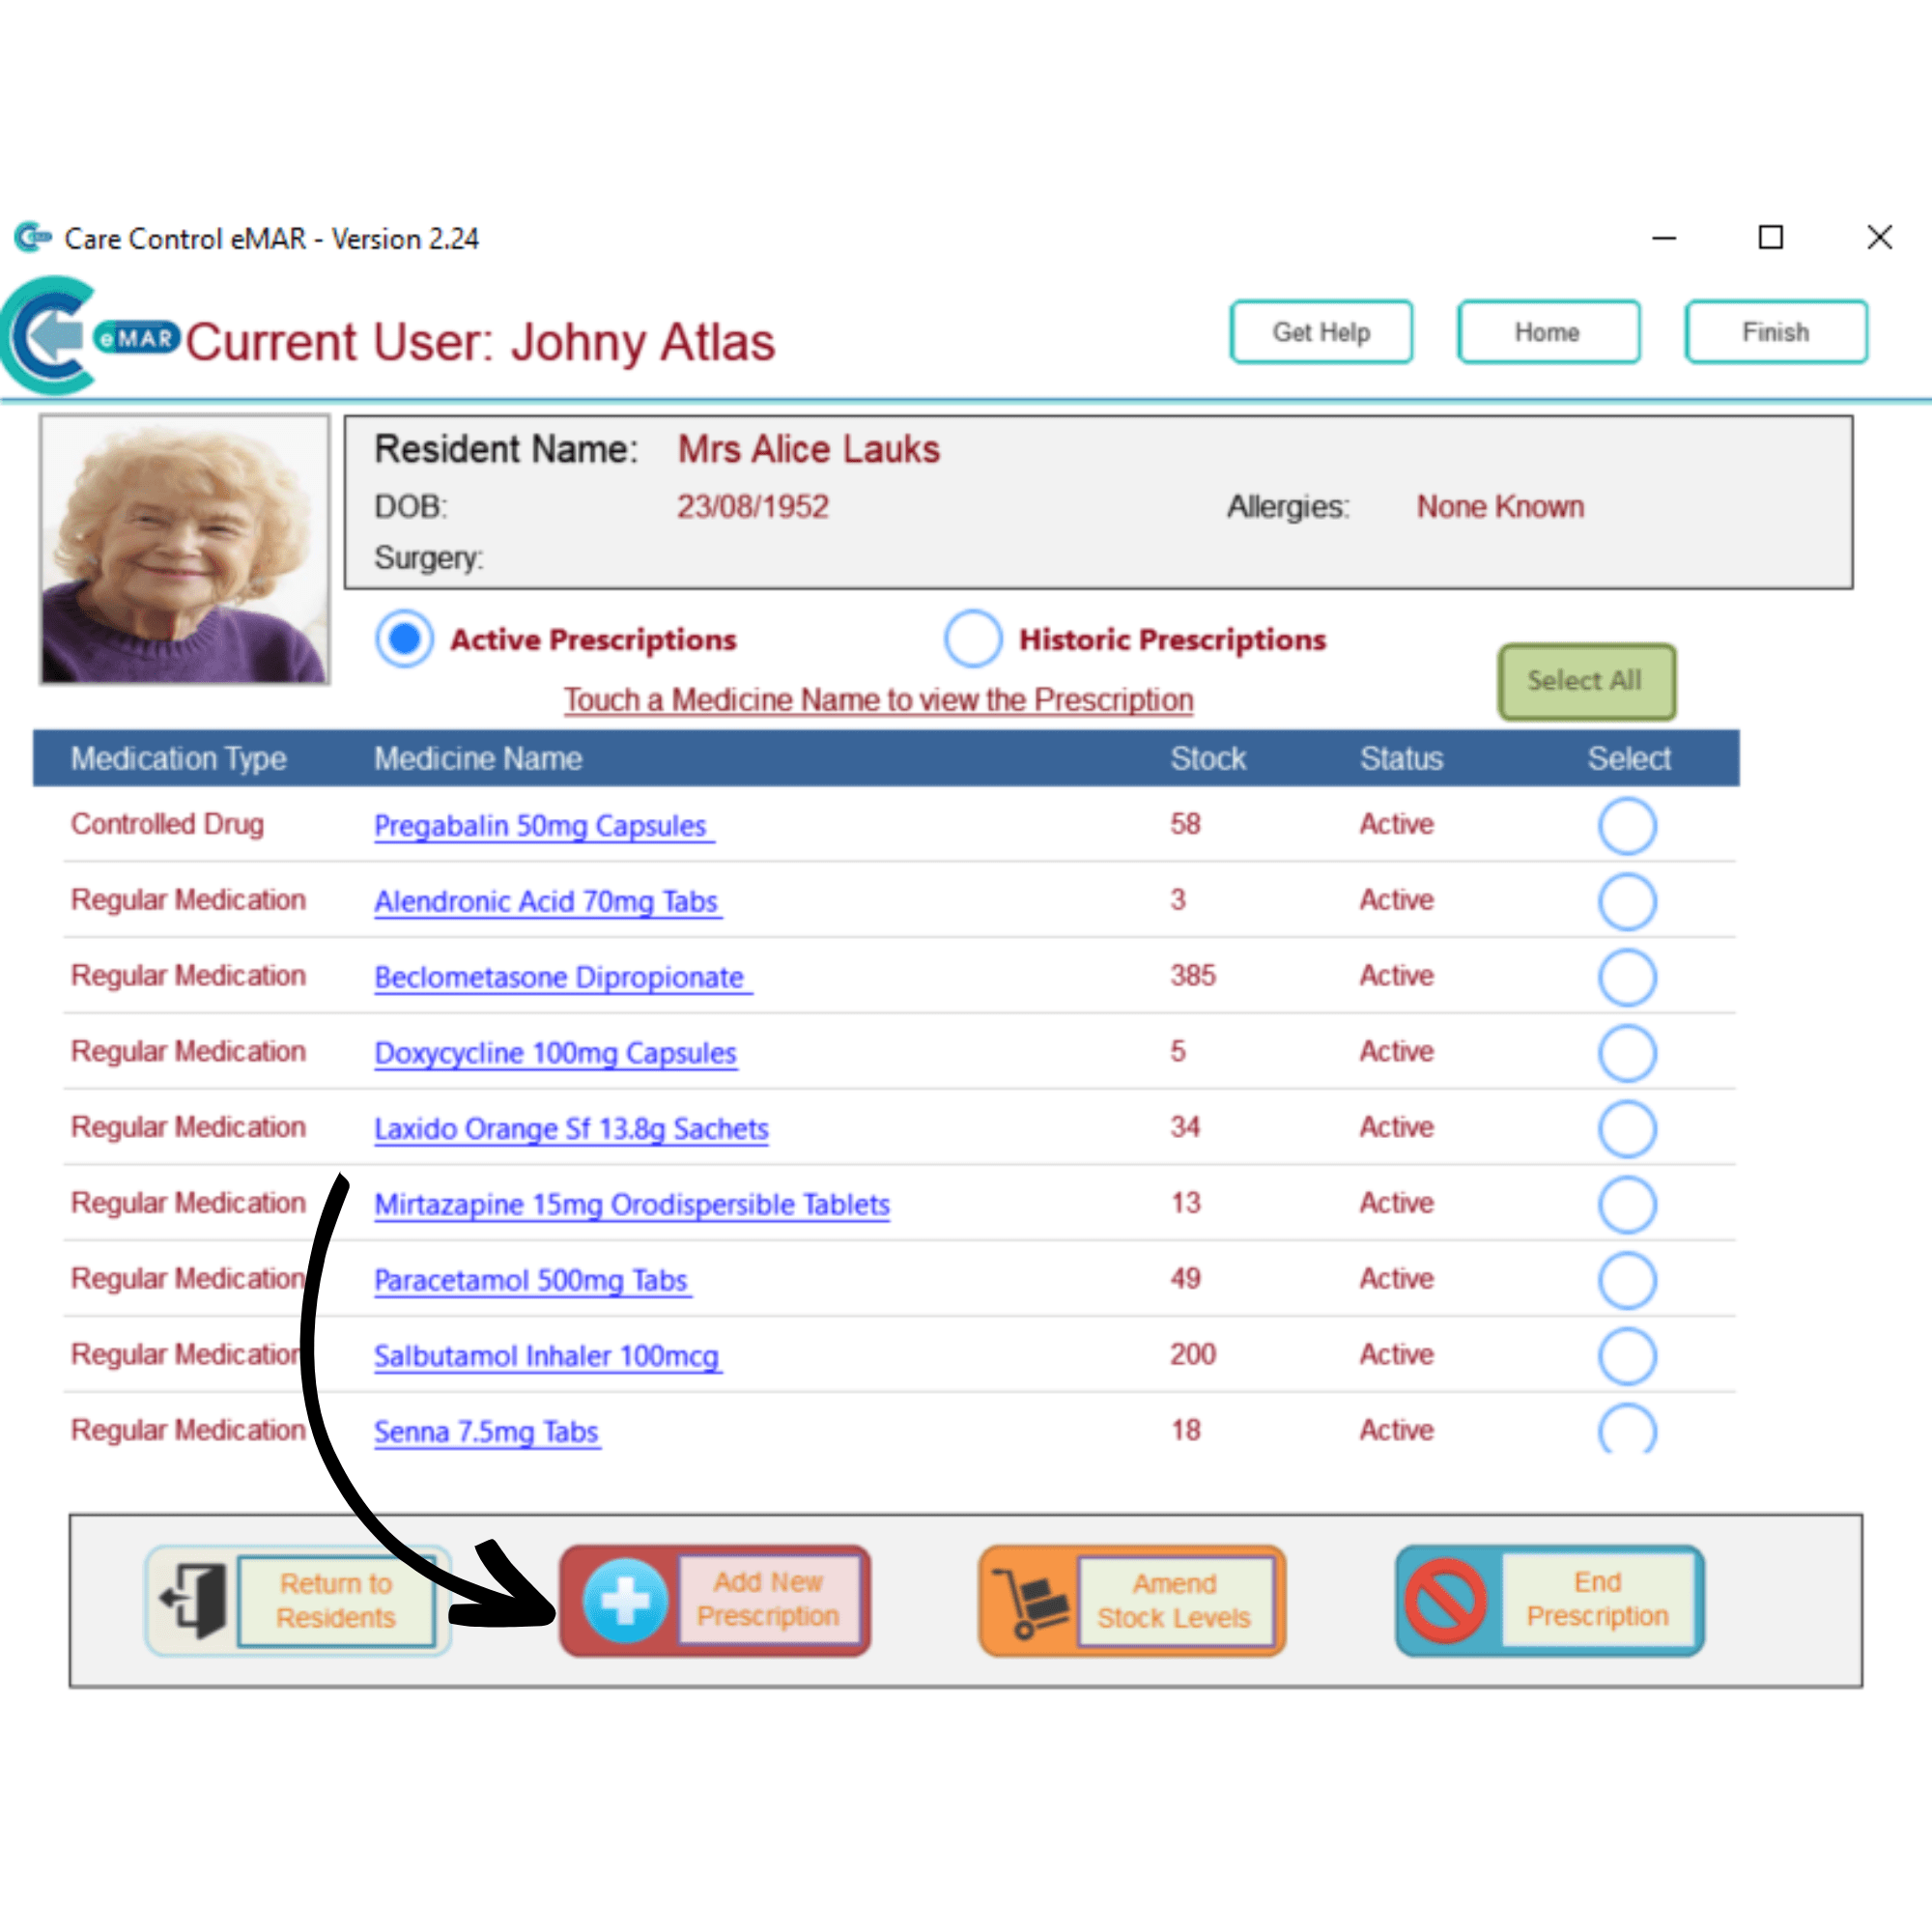
The new prescription will now show in the service user’s list.

Powered by BetterDocs

Important links

Contact

support@carecontrolsystems.co.uk

01822 738 100

v2.40