Creating Custom Monitoring – Care Control Learning Hub

Creating Custom Monitoring

This guide will cover how to create custom monitoring forms on Care Control Windows. This allows you to have monitoring areas which are tailored to your service users and needs as an organisation.

Note – this method of custom monitoring creation is different to creating Single Form monitoring.

Play Video

1

In the Administration of Care Control Windows, navigate to the Monitoring Types tool, which can be found under the Care Planning tab.

2

Select Create New from the options at the bottom of the window.

3

Choose Multi Select Monitoring and press Continue.

4

Enter a name for your new monitoring area. You can also base the new monitoring on an existing one via the use of a template.

5

Begin by entering a description of the monitoring. This can be used to give an overview of the monitoring itself, as well as give instructions to staff members completing the form.

Next, select how the monitoring will link to the Care Review via the Care Review Section Link drop down option.


There are also options to add Photo Support, QR Codes and Date & Time selections.

6

Next, select a Comment Type from the drop-down list. This is the method in which the answers of the monitoring will be collected.

  • None – allows staff to record that the monitoring has been completed, without the need for further information entry.
  • Free Text Entry – allows staff to type their own note.
  • Simple List – allows staff to choose an option from a list – useful if the monitoring only ever has one outcome.
  • Comment Builder – allows the use of multiple selection lists.

For ‘None’ and ‘Free Text Entry’, no further options need to be completed. Choosing Simple List will allow selection of a list (new or existing) for the monitoring response options. Choosing Add New List will allow creation of a new one.

7

First, enter the name of your new list.

8

Press Add Row to add a list value. You can then type in the content of the item in the List Value box. Continue to create the list as desired, then, press Save Records.

9

For the Comment Builder option, you will first be required to select a Single List – this is useful for recording whether or not the service user has allowed or refused care.

You can have 4 lists in total. Continue to add or create the lists as described in steps 6-8.

10

After selecting the lists required, you will need to design the Templated Note Response. Press Build.

11

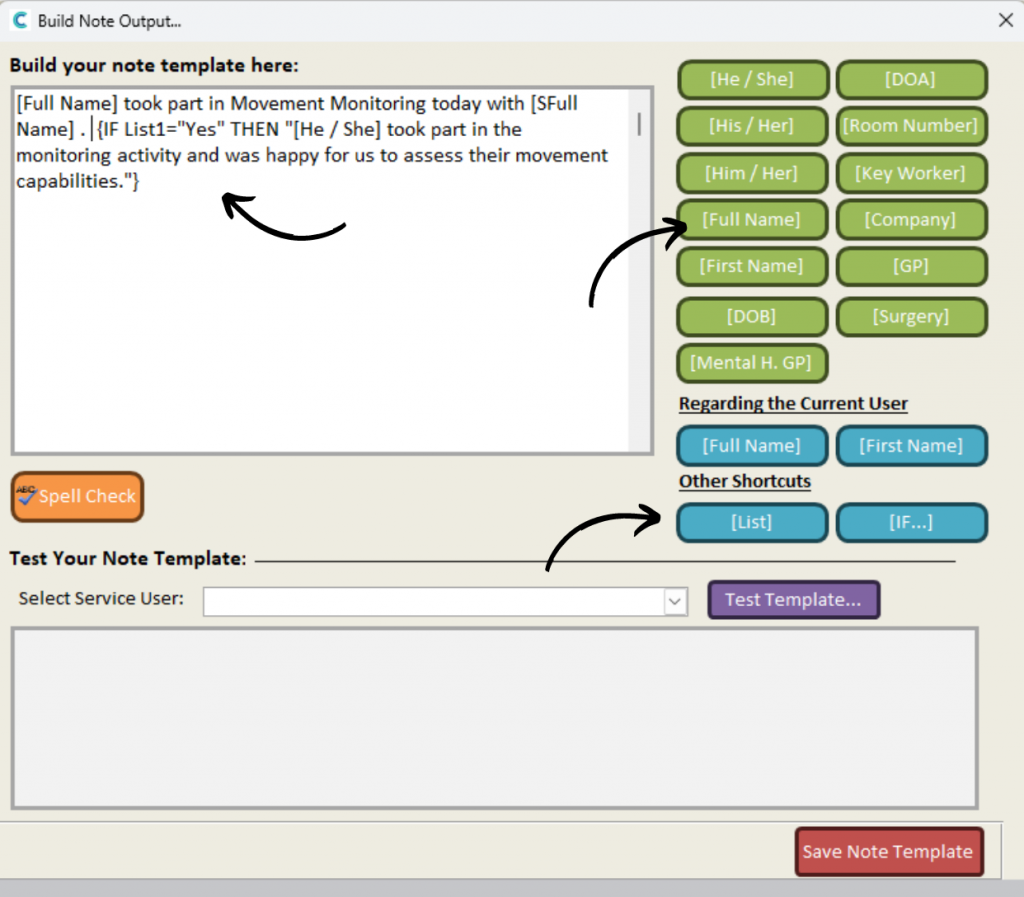
You can type in the text box to develop an output note for when the monitoring is completed. Use the build functions on the right-hand side to personalise the note and create custom notes depending on the outcome of the monitoring.

For example, pressing [Full Name] will add it to the text on the left. When the actual note is created after monitoring is completed, this will be replaced with the service user’s full name.

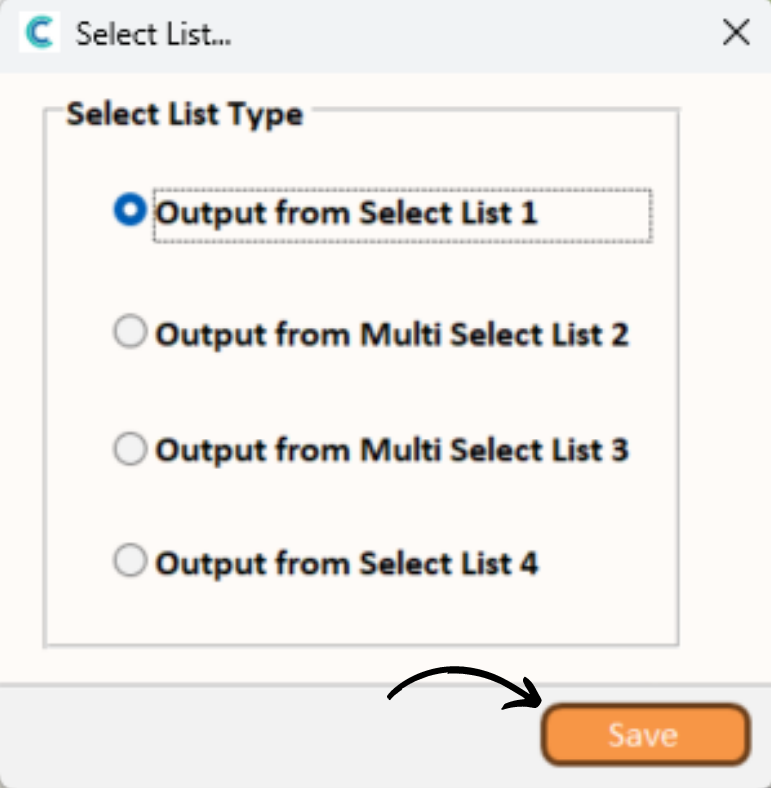
There are also special build functions (List, and IF). The List function will add the results of the selected list in its position within the note.

12

Simply select the list outcome you wish to be added to the note, then press Save.


13

Using an IF function will create a note response which differs depending upon the outcome of the monitoring. In this example:

IF List 1 is answered as Yes then the text “He took part in the monitoring activity and was happy for us to assess their movement capabilities” will be added to the note.

After completing the note template, make sure to save the progress of the new monitoring area.

14

Your new monitoring can be found under the Draft Only section in Monitoring Types. Simply double click it to open.

15

The overview page of the new monitoring area will be displayed. Here, you can set the default frequency. You can also continue to edit the content by pressing Continue to Edit.

Powered by BetterDocs

Important links

Contact

support@carecontrolsystems.co.uk

01822 738 100

v2.40