Creating Menus Part 2 – Care Control Learning Hub

Creating Menus - Part 2

This guide will cover how to add build meals to your new menu. This guide is Part 2 of 2.

Note: Admin access or Kitchen manager access is required to create and edit menus.

1

After creating a new menu in Part 1 of this guide, you are now ready to build its structure. Select your new menu and press Edit Menu.

2

A new window will open. At the top, you can edit the menu name and description, as well as the start date and rolling period by clicking on the settings cog. Press Update after amending any of these. To add some content to your menu, press Add Menu Lines.

3

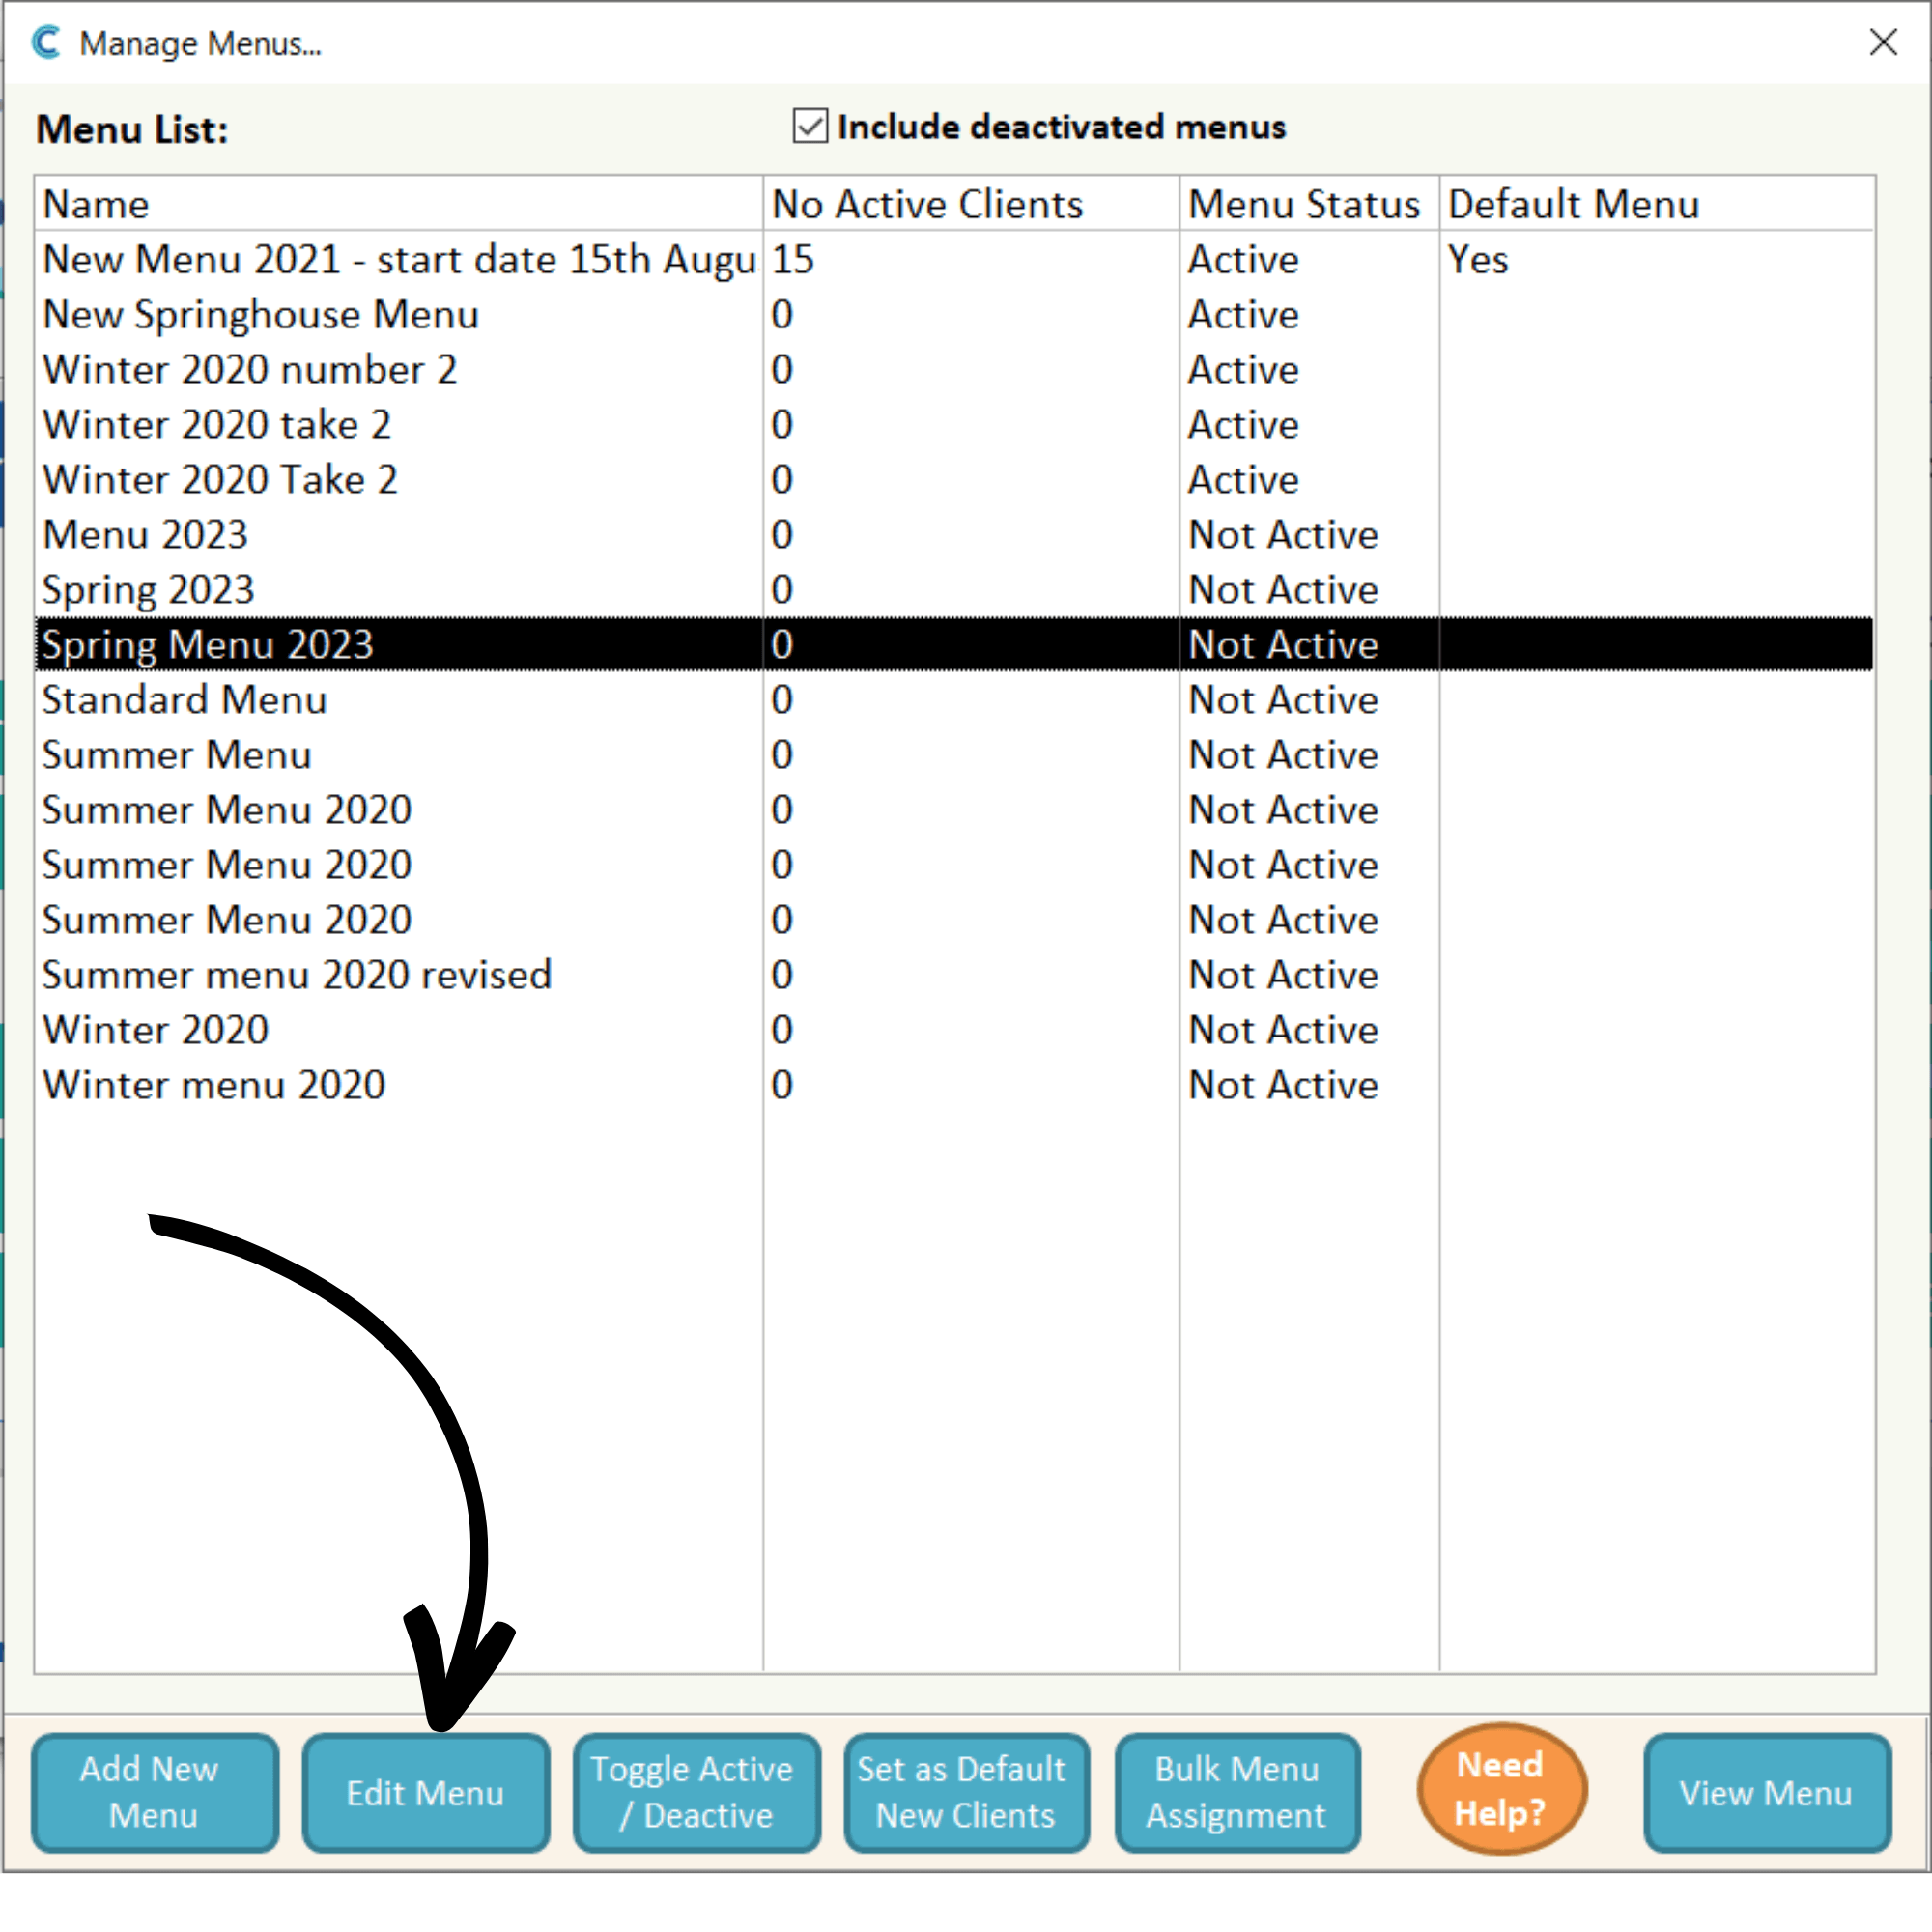
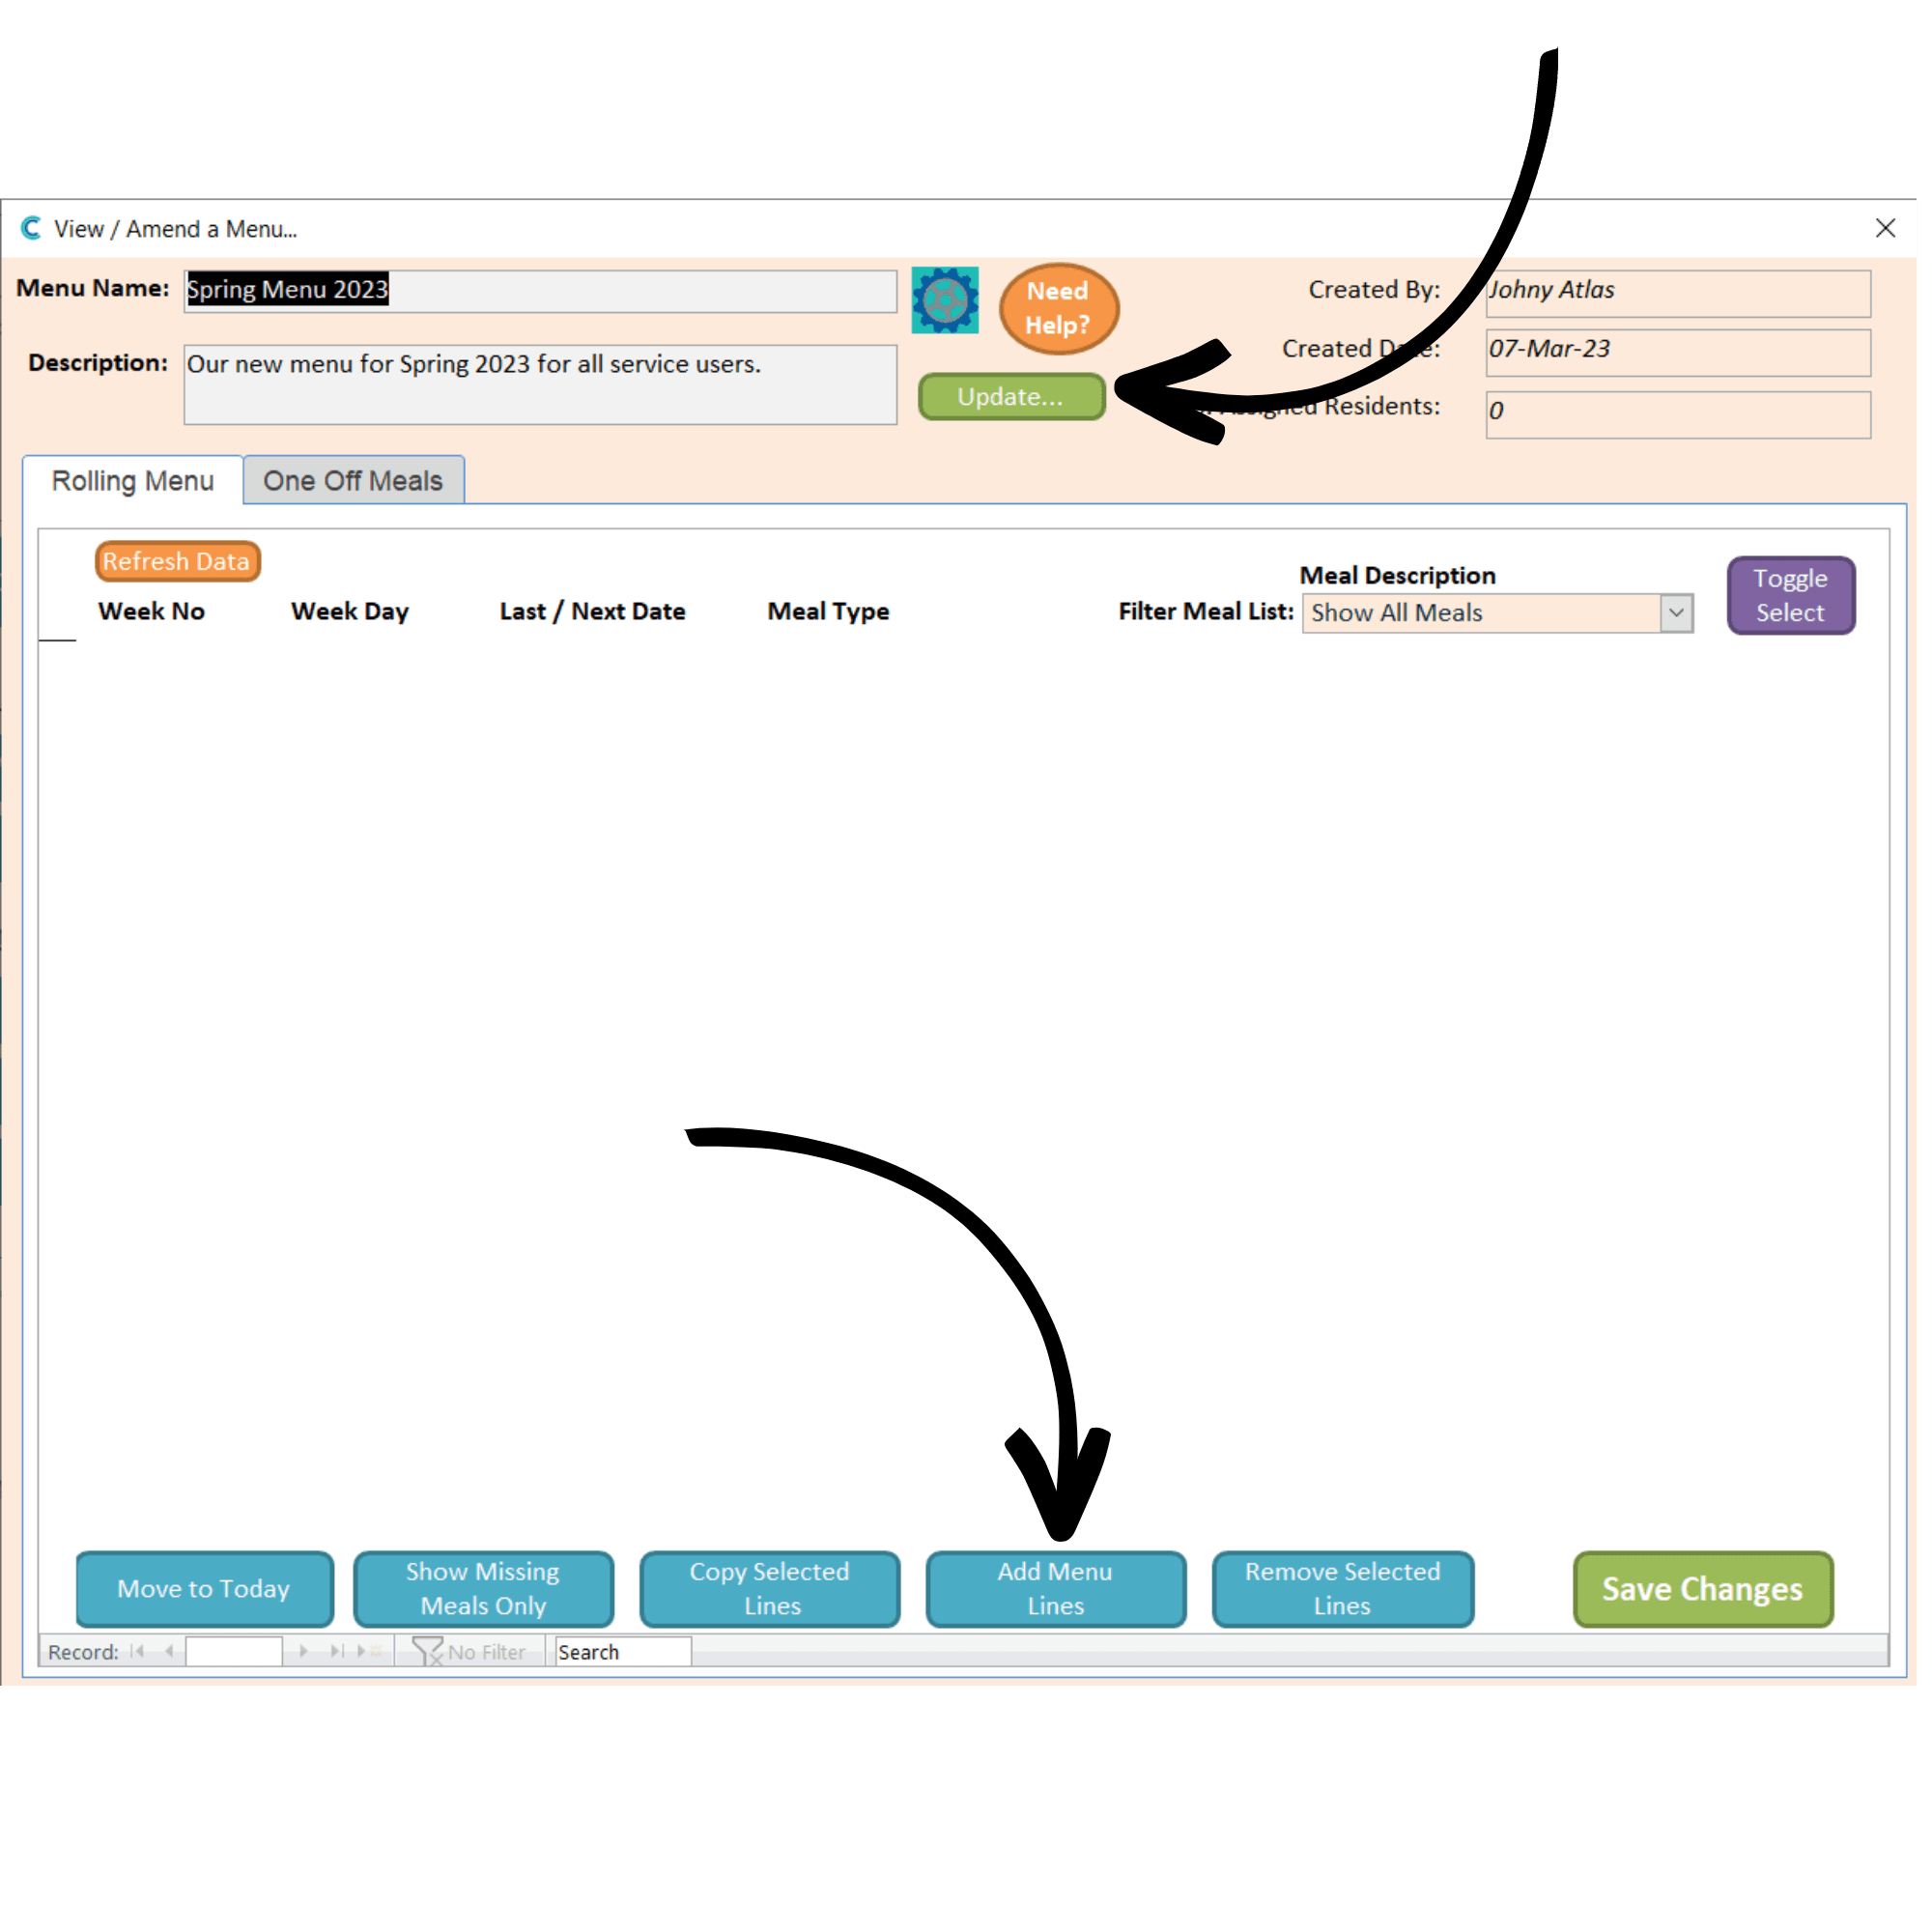
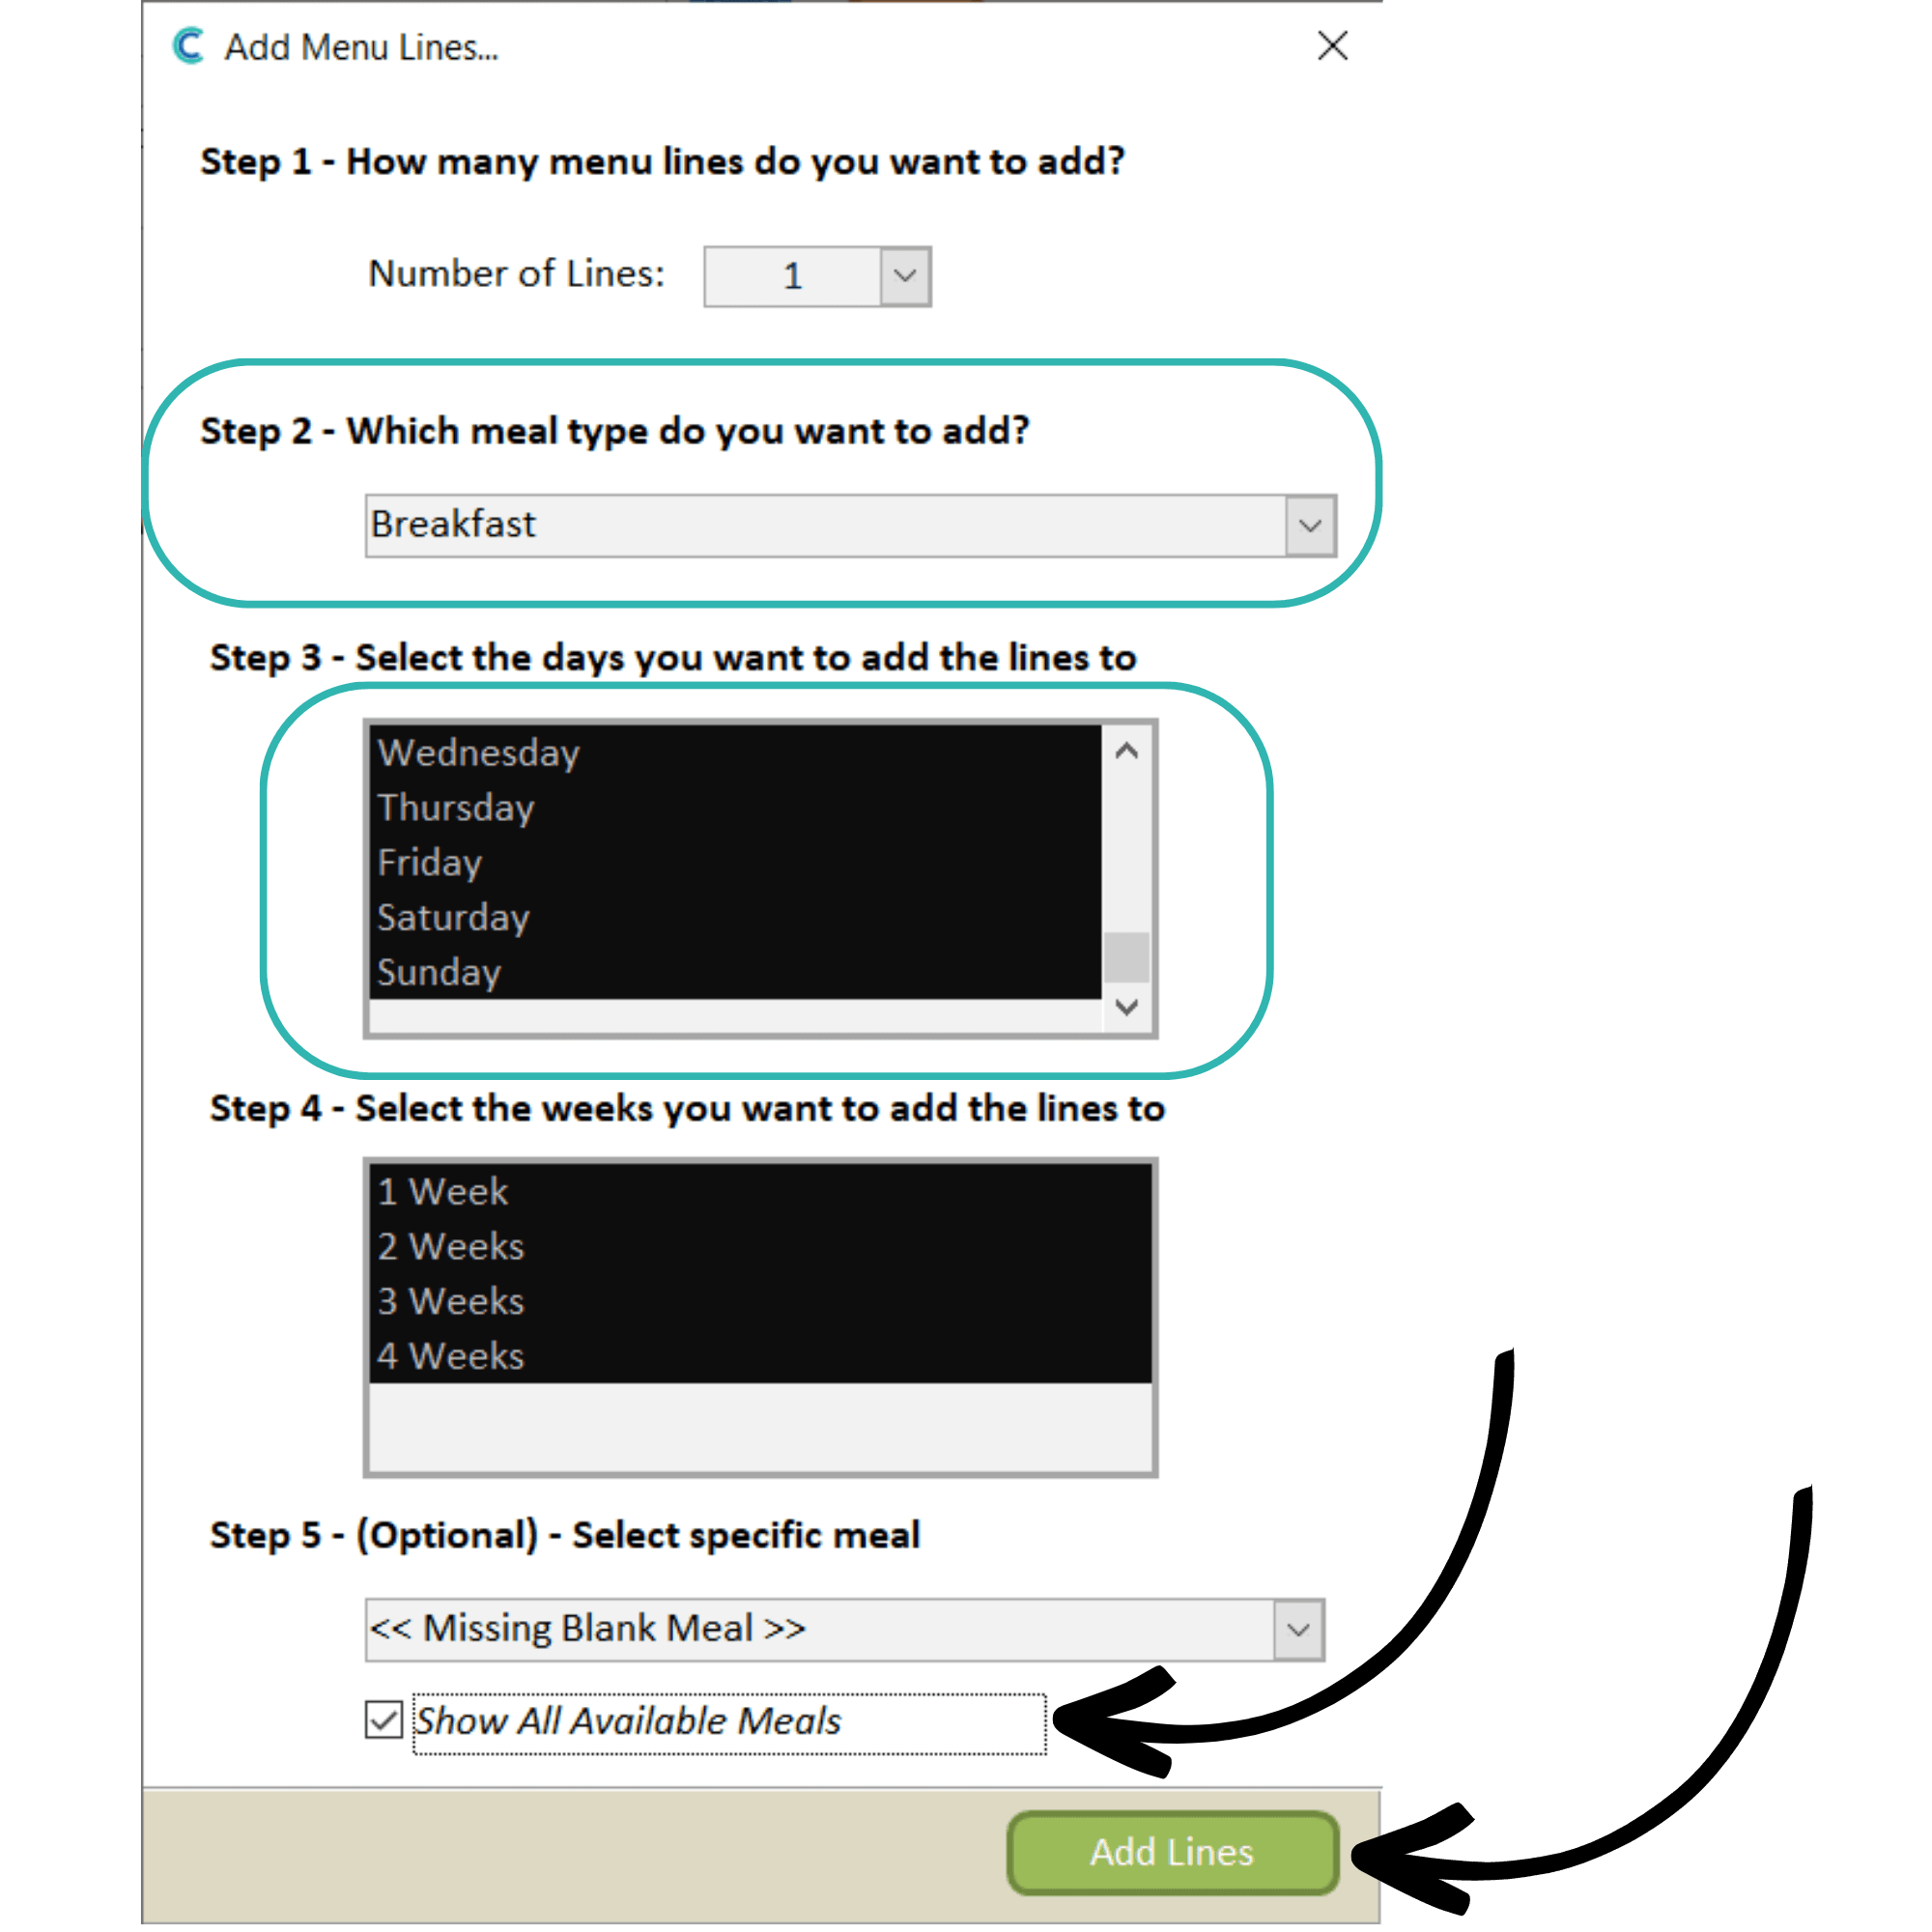
A new window will open. Here, you can enter the menu information in the form of lines. In this example, we will build the breakfast lines.

Select the meal type and days you wish to add the line too. In this case, we will add breakfast for every day of the week.

Next, select the weeks you wish these lines to be added to. In the example, this menu is a 4-week rolling menu, so we will add the breakfast lines to all 4 weeks.

Finally, you can set specific meals for the line. For now, we will leave this and tick Show All Available Meals.

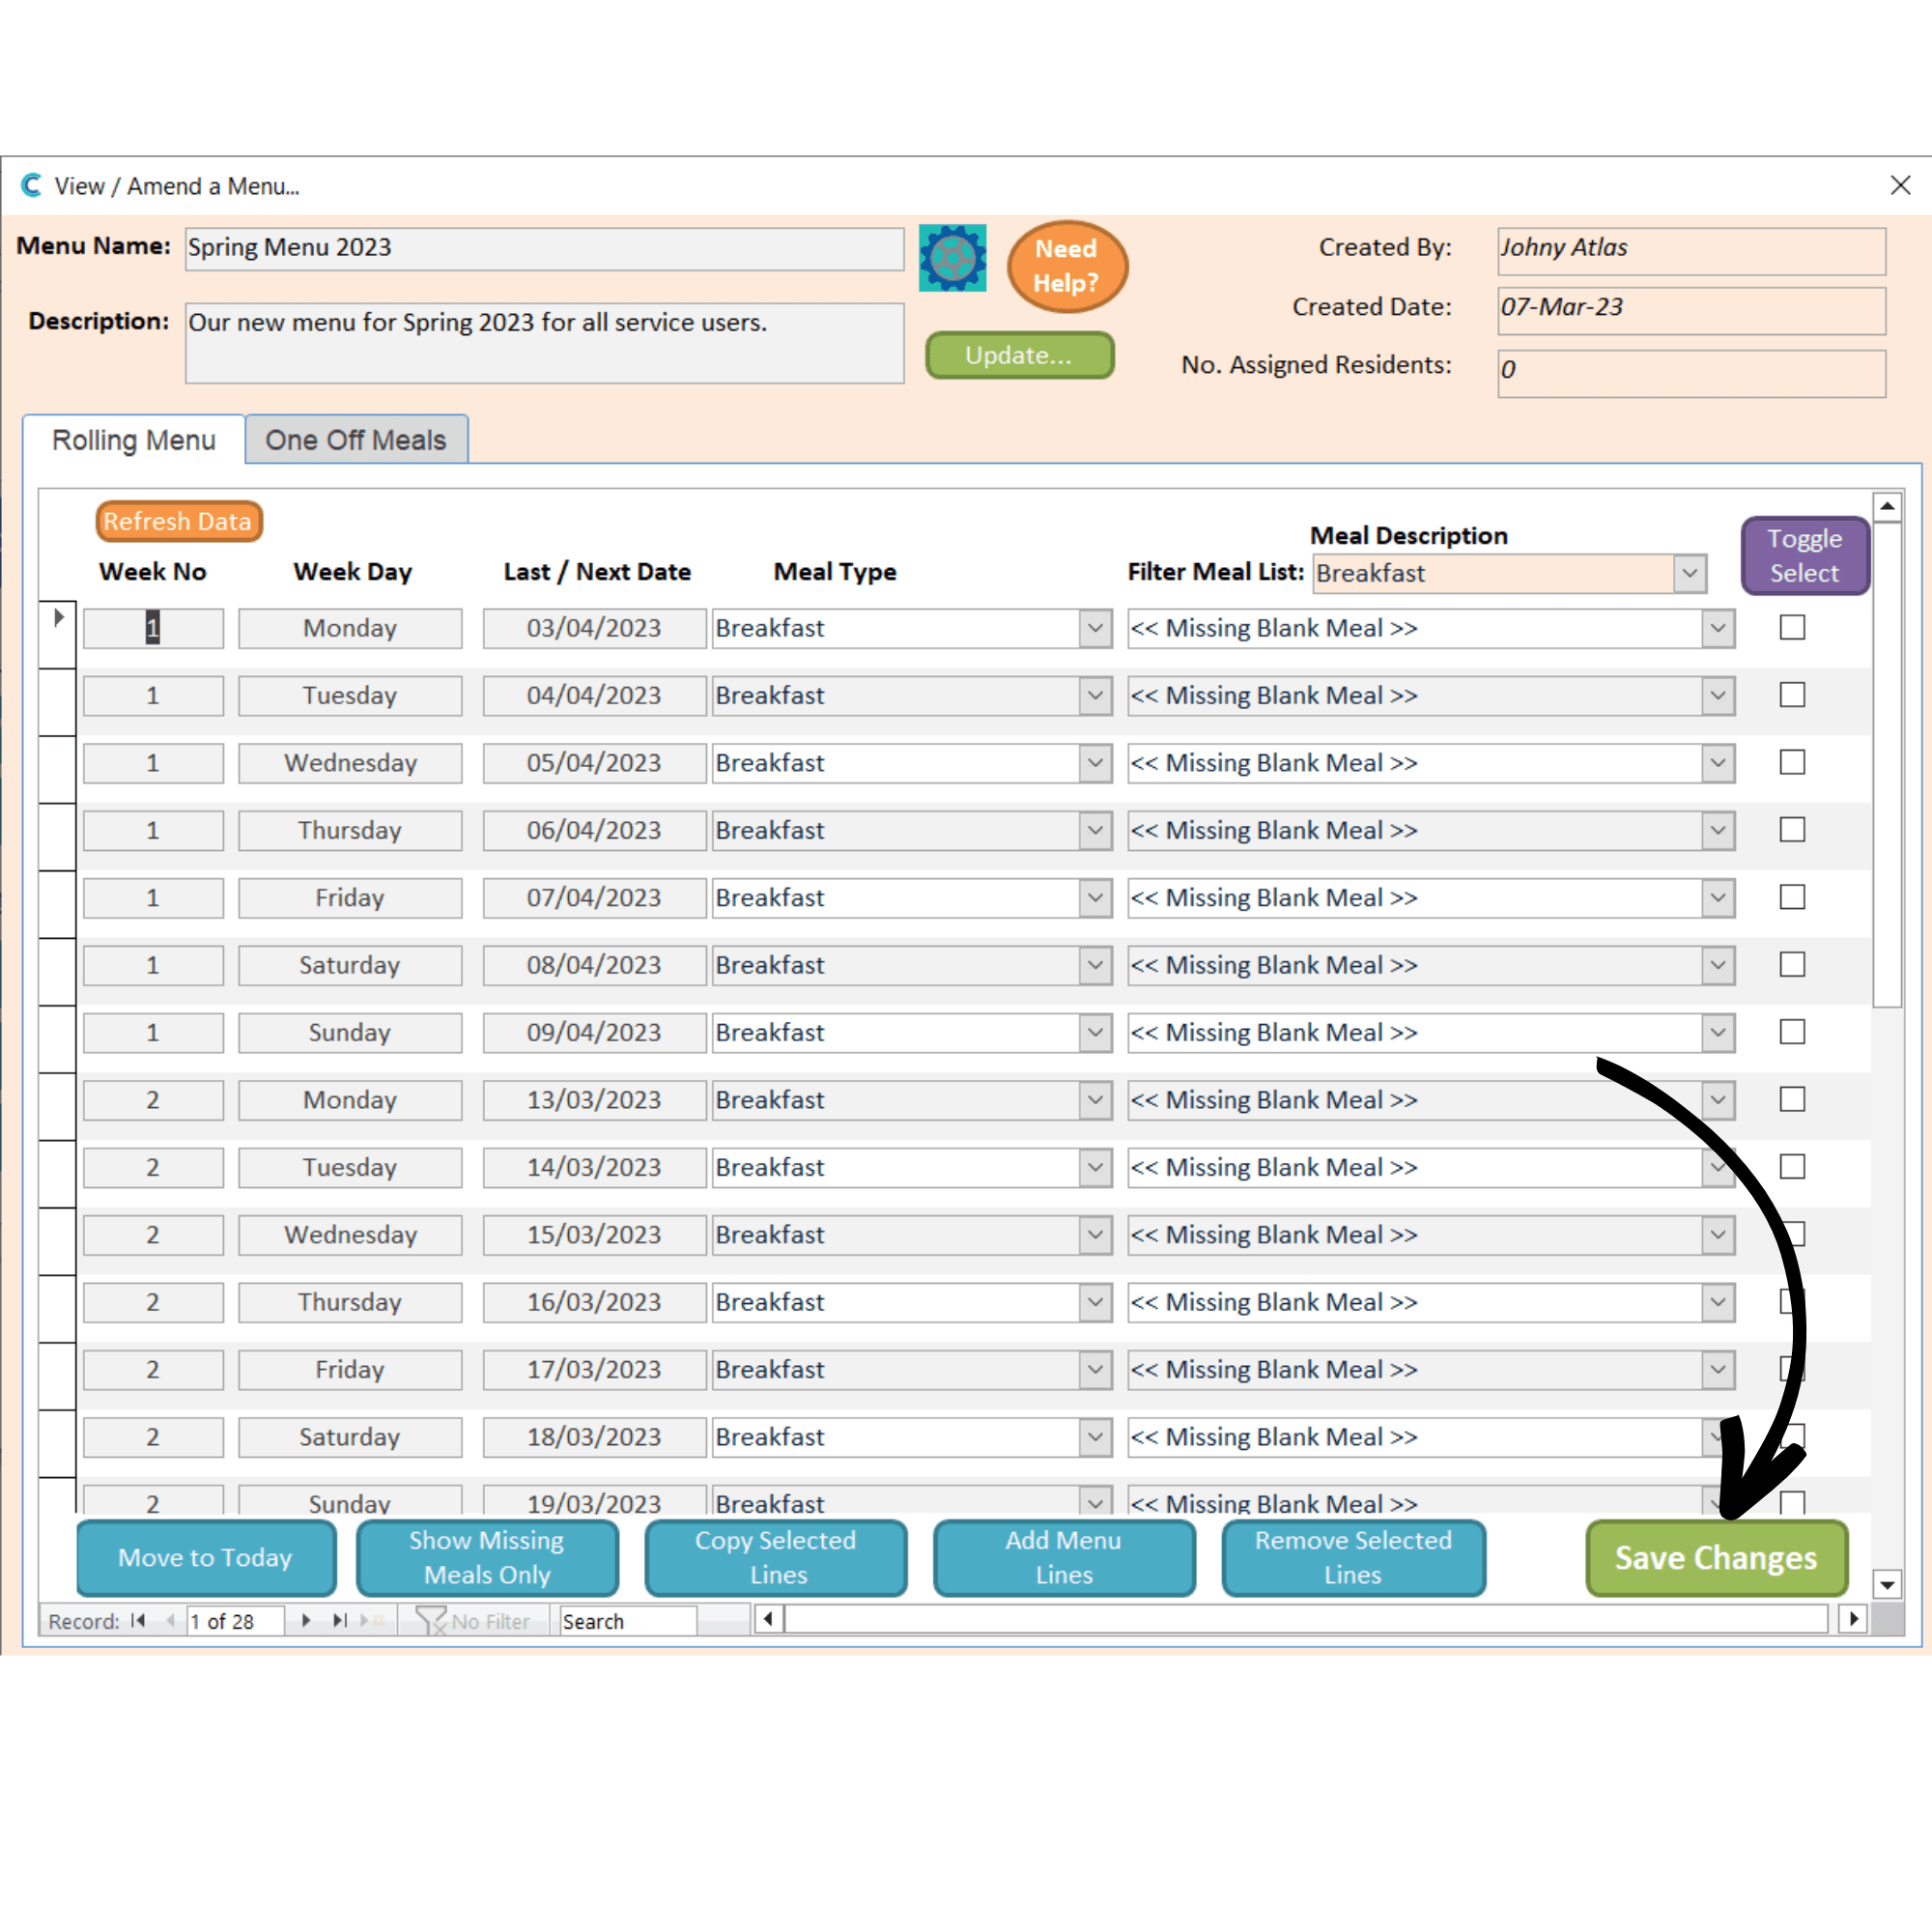
Press Add Lines to finish the process.

4

Your lines will populate the menu as set up in the previous step. You can now repeat this step to continue building your menu.

Press Save Changes.

5

After building your menu, you can activate it from the Manage Menu list. Simply select it and press Toggle Active/Deactive.

Finally, you will need to assign the menu to your service users. Press Bulk Menu Assignment.

6

A list of all your service users will be displayed, alongside their current menu assignment. Simply enter a reason for the change in the menu and press Save Changes.

Powered by BetterDocs

Important links

Contact

support@carecontrolsystems.co.uk

01822 738 100

v2.40