Care Service Groups in Cloud
This guide will cover how to create and modify Care Service Groups in Care Control Cloud.

Step 1:
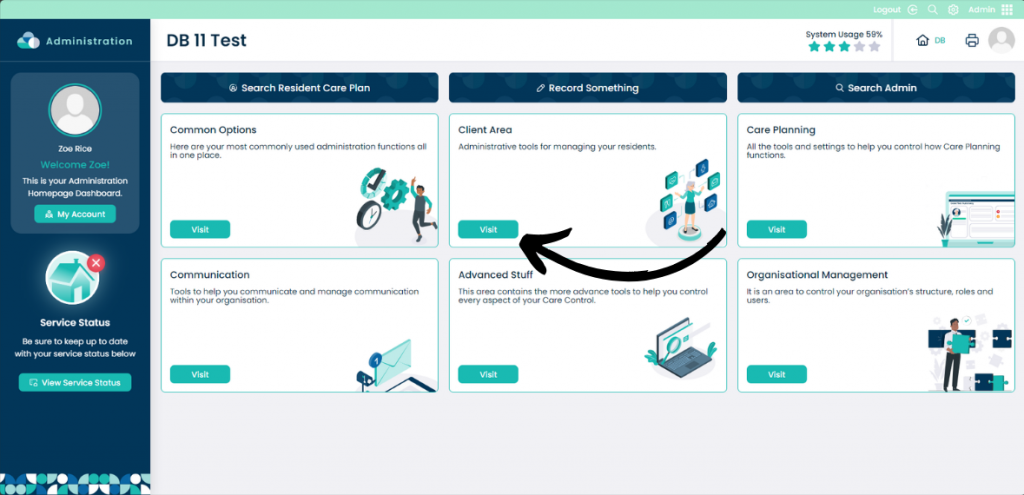
When you are in the Admin app of Cloud, click Visit in the Client Area pane.
Step 2:
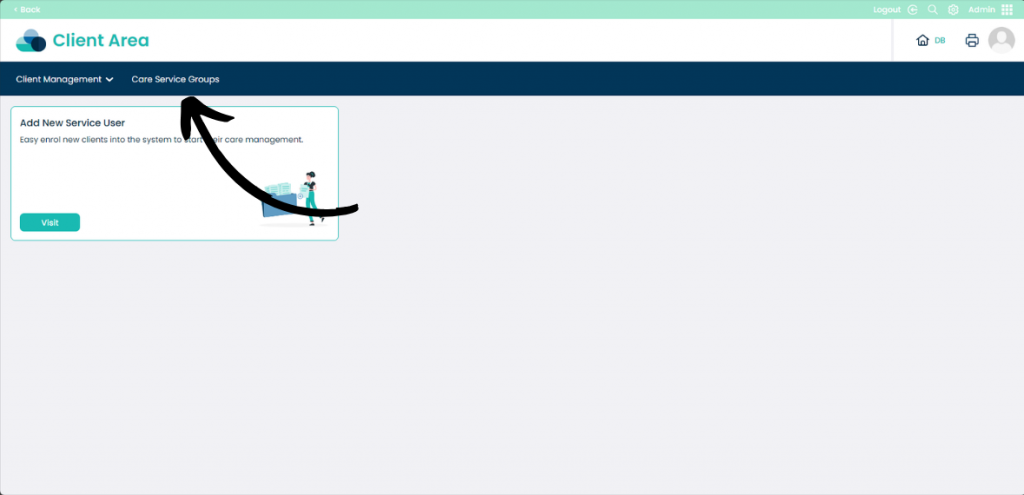
Select the Care Service Groups tab.
Step 3:
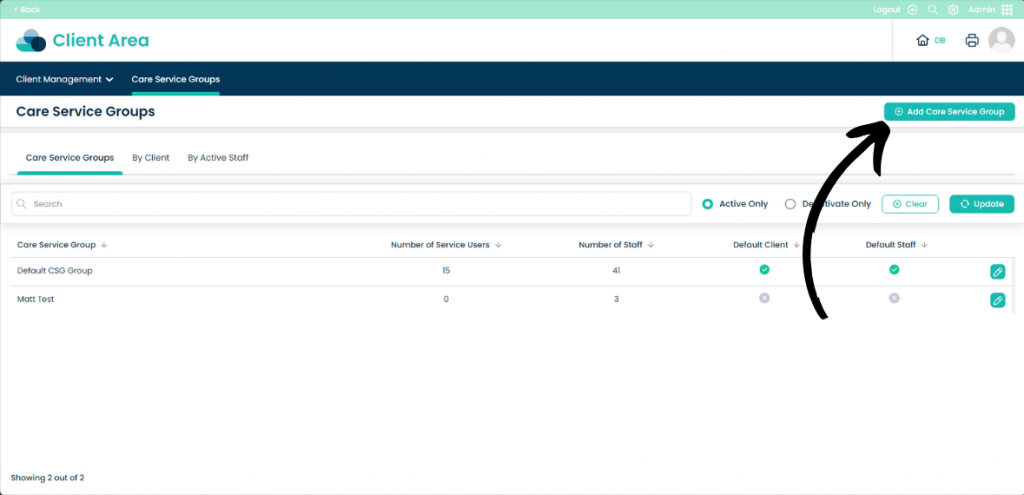
This page shows all of the current Care Service Groups you have. To create a new one select Add Care Service Groups.
Step 4:
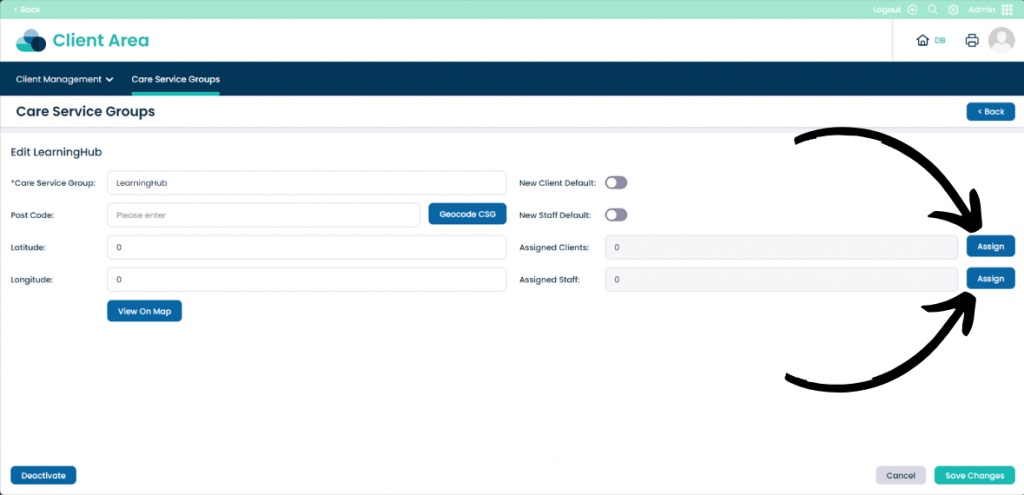
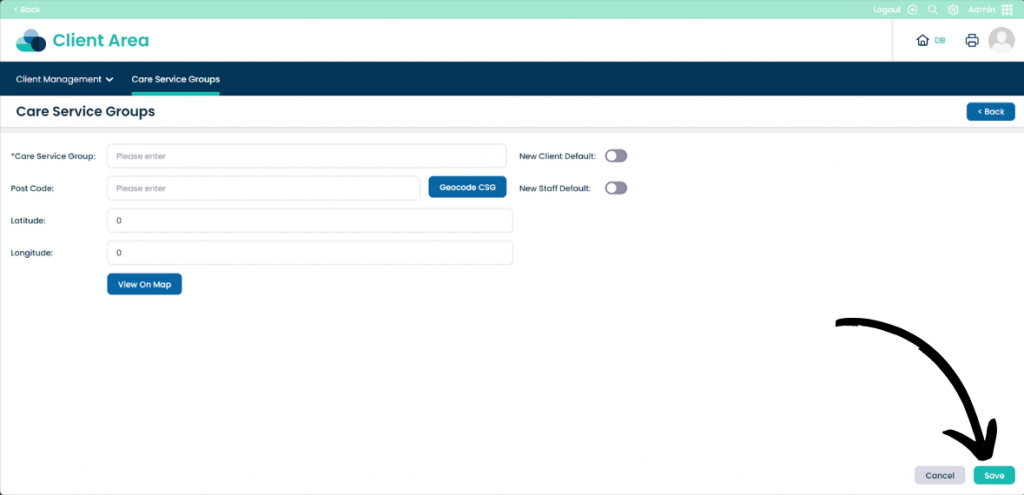
Fill in the details of the Care Service Group. The only mandatory field is the name of the group which needs to be entered under the Care Service Group text box.
You can set this Care Service Group as the New Client Default and New Staff Default by toggling them on or off.
You can also set the location of the Care Service Group by entering a post code, this is not mandatory.
Step 5:
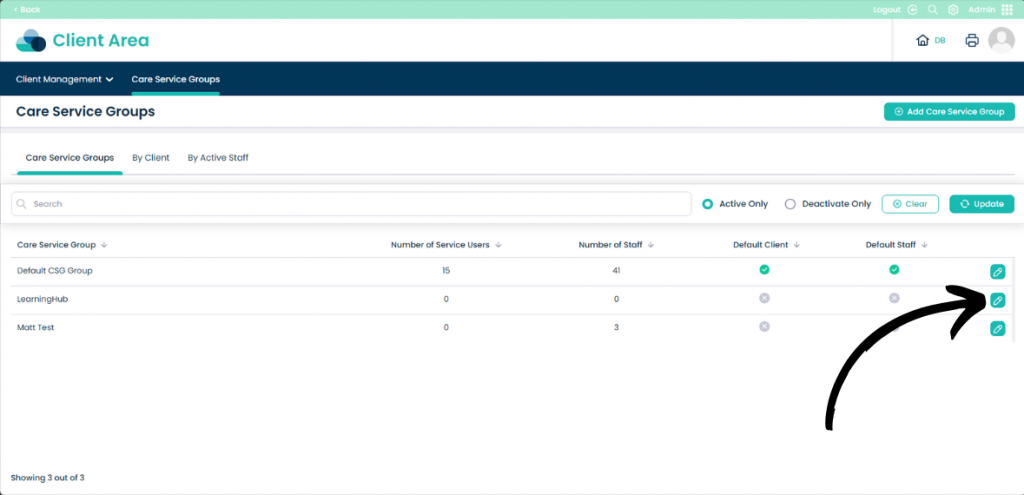
You can further modify the Care Service Group by clicking the Pencil Icon.
Step 5:
Assign specific staff or clients to the Care Service Group by clicking Assign next to the appropriate tabs.
Once happy with the changes click Save Changes or Cancel to stop the changes.
You can also click Deactivate to stop the Care Service Group from functioning.
