Adding a new view allows you to see multiple rotas at once, this helps you to see what’s important in one view.
Step 1:
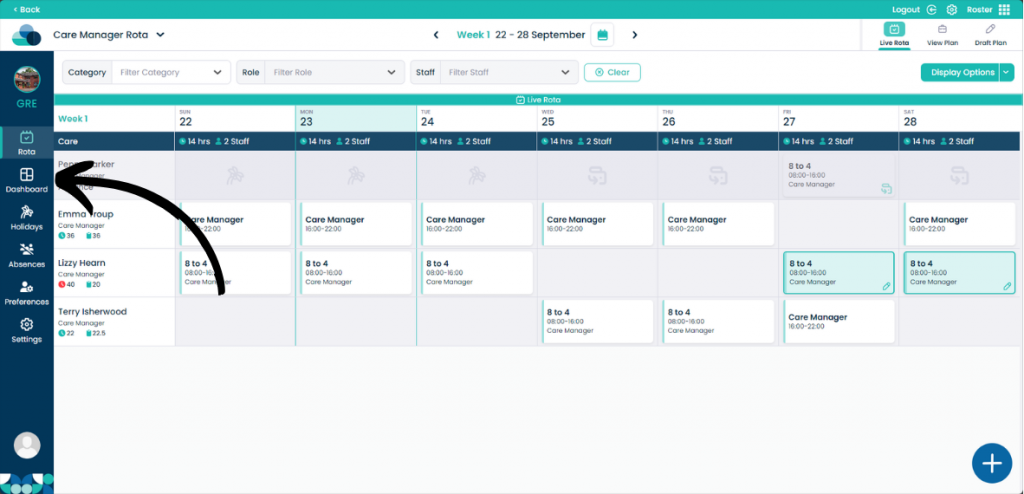
Navigate to the Dashboard page of Roster.
Step 2:
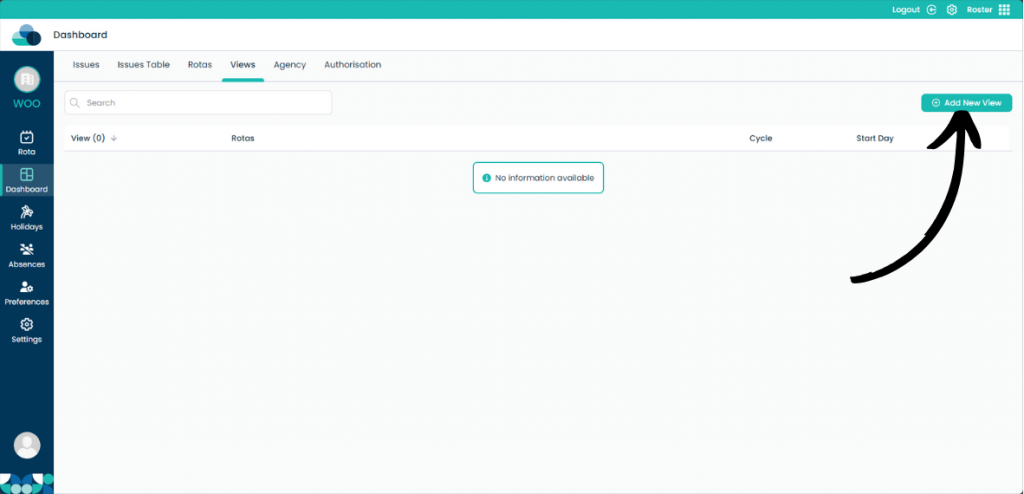
Then clickViews from the tabs at the top of the dasboard. Now select Add New View.
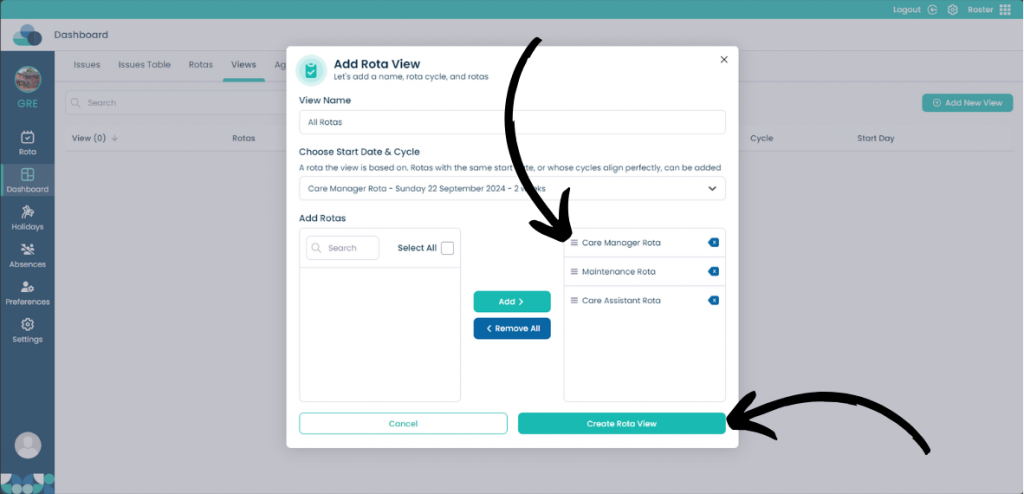
Step 3:
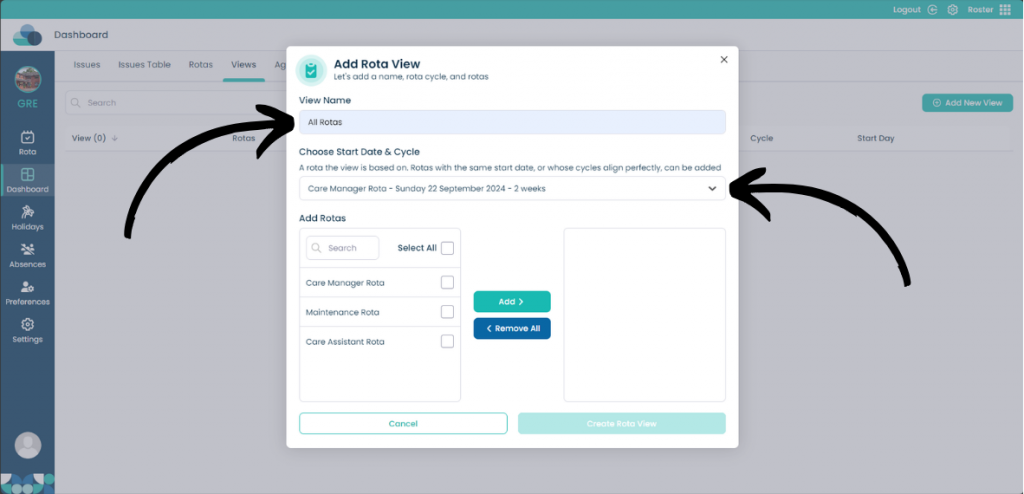
On this page type in the name of the view in View Name. You can also set the Start Date to match the rotas you would like to view.
Step 4:
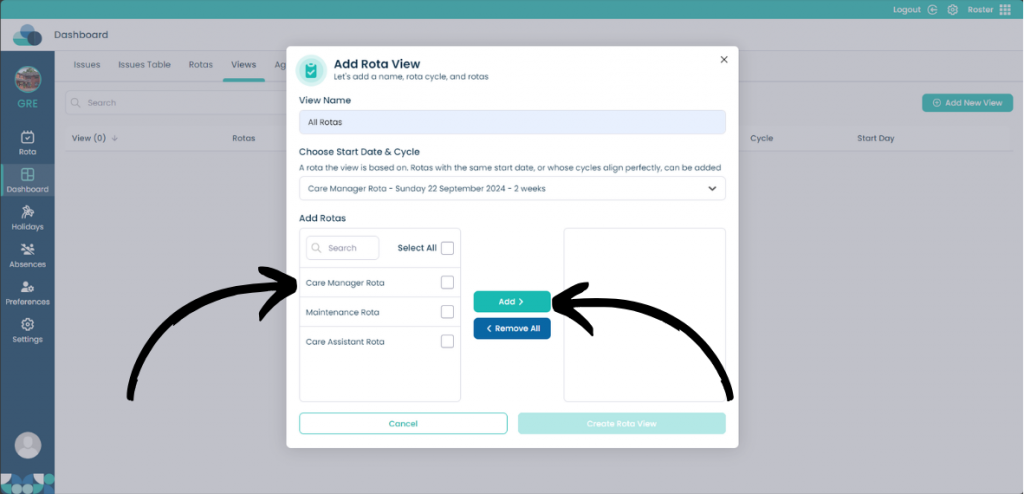
In theAdd Rotas menu you can select which Rotas you would like to add. When they are highlighted click theAdd button to put it into the Rota View.
Step 5:
When you have added the Rotas to the right hand pane, you can sort them by clicking the three lines and dragging them to the position you would like.
When done, clickCreate Rota View.
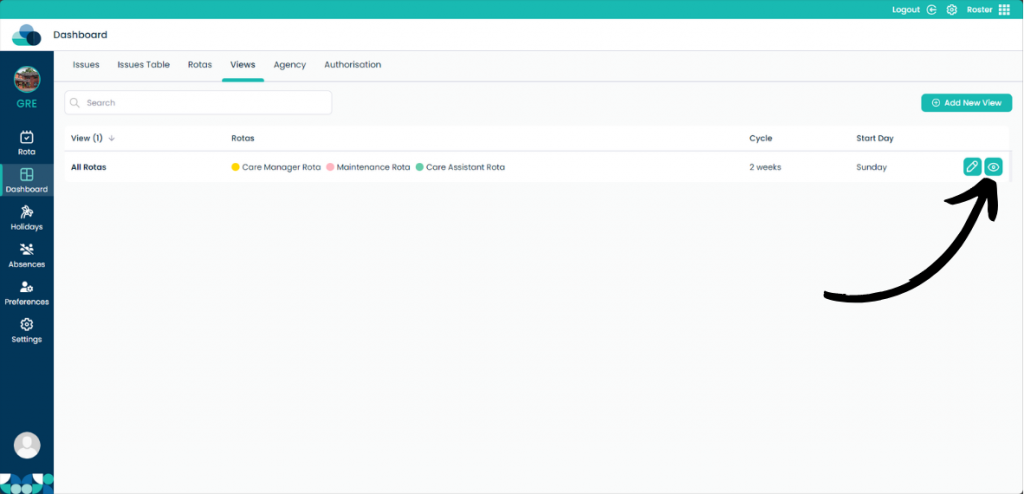
Step 6:
Once done, you can click thePencil button to edit the view again or click theEye icon to view the newRota View.
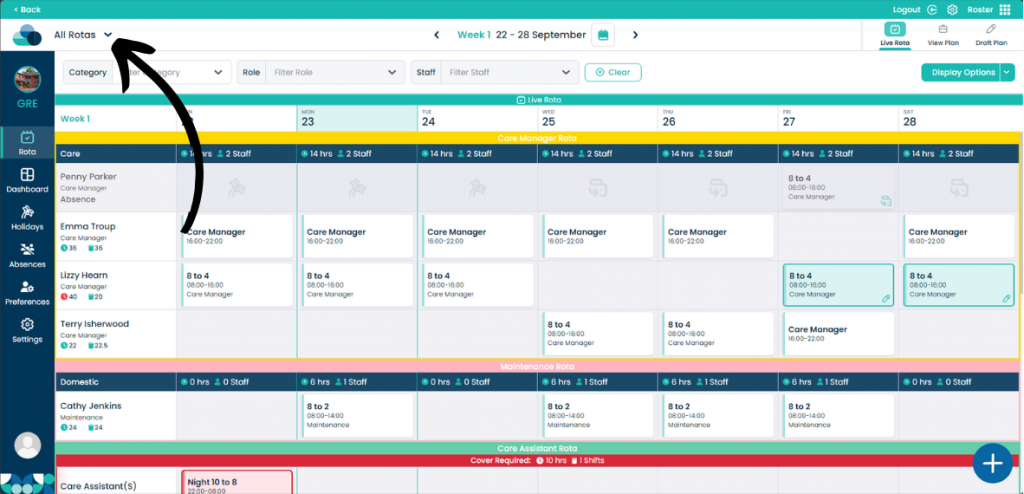
Step 7:
On the rota view page you can see the name of the rota and it’s colour which will separate the rotas from one another.
If you would like to go back to viewing individual rotas, or other views, click the down arrow next to the name of the view to change which view you would like to look at.