Adding a New CSG – Care Control Learning Hub

Adding a New CSG

This guide will cover how to create a new Care Service Group on Care Control Windows. CSG’s can be used to split up your clients into groups –  for example, by floor in the home, by unit or by region.

1

In the Administration of Care Control Windows, navigate to the Care Service Group tool, which can be found under the Client Area tab.

2

A new window will open. Here, a list of your currently active CSG’s will be displayed.

Press Add CSG to create a new one.

3

Enter a Name for your new CSG and press OK.

4

The new CSG will appear in your list.

Double Click on it to view more details.

5

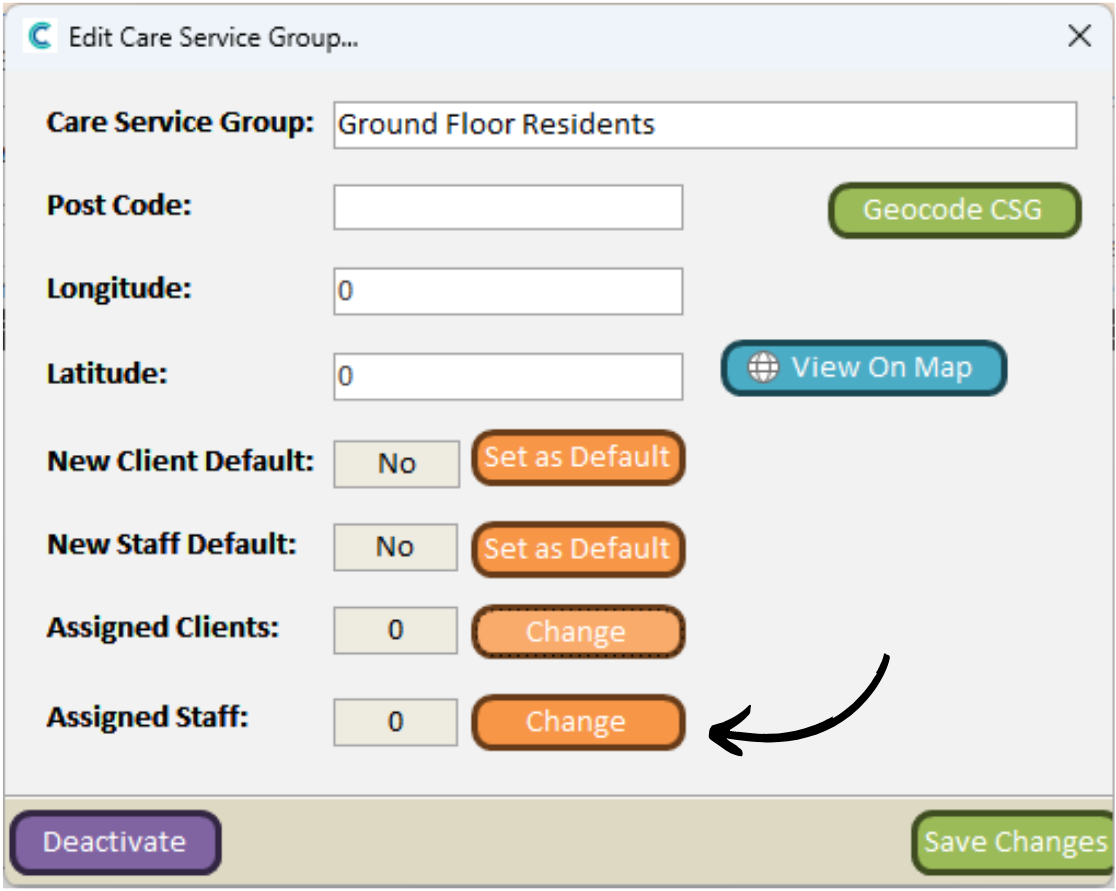
Here, you can amend the name of the CSG as well as enter in the location (Post Code, Longitude, Latitude) if required.

You can set the CSG to be the New Staff /Client Default so that when new staff members for clients join, they will be added into this CSG automatically.

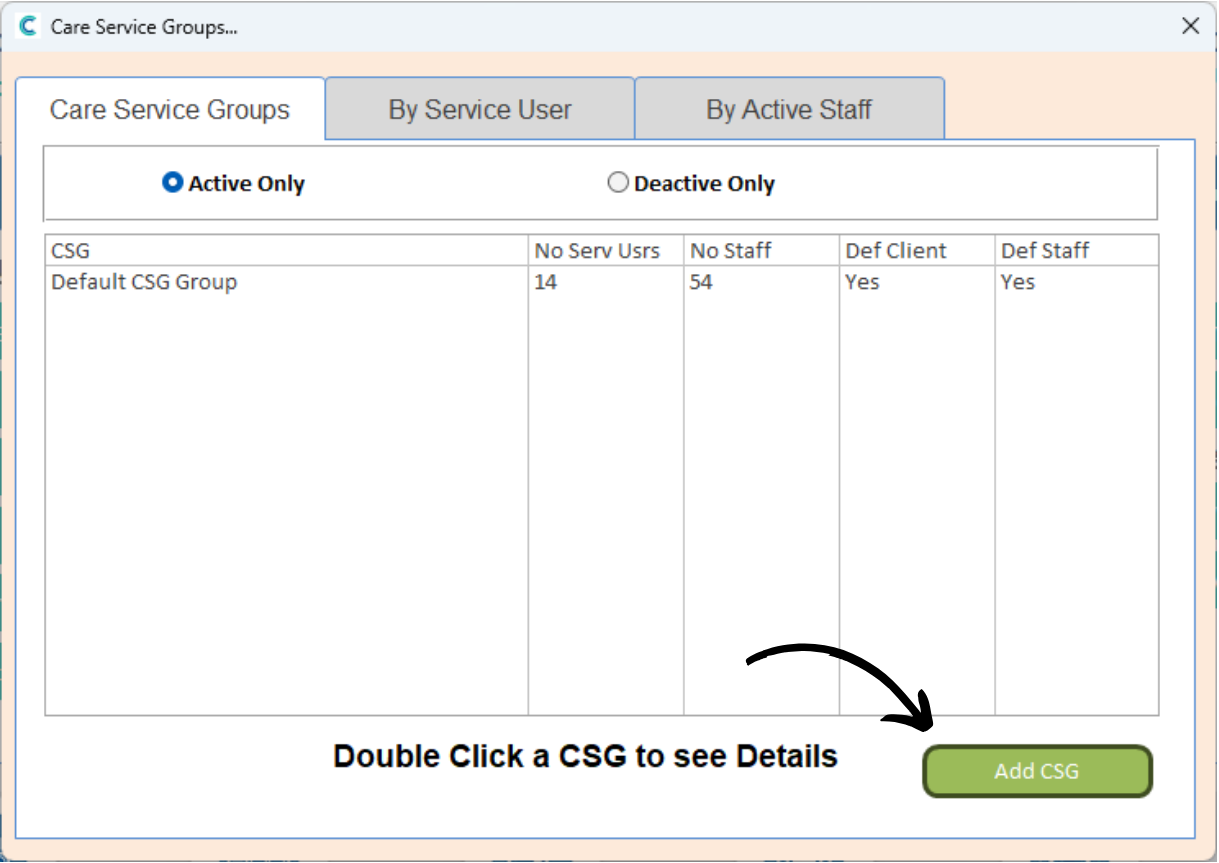
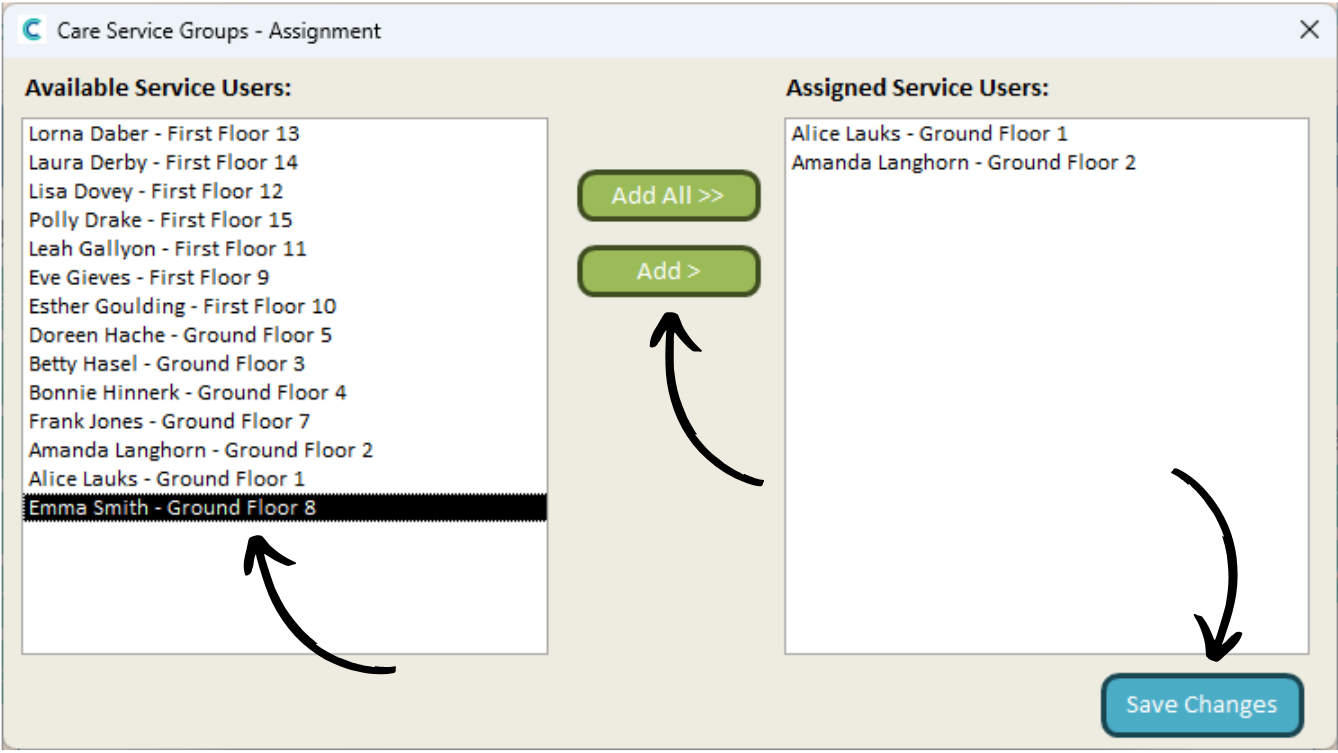
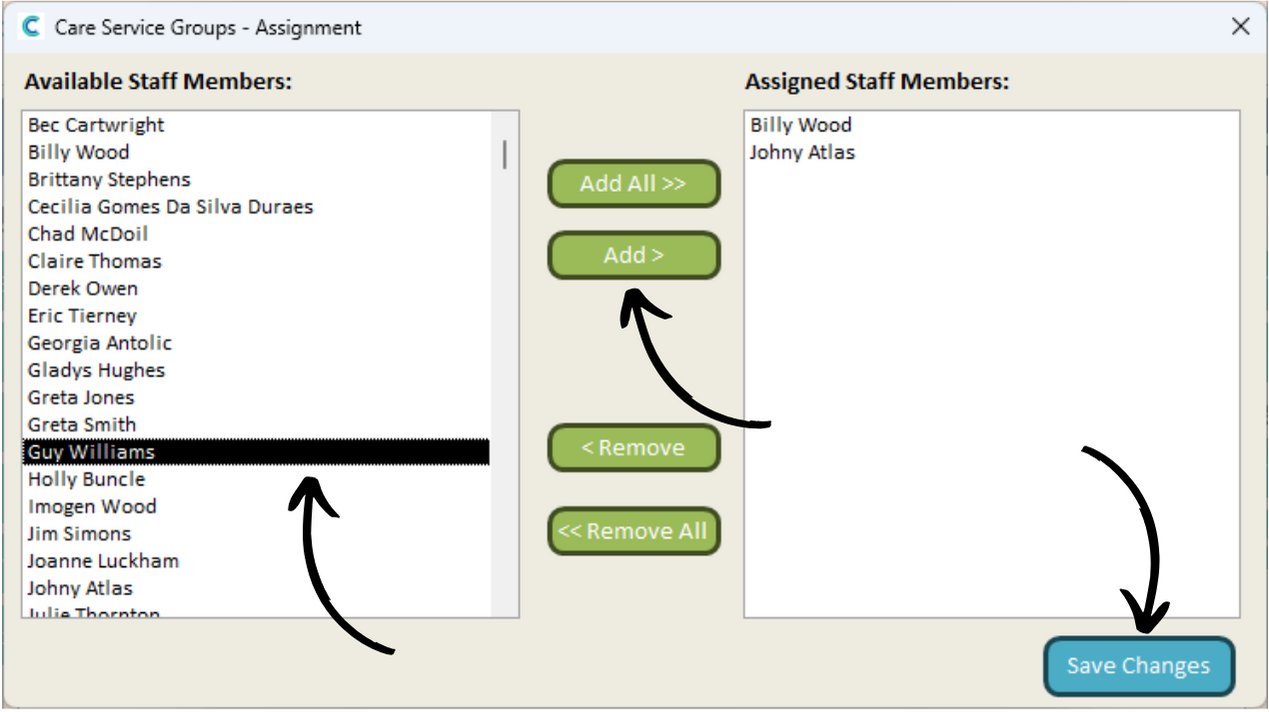
Press the Change button next to Assigned Clients to add service users to your new CSG.

6

A new window will open containing a list of the service users on your system. To add them, simply select them from the left-hand list and press Add to move them into the right hand list.

Press Save Changes after making any amendments.

7

Staff members can only access client information if they are assigned to the same CSG as them.

Press Change next to Assigned Staff to add staff to the CSG.

8

In the same way as above, select the staff members you wish to add from the left hand list, then, press Add to move them into the right hand list.

After making any amendments, press Save Changes.

Powered by BetterDocs

Important links

Contact

support@carecontrolsystems.co.uk

01822 738 100

v2.40