This guide will cover how to assign allocation groups to shifts on the rota. Two methods will be covered, both completed within Care Control Windows.
1
In the Administration of Care Control Windows, navigate to the Roster System, which can be found under the Common Options and Time & Attendance tabs.
2
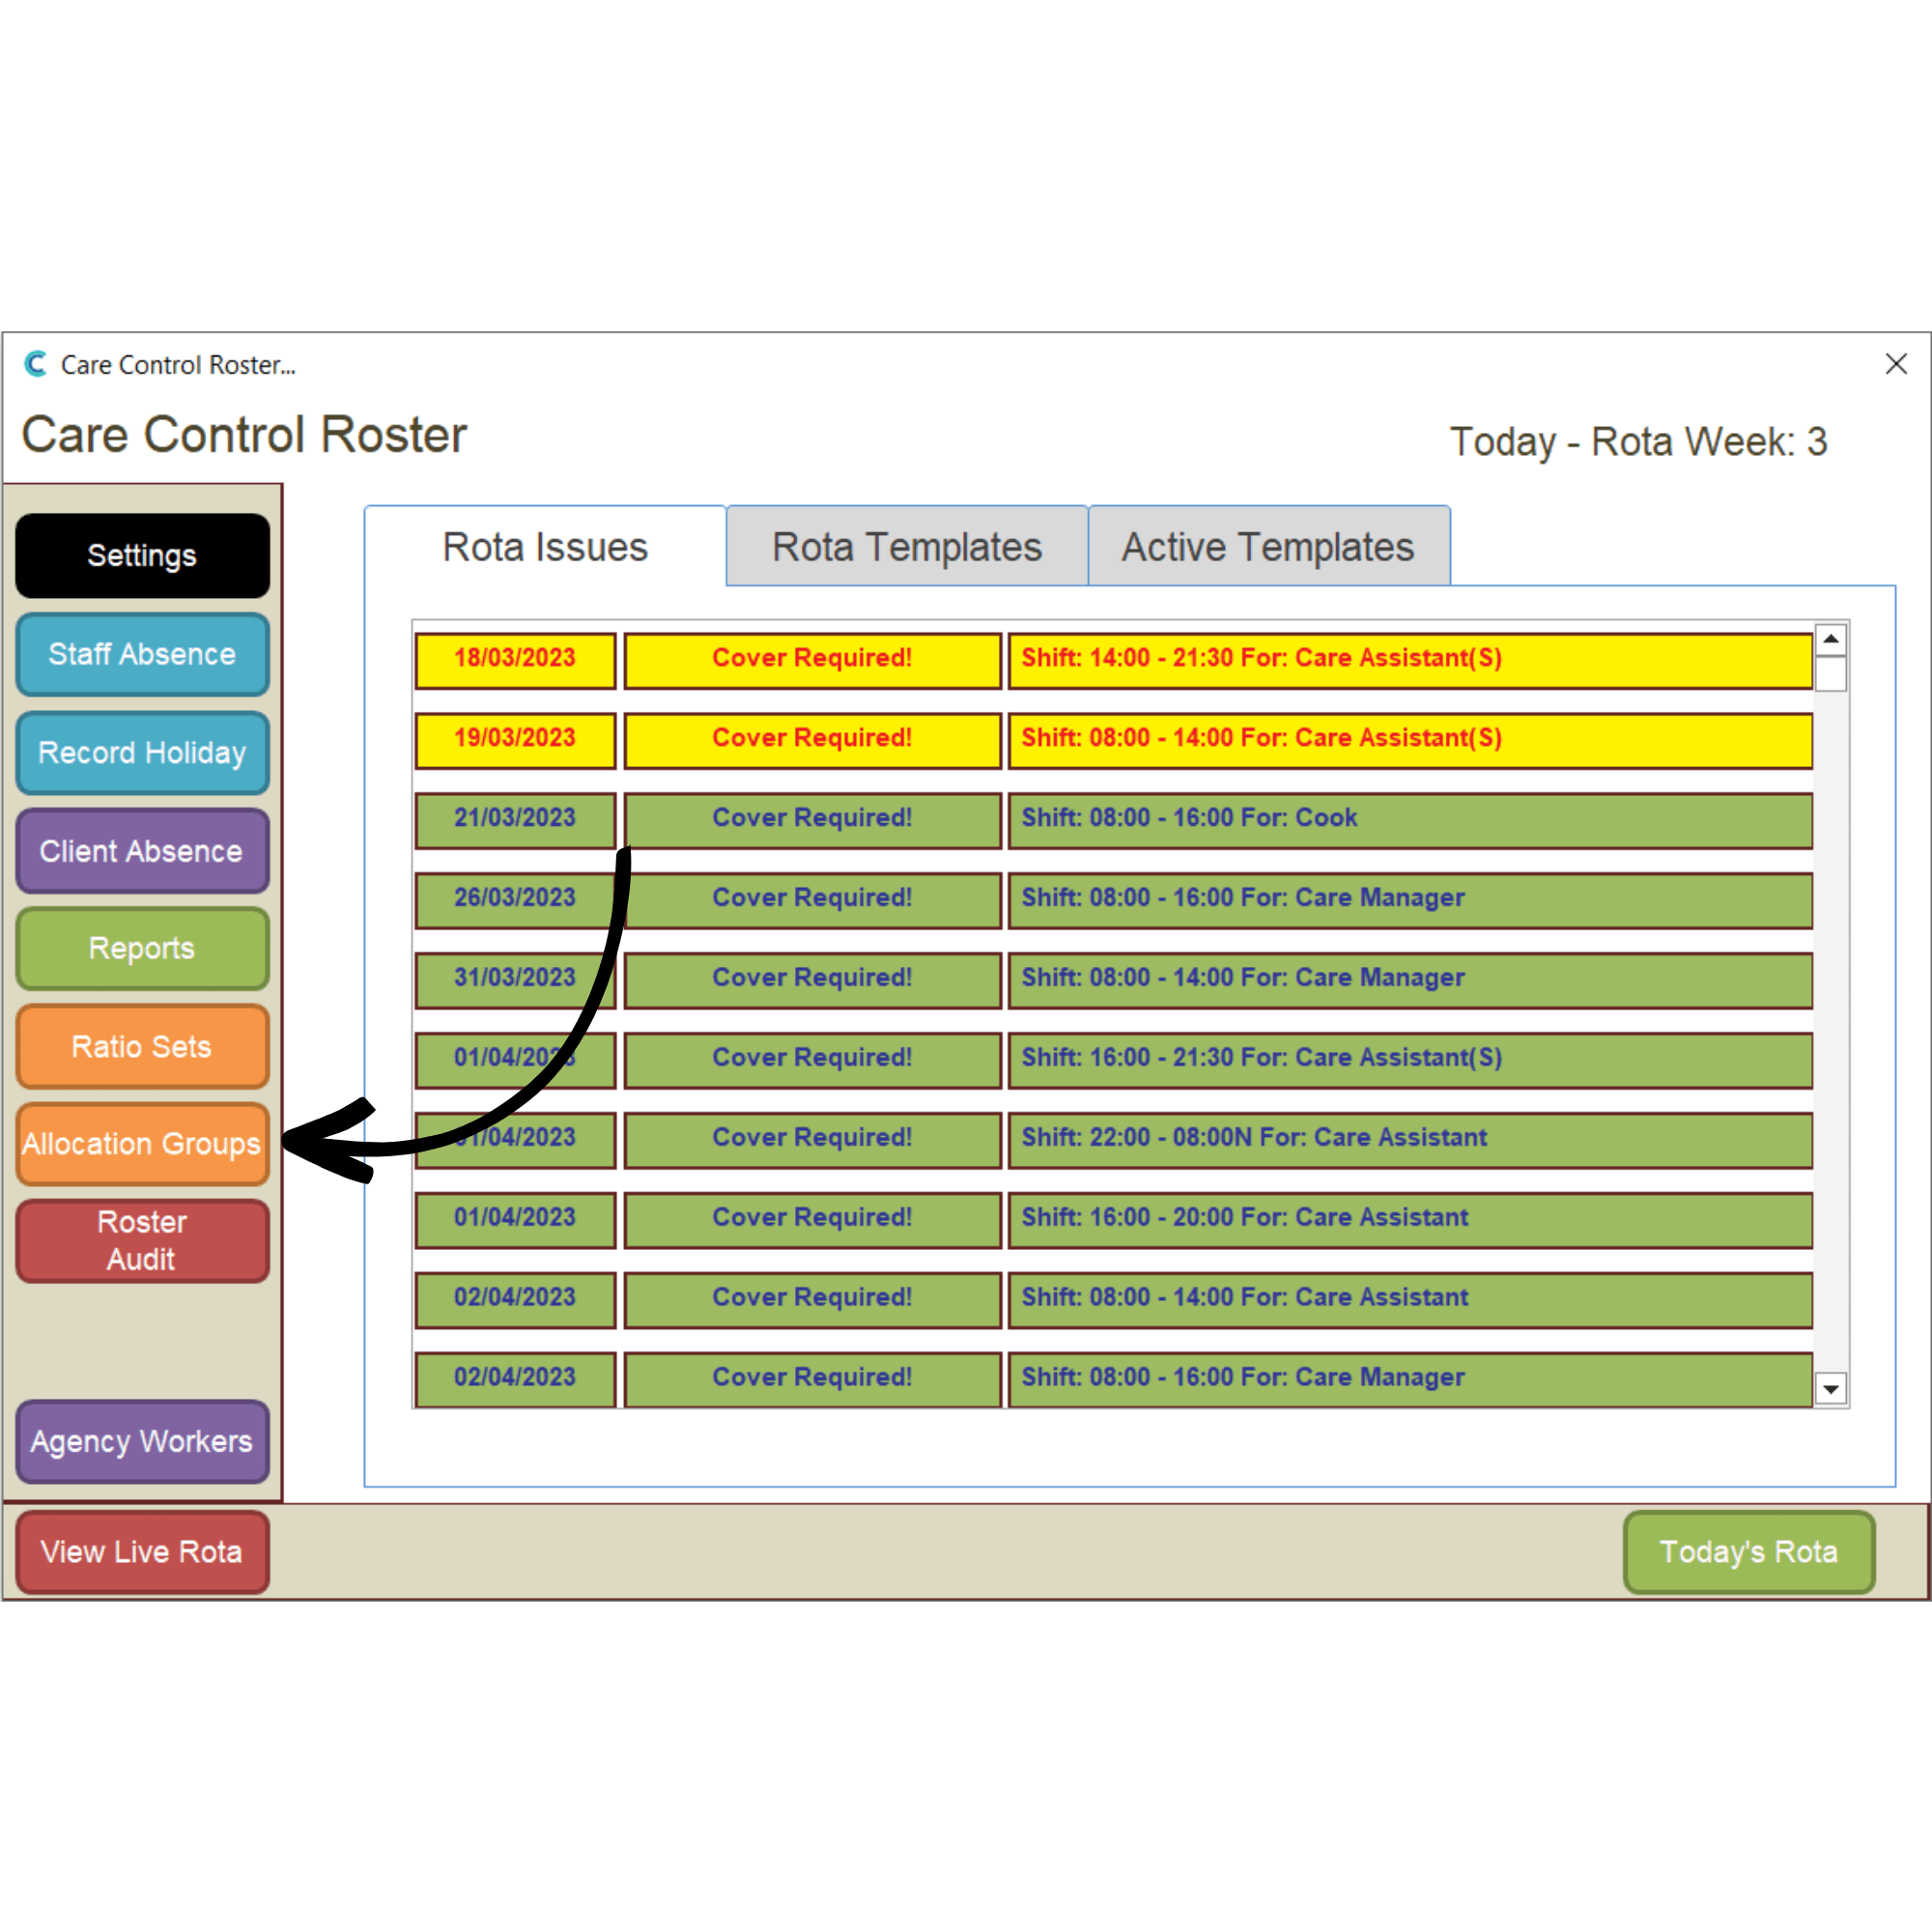
We will first bulk assign allocations via the Allocation Groups button on the left-hand side of the window.
3
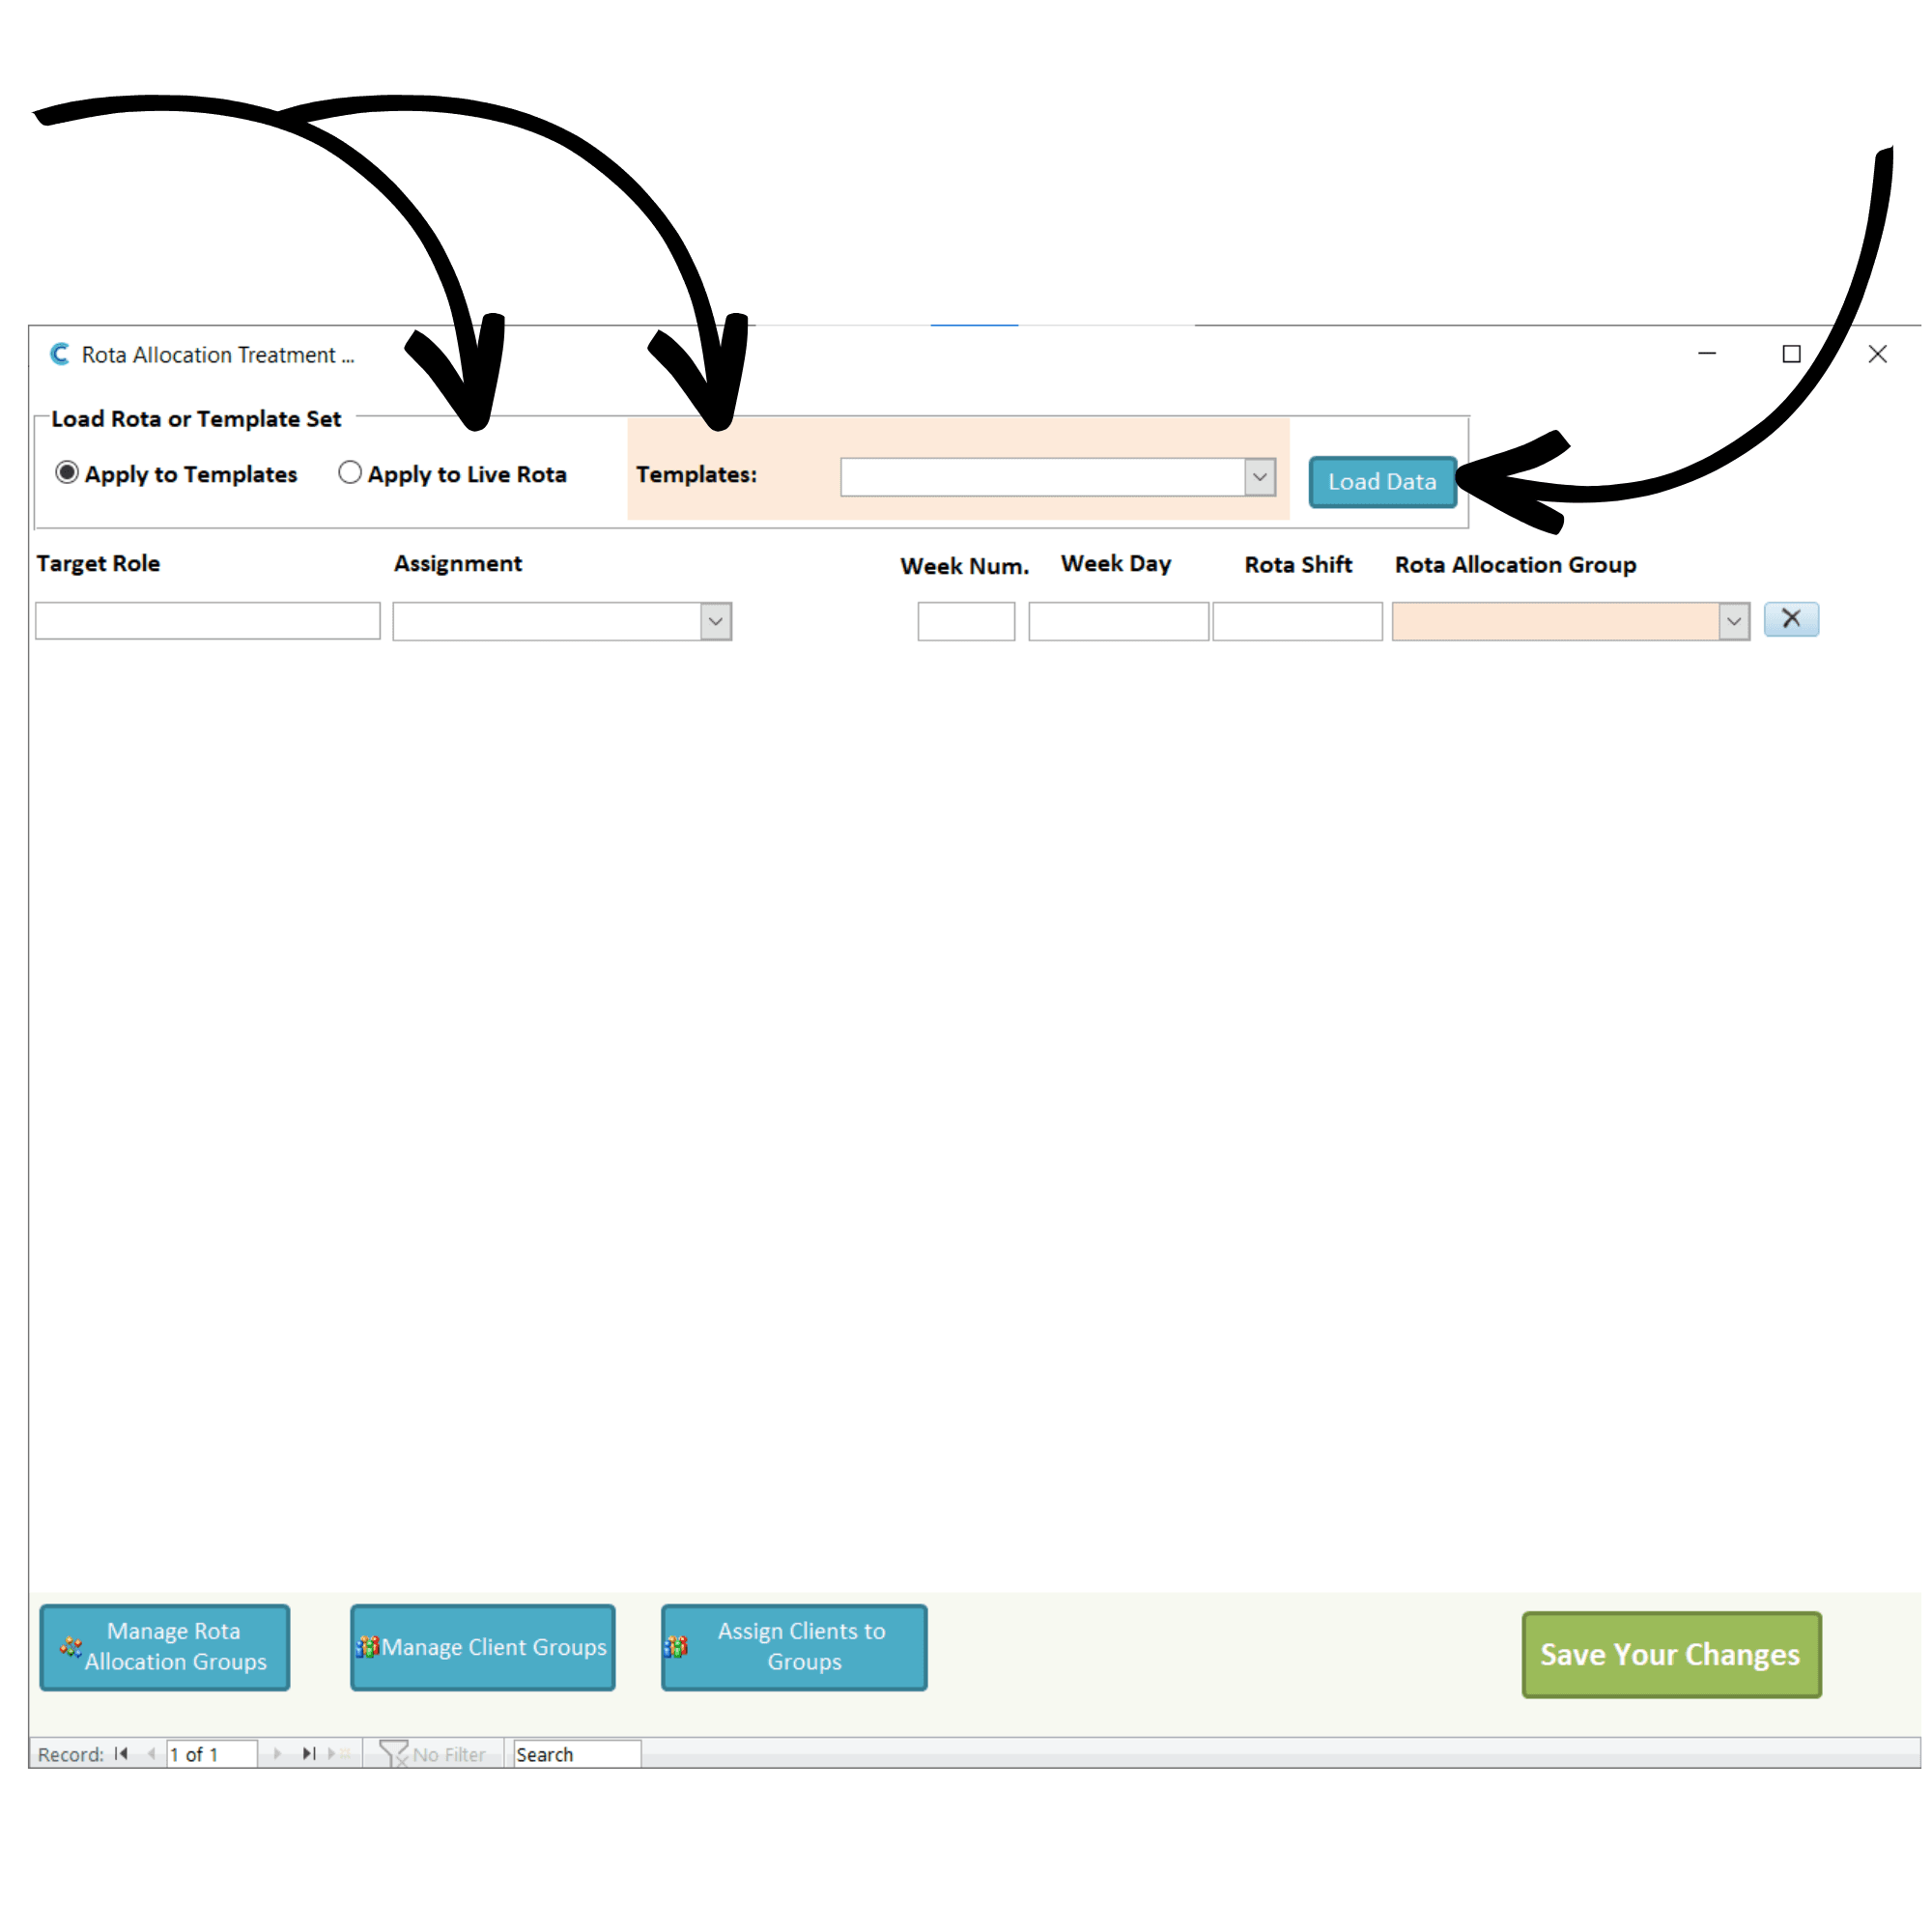
A new window will open. Here you can set the parameters for assigning allocation groups. First, choose whether to assign to theTemplate or Live rotaand select the template from the drop-down list.
Press Load Data.
4
The page should populate with the shifts from the template. You can select the Rota Allocation Group for each shift via the drop-down list on the right-hand side of the screen.
Make sure to Save Your Changes after making any amendments.
5
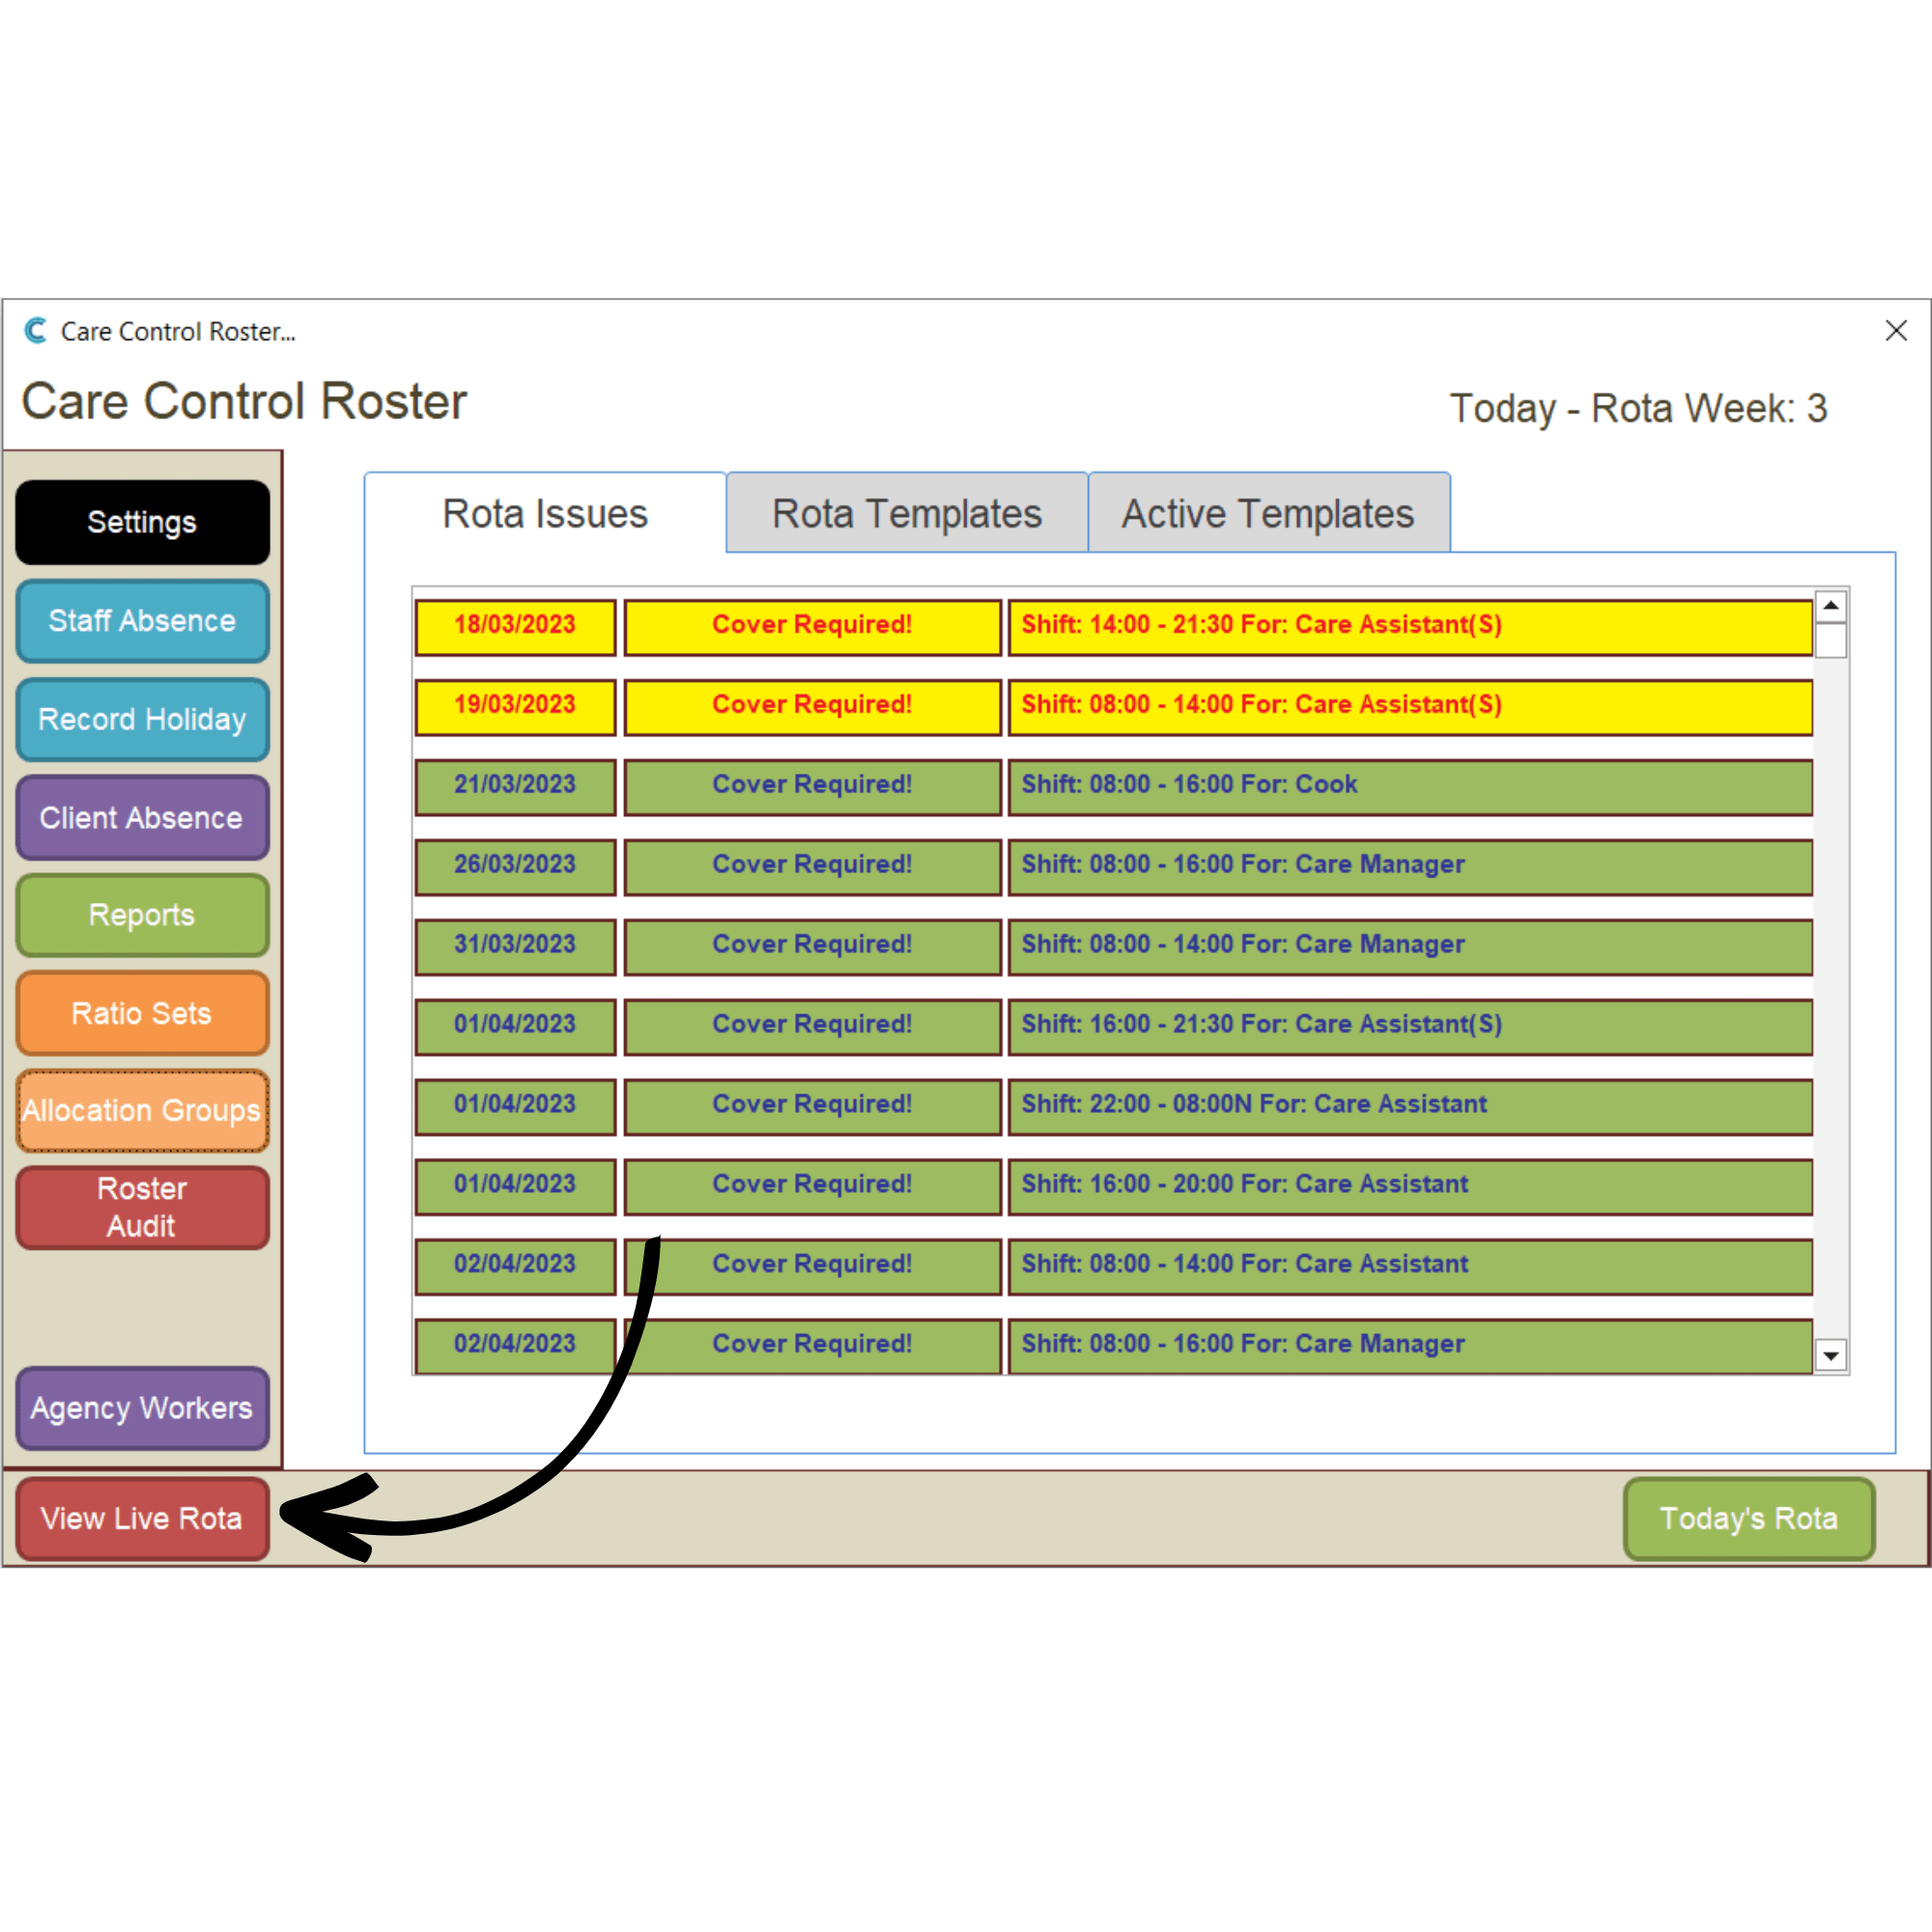
You can also assign allocations directly from the live rota. From the Roster System, select View Live Rota.
6
You can add the allocation to an existing shift or to a new one. In this example, we will allocate a new shift. Press the Green Plus (+) symbol on the day you wish to add a shift.
7
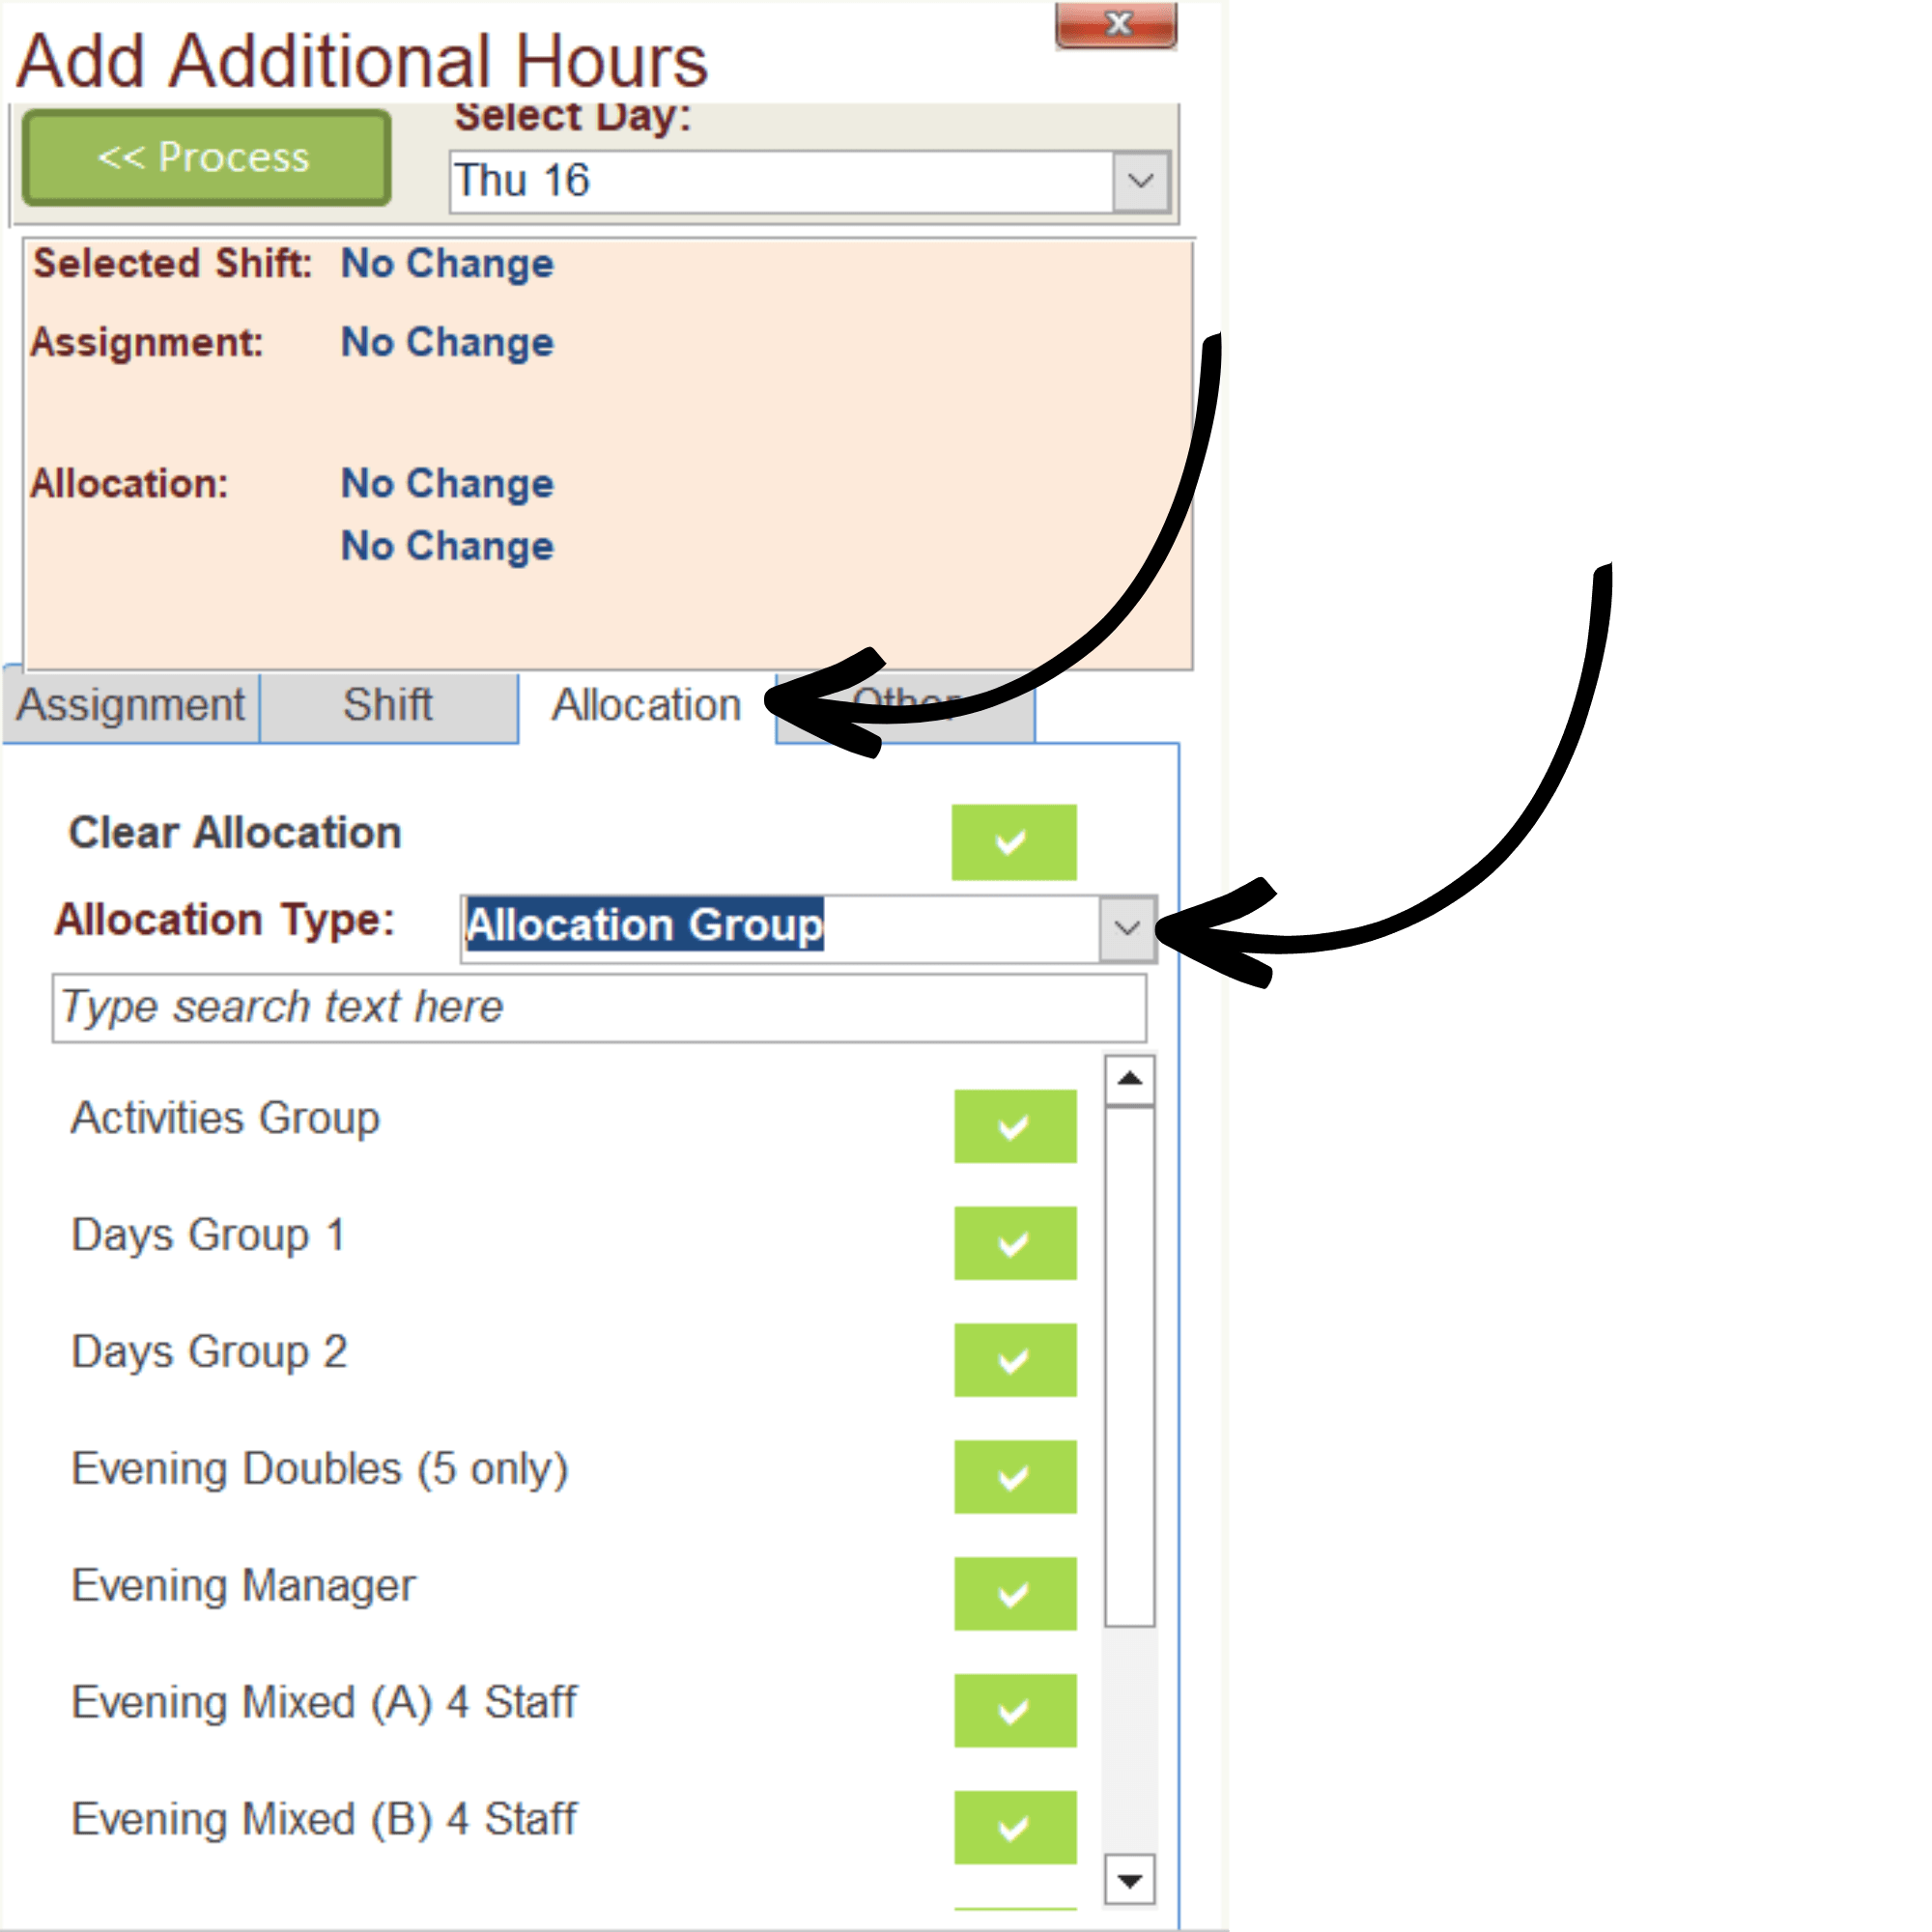
The smart board should open on the right side of the rota. Here, select the shift assignment (by role or staff member). Next, under the shift tab, enter the times for the shift.
8
Under the allocation tab, set the Allocation Type to Allocation Group and select the group via the green tick.
After confirming that all the shift details are correct, press Process at the top of the smart board to finish creating the new shift.