How to Build a Rota Template – Care Control Learning Hub

How to Build a Rota Template

This guide introduces the Care Control roster system on Care Control Windows. It covers how to create a new rota template, populate it with shifts and assign those shifts to staff members.

Play Video

1

In the Administration of Care Control Windows, navigate to the Roster System which can be found in the Common Options and Time and Attendance tabs.

2

In the Roster System, select Rota Templates from the 3 tabs at the top of the window. Here you will be able to see Active, Draft and Historic Templates. You can also Edit and Add New templates using the corresponding buttons. In this guide we will Add New.

3

Selecting Add New will open a new window with a blank form. Here you can set a New Template Name. You can also select a template set-up option:

  • Blank Template – a clean slate, no data loaded
  • Base it on another Template – you can choose to base it on an existing template
  • Auto-populate based on your rules – you define the rules, and Care Control will populate the information for you

In this example, we will use Auto Populate. To create rules for the template, select Auto Populate and press Set Rules.

4

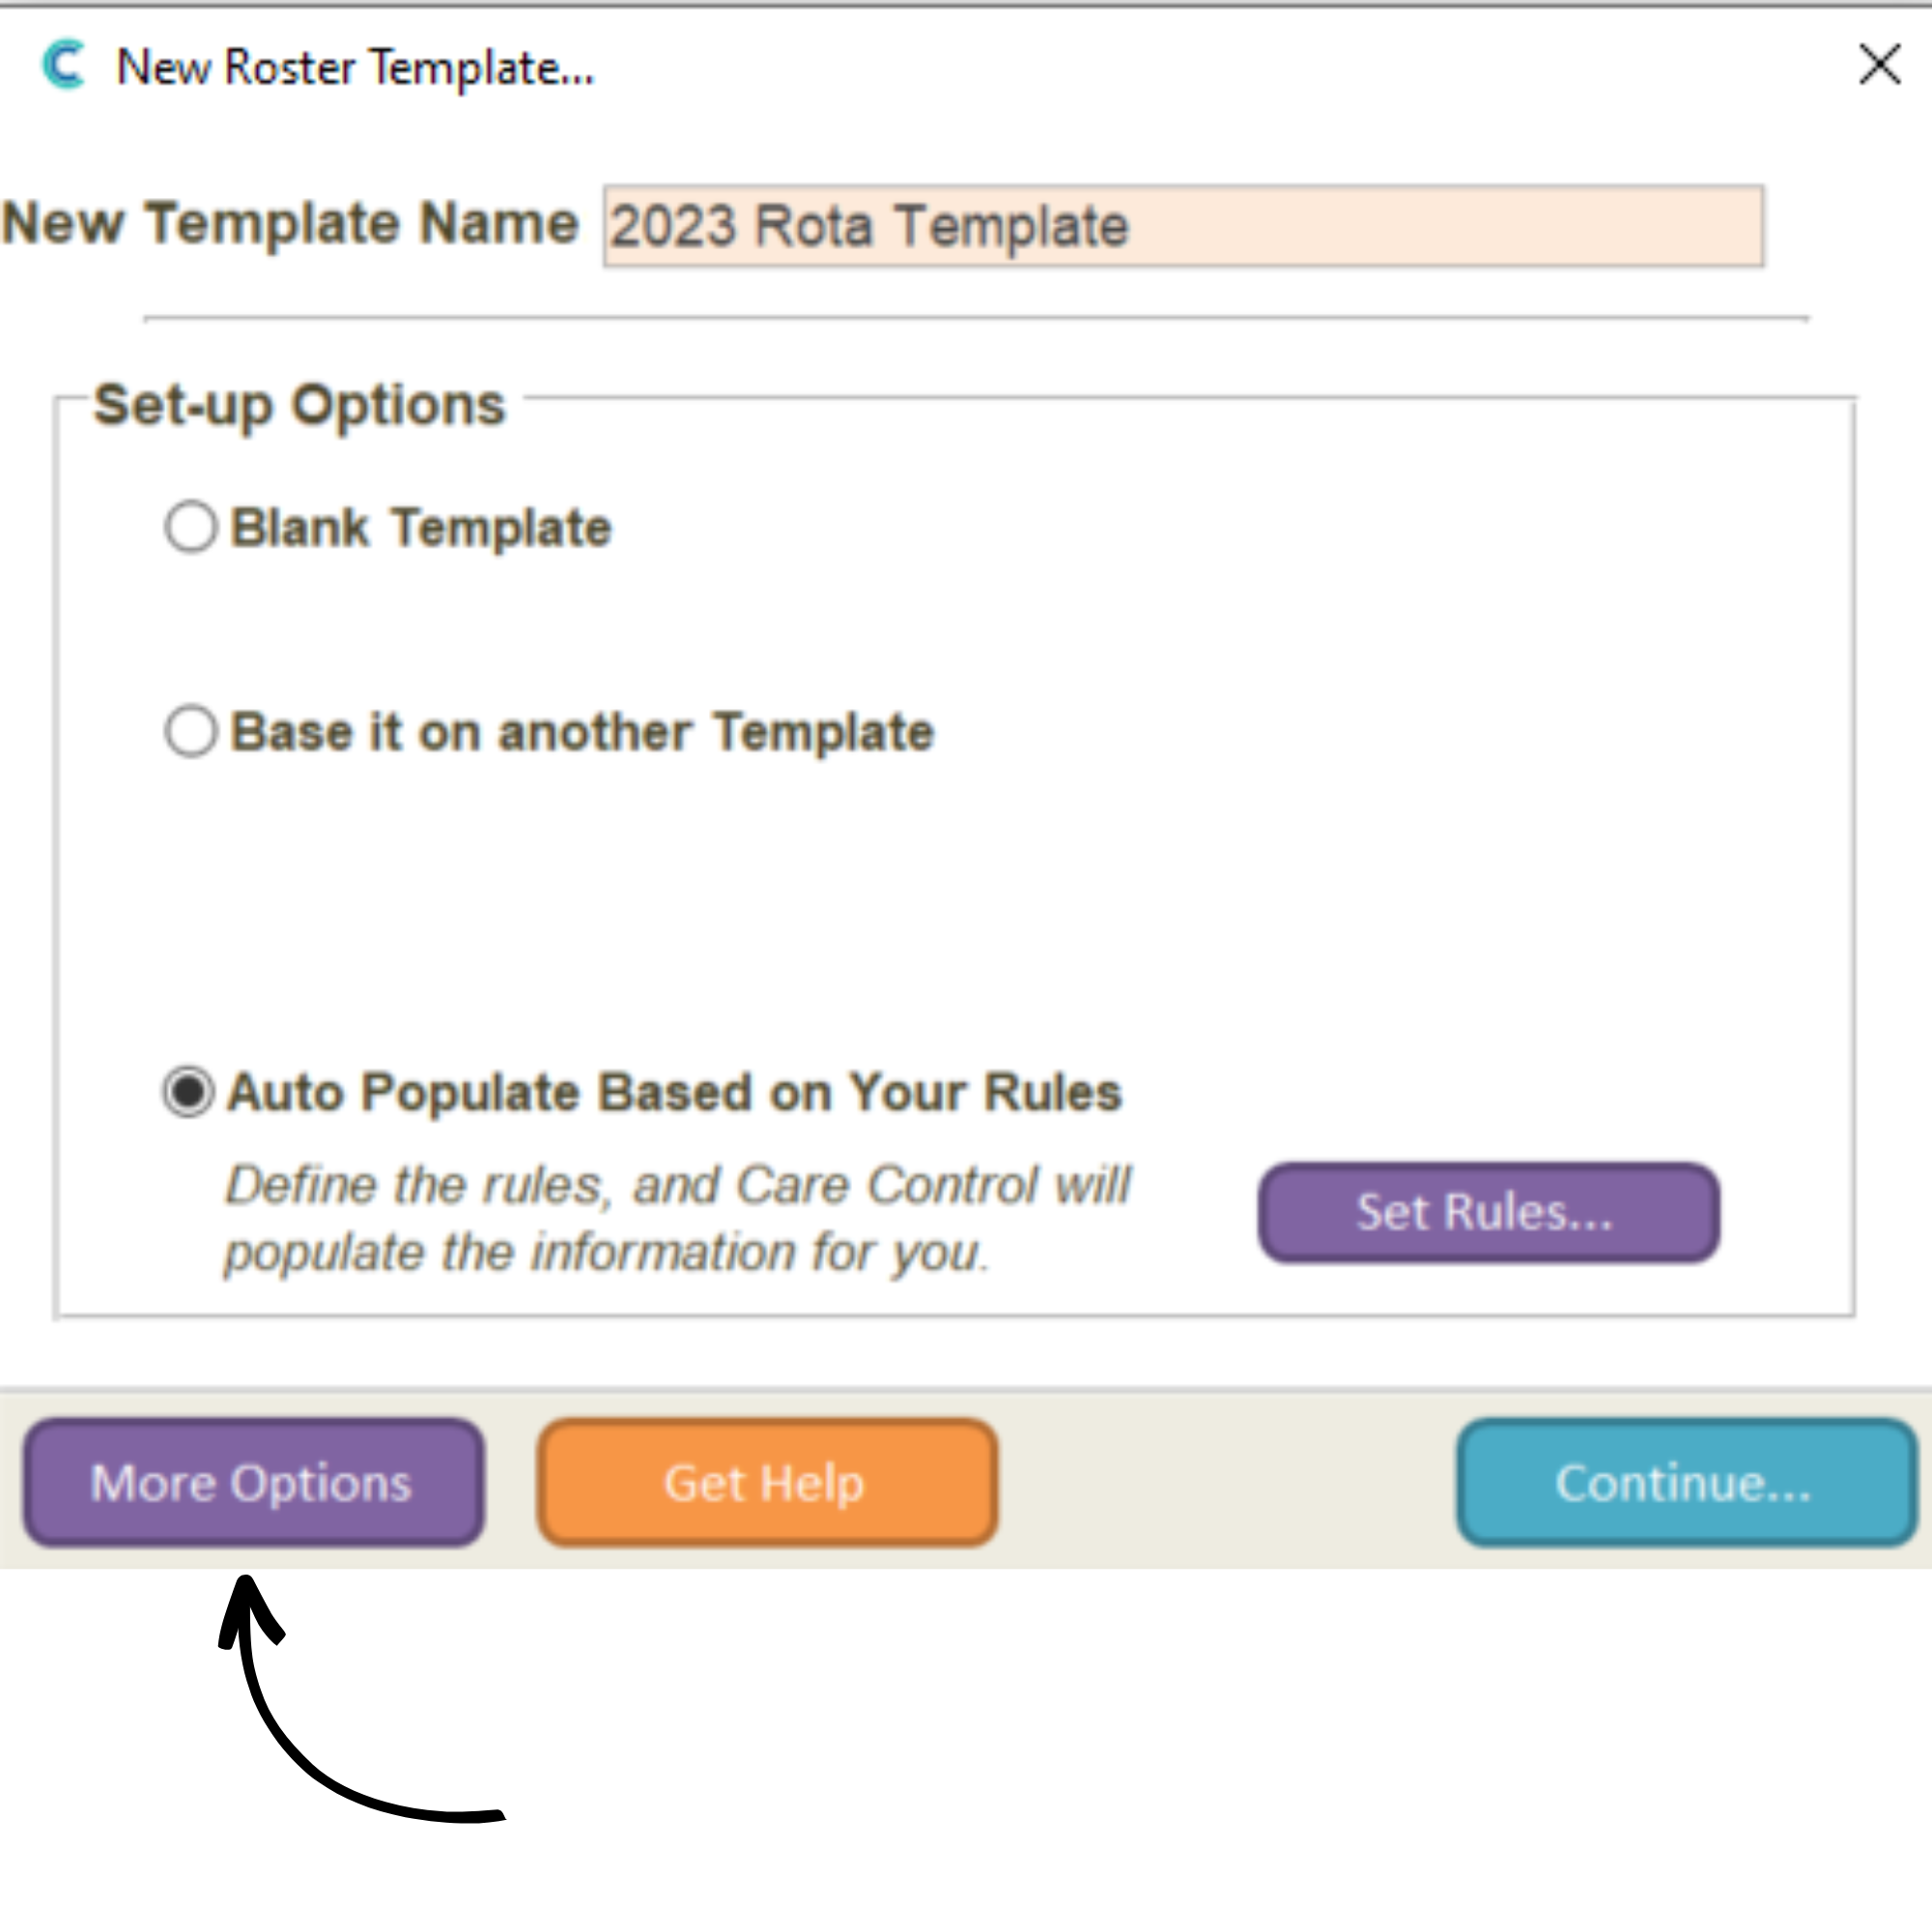
Pressing Set Rules will open a new window with a blank form. Here you can create rules which Care Control will use to populate a template. The form is split into 4 columns:

  • Staff Member or Role – select a staff member or role for this rule
  • Weekday – select the day(s) on which the staff member or role will work
  • Shift or Shift Template – either manually enter a shift time or select a Shift Template, for information on creating Shift Templates, please see the relevant guide.
  • Number – select a number, and the shift rules will display on the rota in this order.


In this example, we will set up a singular shift pattern – a Care Assistant role for all weekdays, working 08:00-18:00. This will show 1st on the rota.
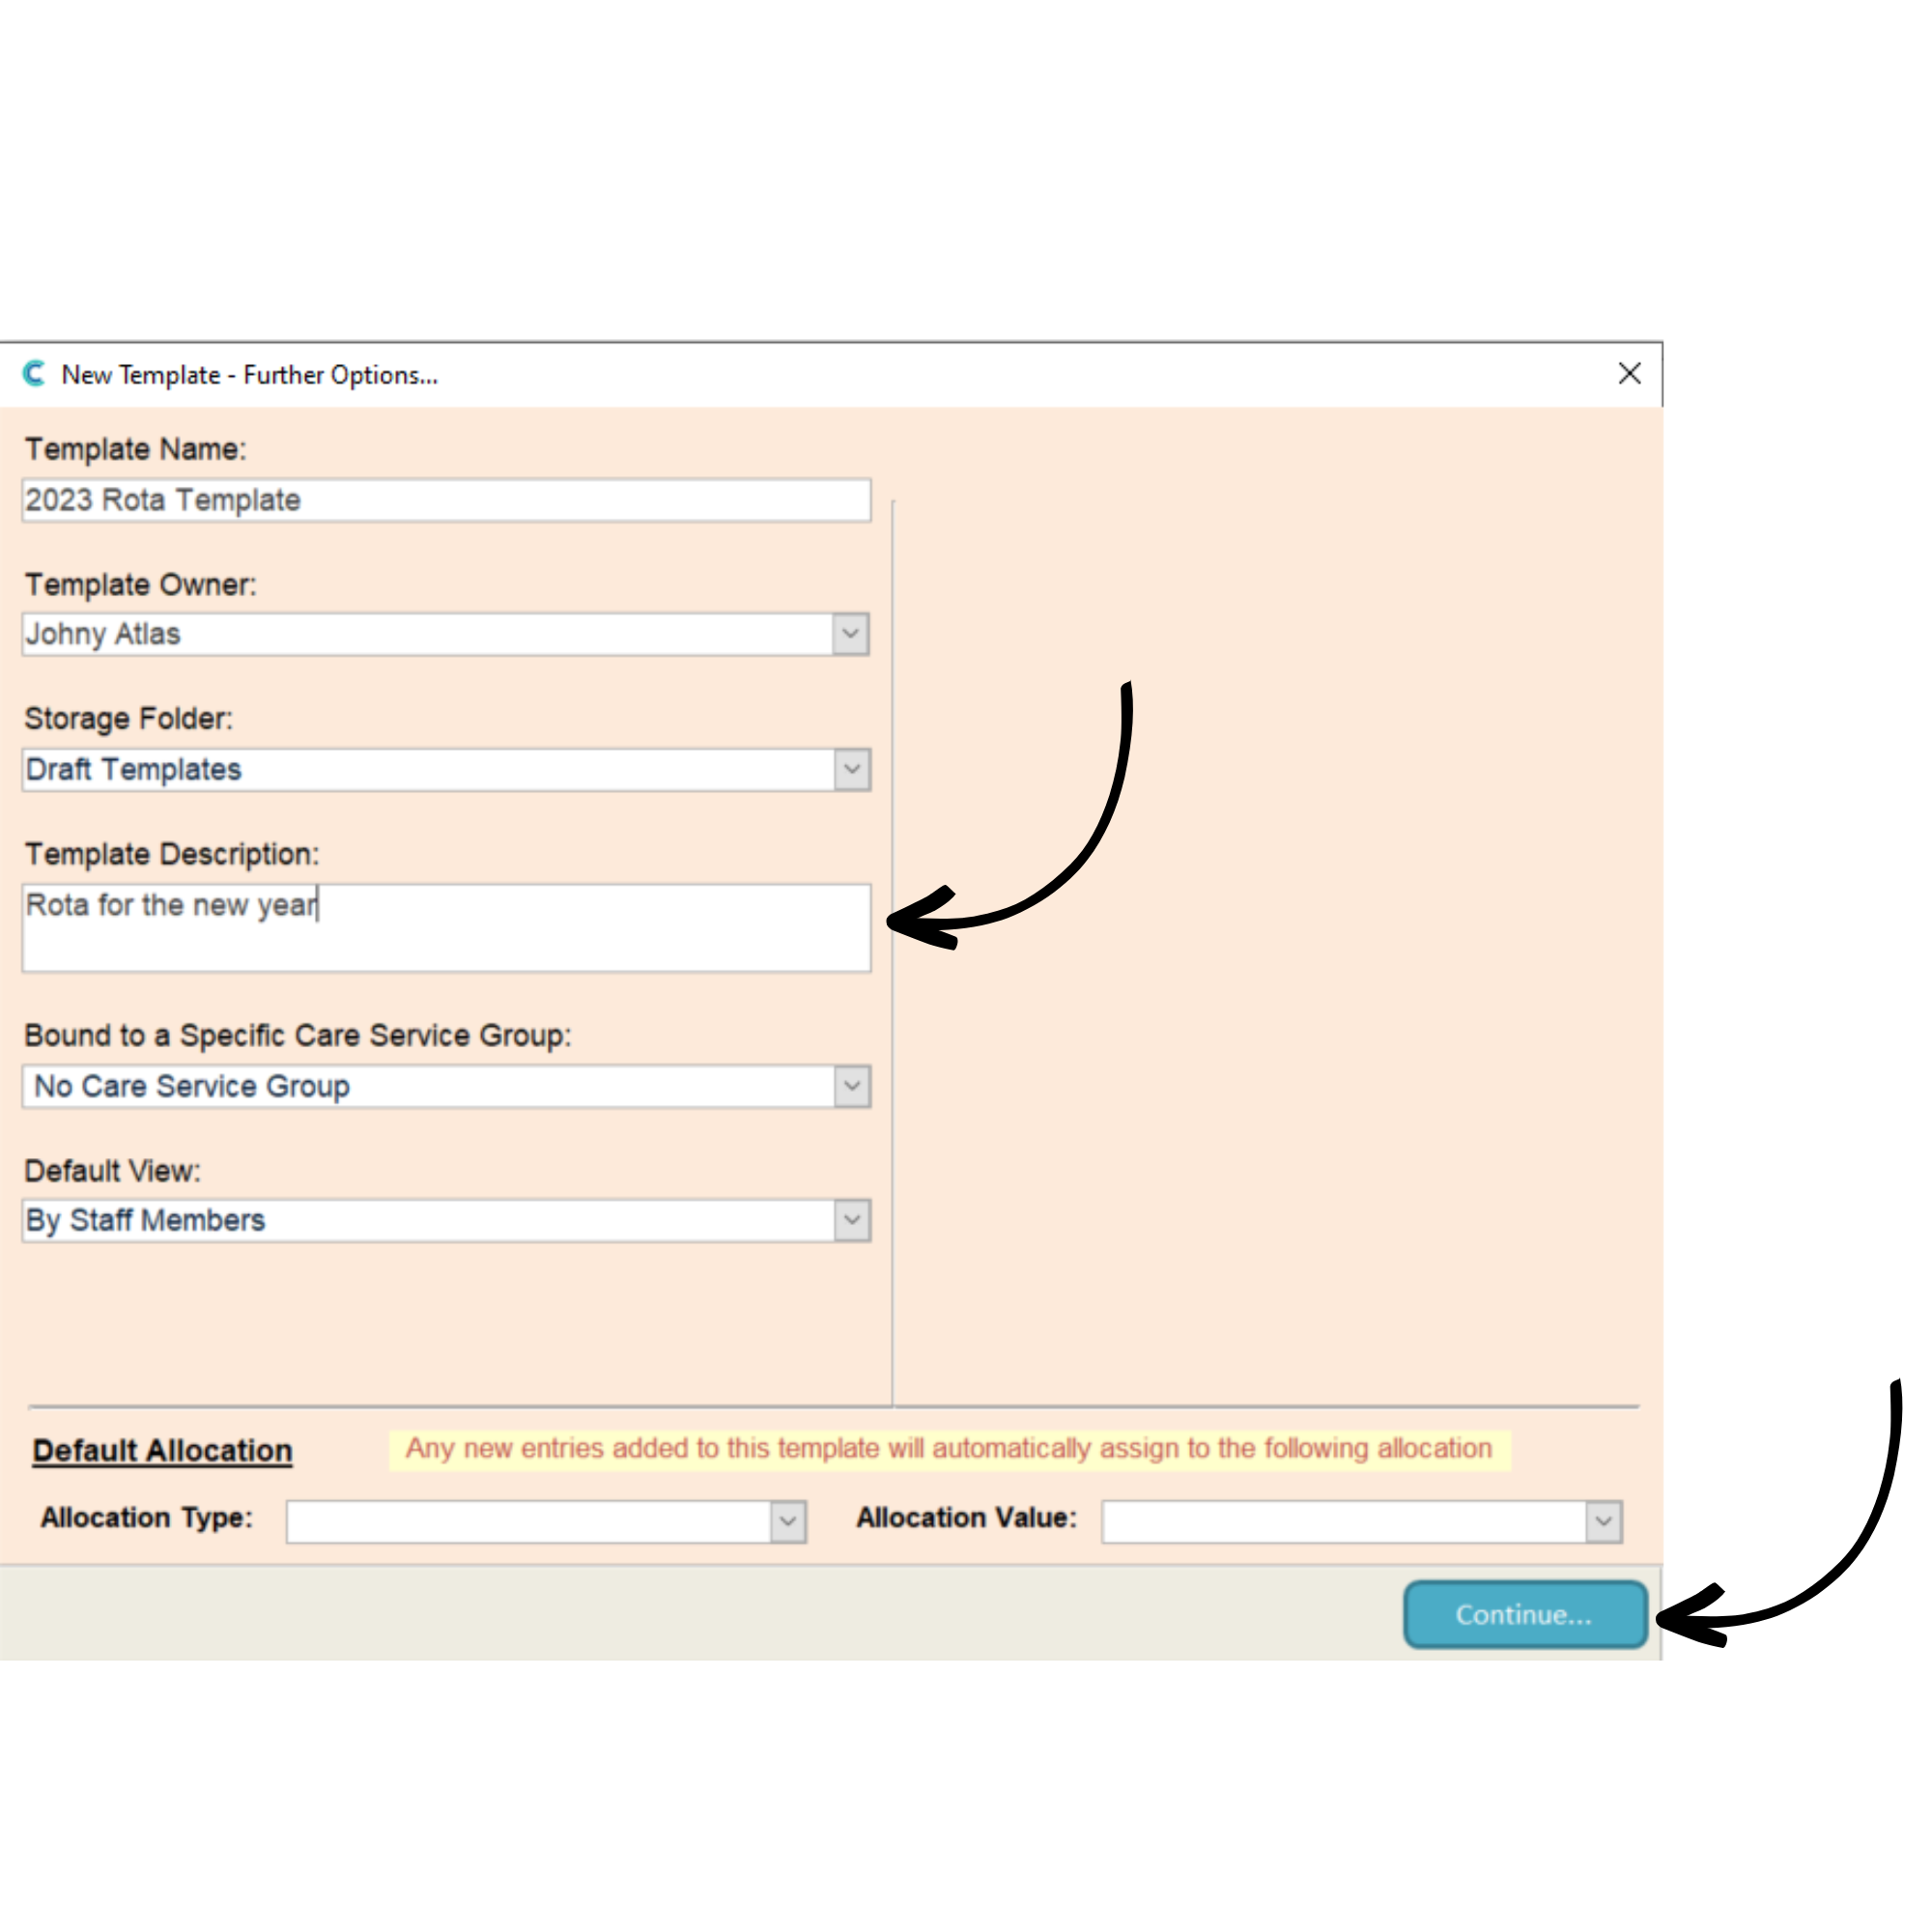
Select Continue.

5

Finally, we can enter further information about the template by selecting More Options.

6

Selecting More Options will open a new window. Here the template information is displayed along with some further options.

For now, simply add a Template Description and select Continue.

7

Now we have created the groundworks for a basic template. Select Continue to populate the template.

8

Your new template should open. It can also be found in Draft Templates from the Roster System window. We can now assign our shift pattern to staff members.


9

Select the shift you wish to assign – it will be highlighted in red, and some new options will appear on the right-hand side of the screen.

10

Under the Assignment tab you will be able to see a list of the Relevant Staff Members. Select the staff member by clicking the green tick on the right side of the staff member’s name.


11

Next, navigate to the Shift tab. Select the shift time you wish to assign by clicking the green tick on the right side of the shift. Finally, press the Process button. This will load the information selected onto the shift.

12

As you can see, the shift is now assigned to a staff member.


13

You can also assign a whole row of shifts at once by pressing the arrow on the left-hand side. This will highlight the row. Follow the same steps to assign a staff member and shift time.

Powered by BetterDocs

Important links

Contact

support@carecontrolsystems.co.uk

01822 738 100

v2.40