Manage Organisations – Care Control Learning Hub

Manage Organisations

This guide will cover how to use the ‘Manage Organisations’ module within the Organisational Management (OM) tool.

For an introduction and explanation of the new tool, please see the following:

Introduction to OM – Care Control Learning Hub (cclearninghub.co.uk)

1

Begin in the Organisational Management tool, which can be found under the Advanced Stuff tab of Care Control Windows.

Here, select Manage Organisation.

2

A new window will open. Here, your organisational overview will be displayed. This will contain the top level of your organisation, usually the Head Office.

To amend the labels associated with each level, or the order in which they show, press Amend Hierachies. 

3

A list of the default levels will show. Here you can switch on / off each level accordingly. 

Press Edit Hierarchies to amend the names.

Note: level 1 & 5, head office and site, can be renamed but not switched off as these as the minimum levels required for an organisation.

4

Simply change the name of the level in the text box and press Save Changes when complete.

5

After returning to the Manage Organisations window, press the Eye Icon to the right of the row to view information about the organisation level.

6

A new window will open. Here, all the details about the organisation can be seen, and edited, via the Edit Organisation button.

When editing, you can amend the details of the organisation unit.

You can also Deactivate the unit via the dedicated button.

After making any changes, you can Discard or Save them.

7

After returning to the Manage Organisations screen, we can add an organisation level via the Add Organisational Unit button.

As an example, you may wish to add a regional office unit.

8

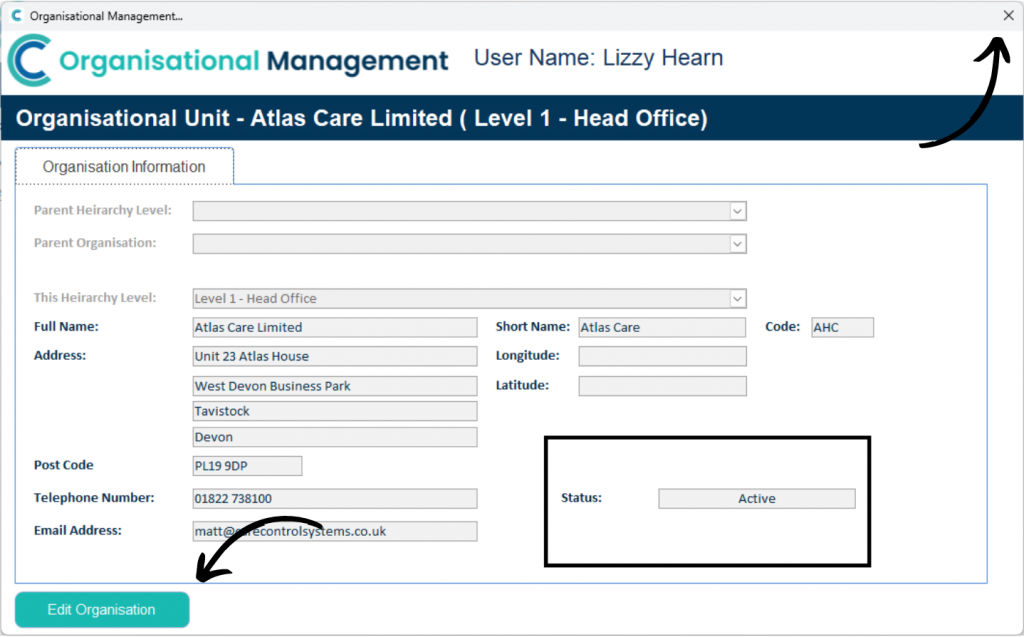
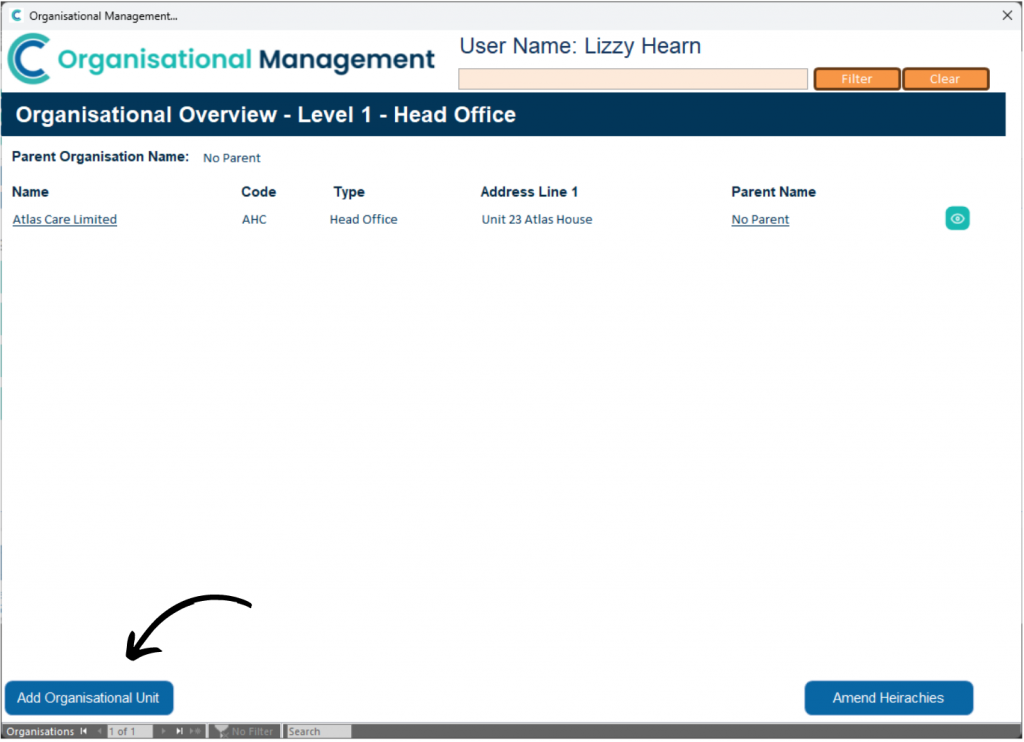
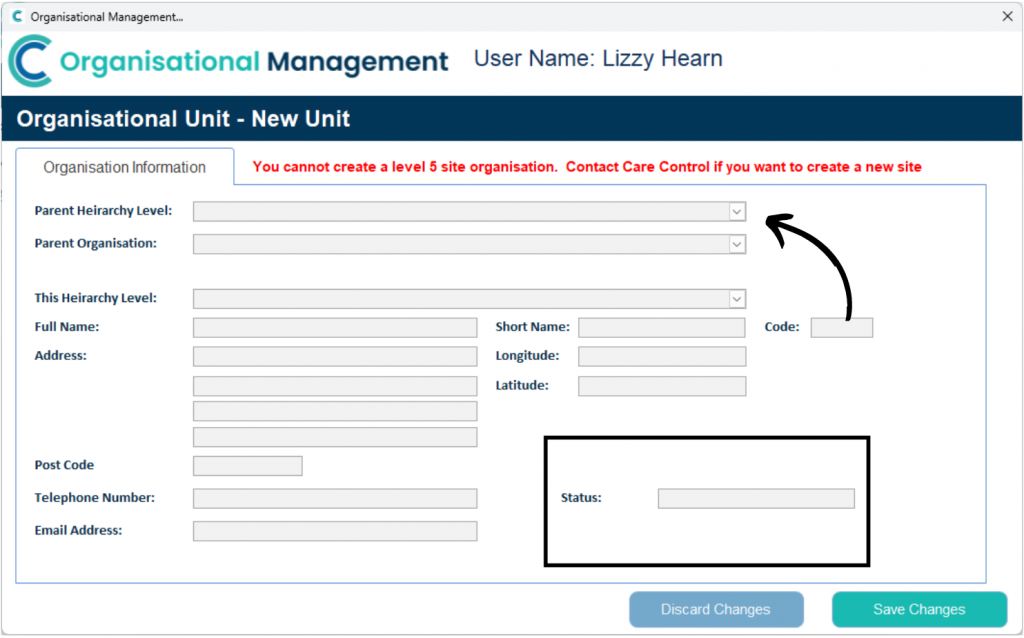
A blank form will open. Here you can begin entering the details of the new unit.

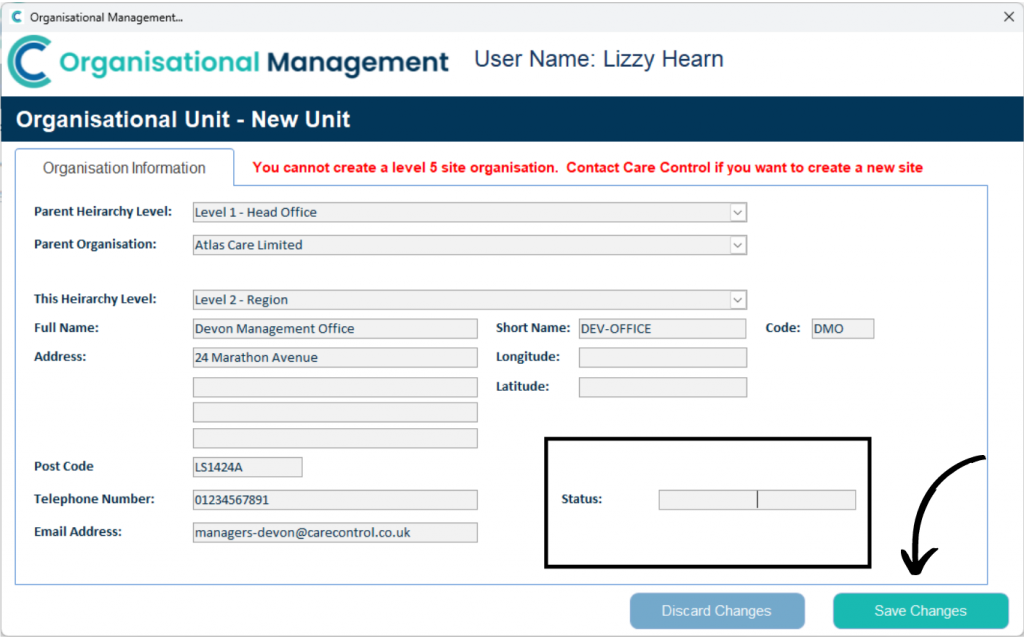
First, select the Parent Level & Organisation. This is the unit which is above the one you are making. For example, if creating a regional office unit, its parent would be the national office unit.

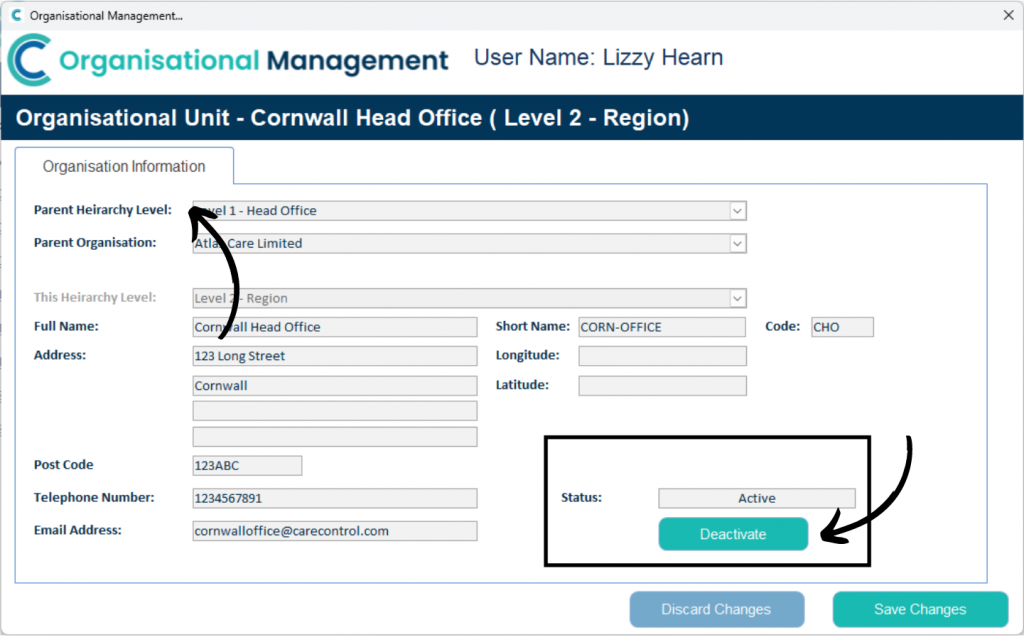
Next, enter the details about the unit, including its Hierarchy Level, Name, Location & Contact Info as well as a Short Name & Code.

There are also options to add Longitude & Latitude details for the unit – this is required to use the Map View on the Organisational Service Status. The guide linked below covers how to retrieve longitude and latitude data to paste into the dedicated boxes in the form.

 CSG Geocoding – Manual Latitude and Longitude Entry – Care Control Learning Hub (cclearninghub.co.uk)

Follow steps 1 to 3 of the guide, then paste the details into the form in CC Windows.

9

Here is the same form populated with an example Region Unit.

Since its a regional office, its parent is the Head Office.

Its name is Devon Management Office, so for the short name, DEV-OFFICE has been used, and for the code, DMO has been entered.

The Status box will auto-fill after pressing Save Changes.

10

After saving an closing the form, return to the Manage Organisations dashboard.

Click on the Head Office unit to view the units below it in the hierarchy.

11

We can now see the Region Unit created in step 9 of this guide, the Devon Management Office. Click on the eye icon to view further details about the unit.

Clicking on the name of the unit will show which (if any) units work beneath it in the hierarchy. For example, the sites which the Devon Management Office control would appear.

On this page, you can also toggle whether inactive units are shown via the tick box.

You can also refresh the data on the page if any changes have been made.

To go back to the Level 1 – Head Office view, simply press on the Parent Name which is underlined on the right hand side.

12

Selecting the eye icon in the previous step will open the details of the unit. Here, you can Edit the Organisation via the dedicated button. 

Powered by BetterDocs

Important links

Contact

support@carecontrolsystems.co.uk

01822 738 100

v2.40