Recruitment – Settings – Care Control Learning Hub

Recruitment - Settings

This guide will cover how to find and amend the settings for the Recruitment tool on Care Control Windows. This includes contract and induction set up, message templates as well as access settings.

1

Within the Recruitment tool, navigate to the Settings button, which can be found in the top right corner of the window.

2

The first settings on the page relate to industry, interview time and review time.

The Default Industry can be set as Older People, Support Living or Domiciliary Care.

The Default Interview Duration and Review Time can be set as a figure in minutes. 

We will next move onto contracts. Press Add / Amend Contracts to begin.

3

A new window will open. Existing contracts will be viewable in the drop-down list at the top of the page. 

Press New Contract to create another one.

4

Enter a name for your contract and press OK.

5

You will be presented with a large blank text box. You can enter text into this area. There are some example keyboard shortcuts shown in the screenshot which can help you customise your contract. Alternatively, highlight written text to reveal further options, such as font type, size etc.

A list of placeholders are shown on the right hand side of the window. These will be replaced by the specific information when the contract is used.

For example, #EmployeeName# will be replaced by the staff members name when the contract is saved in the future.

After completing the written text, press Save Contract.

6

We will now move onto the induction settings. 

Press Add / Amend Inductions to begin.

7

A new window will open. You can view existing inductions from the Induction Name drop down list. This is how you can amend them in the future.

To create a new one, press New Induction.

8

Enter a name for your induction and press OK.

9

Begin by creating categories for your induction. Press Add Category to create a new one.

10

Enter a name for your category and press Save.

11

Your new category will appear on the left-hand list. 

To add an item to it, select the category and press Add Item.

12

A blank form will open. Begin by confirming the correct Parent Category is selected.

Then, enter the name of the item and a description for it. See the screenshot for an example.

Select who can Sign Off the item via the drop-down list and then select a Target Completion Date.

Note: if amending an existing induction item, the checkbox at the bottom will force the changes into any active staff inductions currently going on.

Press Save Item to complete the process.

13

Your new induction item will appear in the list.

Continue to build your categories and items as required.

14

We can now move to the next section of the settings.

These relate to the Application Form. The information is displayed in a table, separated into Section, Field Name and whether the section is mandatory or shown in the form.

Double click on a row to amend it.

15

The row will open.

Here, you can change the name of the section.

You can also choose whether the section is Mandatory (whether or not it is required in the application form) as well as whether the section is Switched On (unticking this will remove it from the application form).

Press Update after making any changes.

16

The next area of settings relate to the Application Form Attachments.

You can amend existing attachments by selecting it from the table and pressing Edit.

Alternatively, press Add to create a new one.

17

Enter a name for the Attachment Type and select whether it is a Mandatory attachment for the application form.

For example, you may want applicants to attach their CV. In this case, you could call the attachment type ‘CV’ and tick it as mandatory.

Press Save.

18

Moving on the the Application Form Declaration Message.

This is a declaration which applicants will be required to sign when completing their application.

Press Edit to amend it.

19

A new window will open. 

You can freely type or edit text within the text box.

Press Update to complete the changes.

20

The next section of settings contains the Recruitment Message Templates.

These templates are used to send messages to applicants depending on the outcome of their application. For example, to confirm an interview, to thank them for applying or to inform them of their success.

Press Add to create a new one or select one from the table and press Edit to amend an existing one.

21

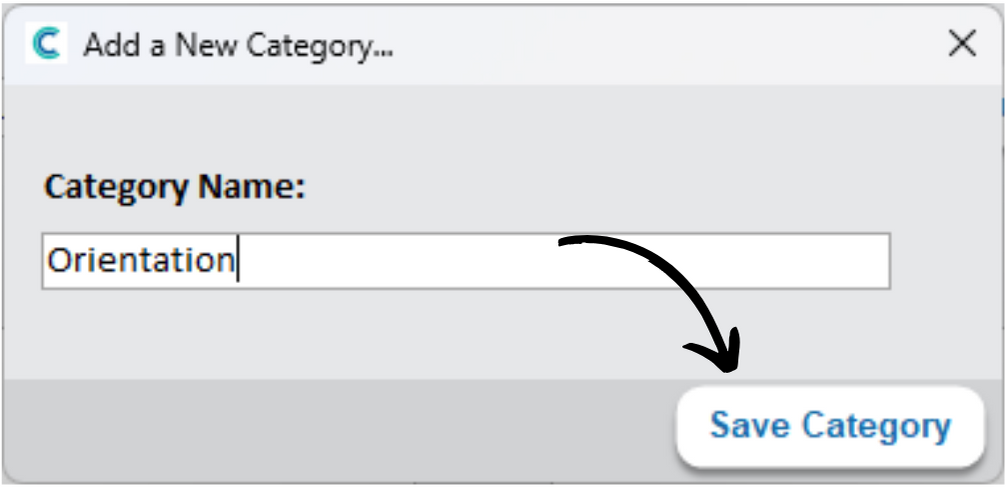
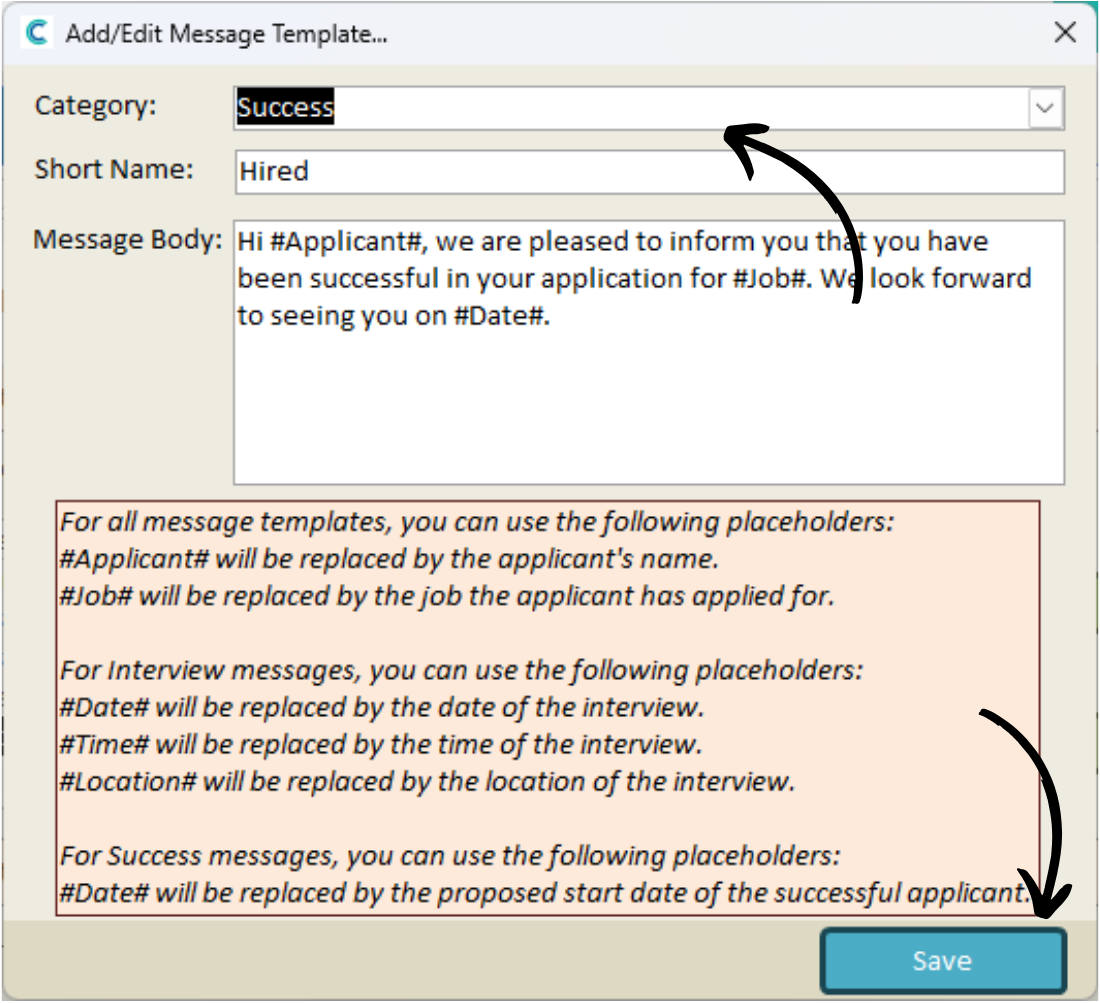
Select the Category from the drop-down list. Then, enter a Short Name for the template. For example, the ‘Success‘ category could have a short name of ‘Hired‘ or ‘Accepted‘.

Next, build the content of the message template in the text box below.

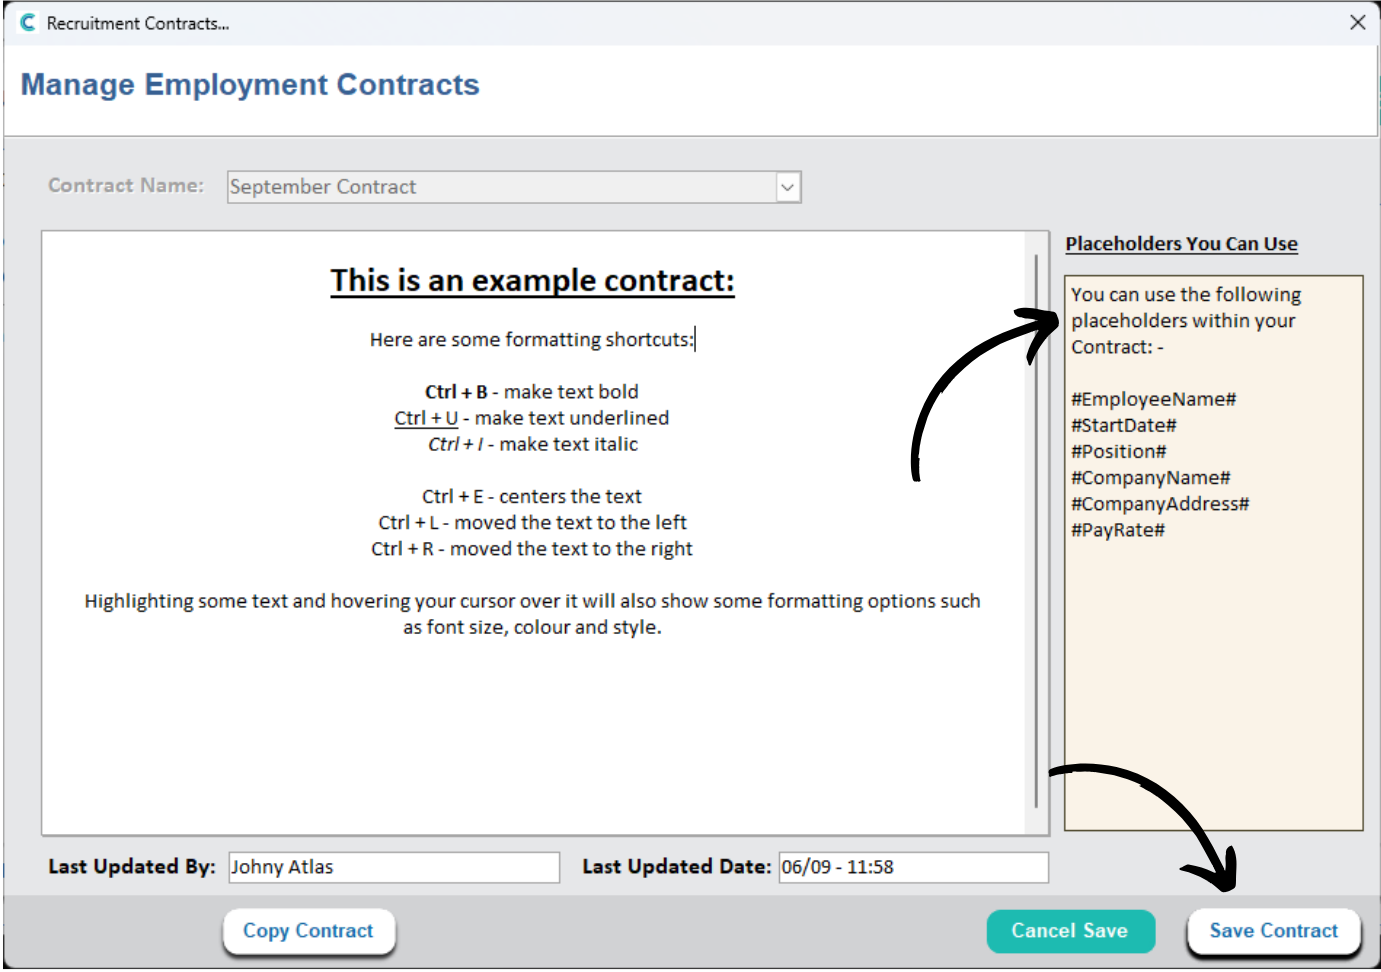
You can use Placeholders in place of specific information, such as an applicants name. These will be replaced by the right information when the messages are sent. 

For example, the #Date# placeholder will be replaced by the date of the interview.

Press Save to complete the template.

22

The final area of recruitment settings relate to the Access for staff members to the recruitment tool.

Staff members with access already will appear in the table, alongside a summary of their access level.

To amend an existing staff members access, select them and press Edit.

Alternatively, press Add to grant new access.

23

Select the Staff Member from the drop down list.

Then, tick the check-boxes to grant them access to that area. Each area is explained.

Finally, press Save to complete the process.

Powered by BetterDocs

Important links

Contact

support@carecontrolsystems.co.uk

01822 738 100

v2.40