⚠️ System update: We are aware of an issue affecting certain areas and user roles within the system following the new Navigation Menu release. Please note that Super Admin access is working as expected. Our Development Team is actively investigating the issue and working to implement a resolution as quickly as possible. We appreciate your patience and understanding while we work to restore full functionality.

View Categories

Create further rotas in Cloud Roster

To make further rotas in Roster Cloud you need to follow these simple steps.

Step 1:

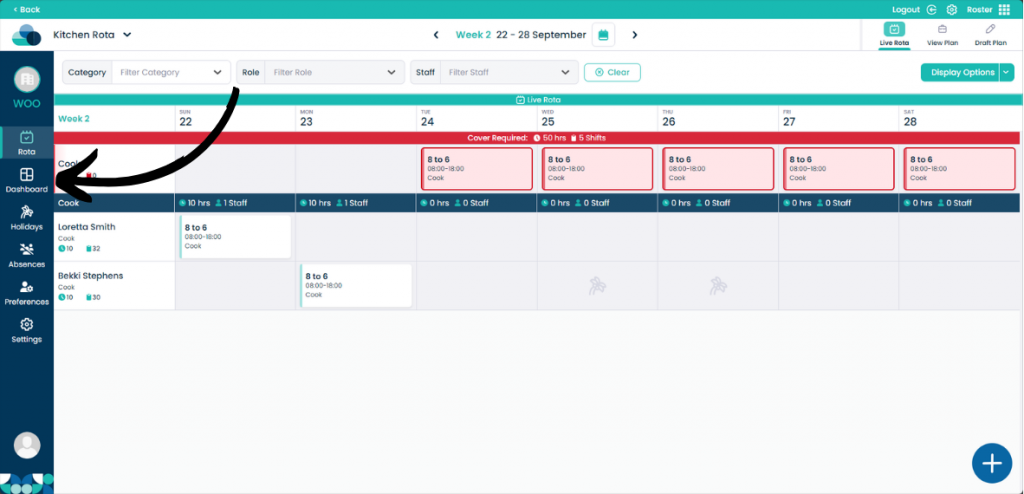
When looking at the rota screen, click the Dashboard button on the left hand pane.

Step 2:

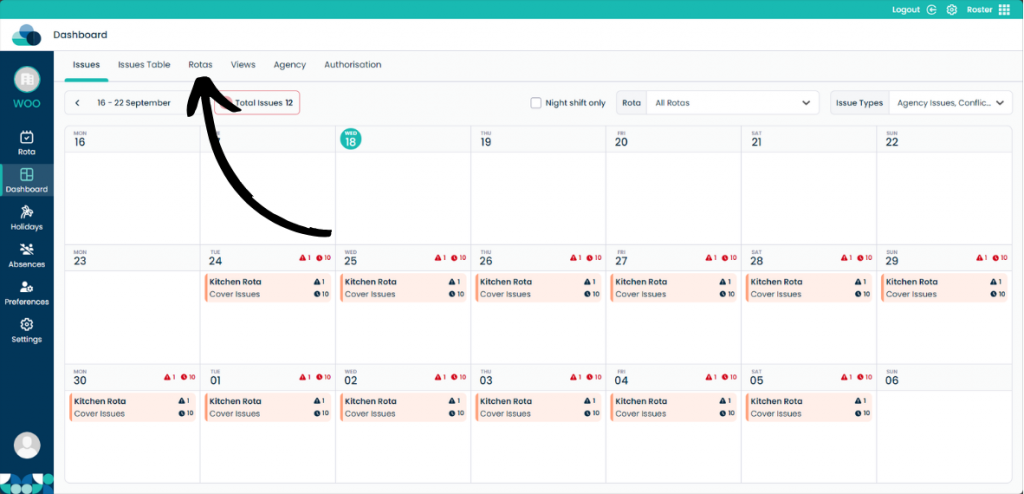
On this page, click Rotas on the menu.

Step 3:

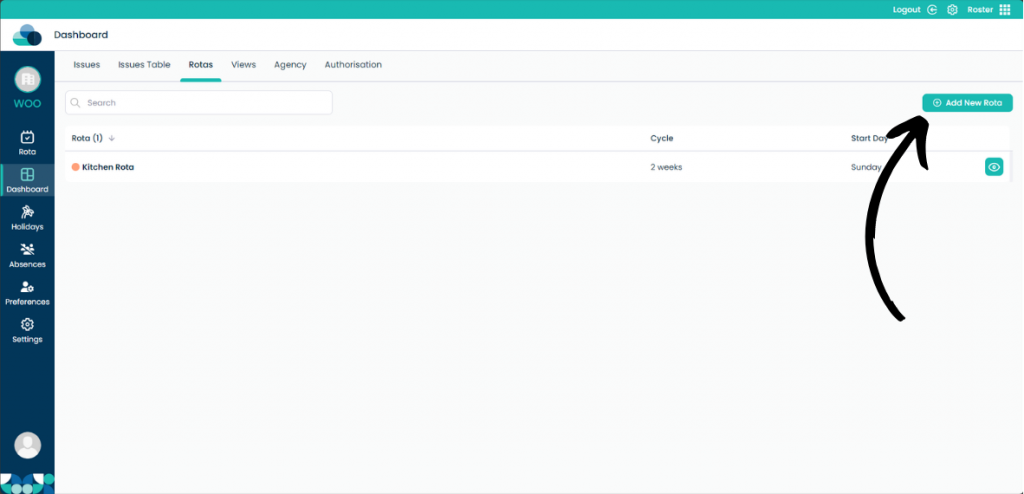
Click Add New Rota.

Step 4:

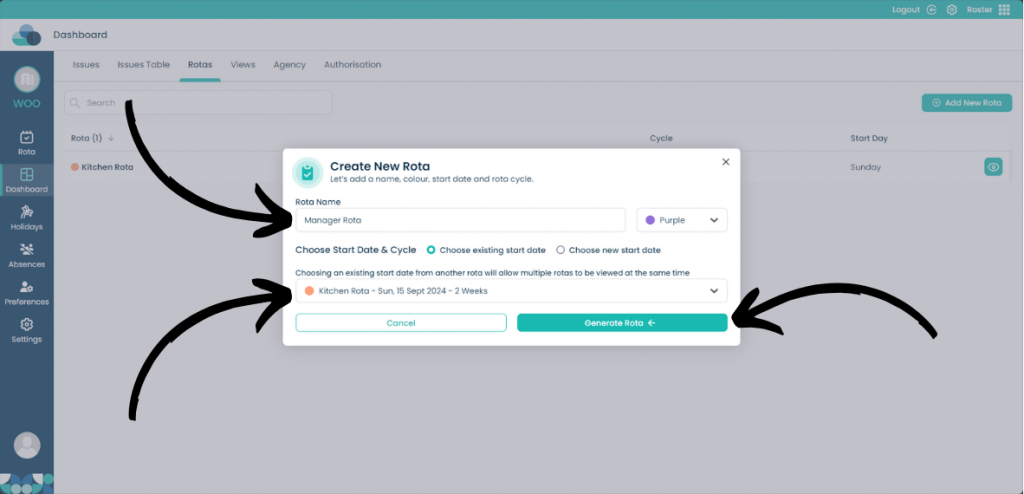
The same menu when you created your first rota will appear. Input all of the information for the new rota.

On this page you can select Choose existing start date. This will start the rota at the same time as your already made rota.

Once you are happy with the settings, click Generate rota.