This guide will cover how to create a shift indicator for your payroll and roster systems. These indicators can be used to mark certain shift types with altered rates of pay.
1
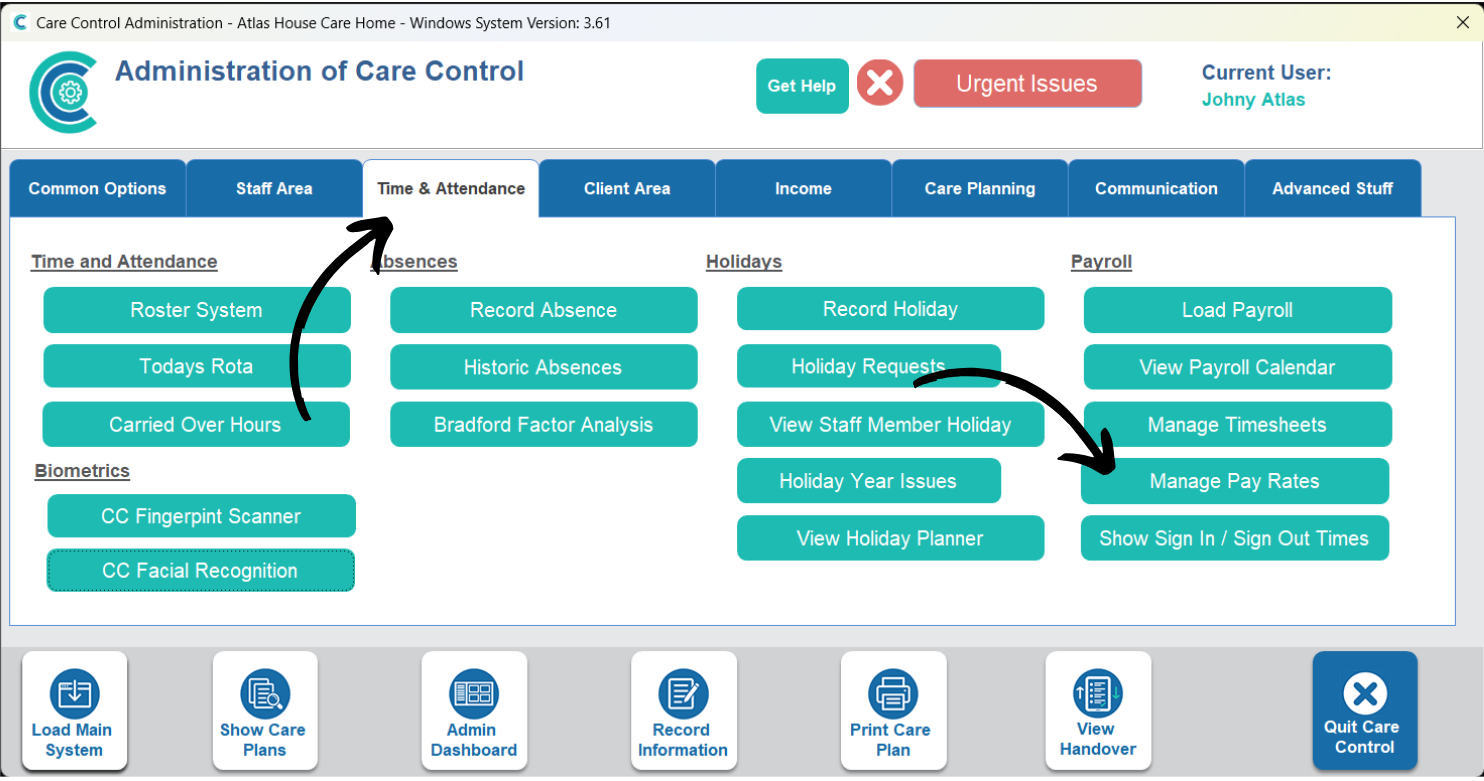
In the Administration of Care Control Windows, navigate to the Manage Pay Rates tool, which can be found under the Time & Attendance tab.
2
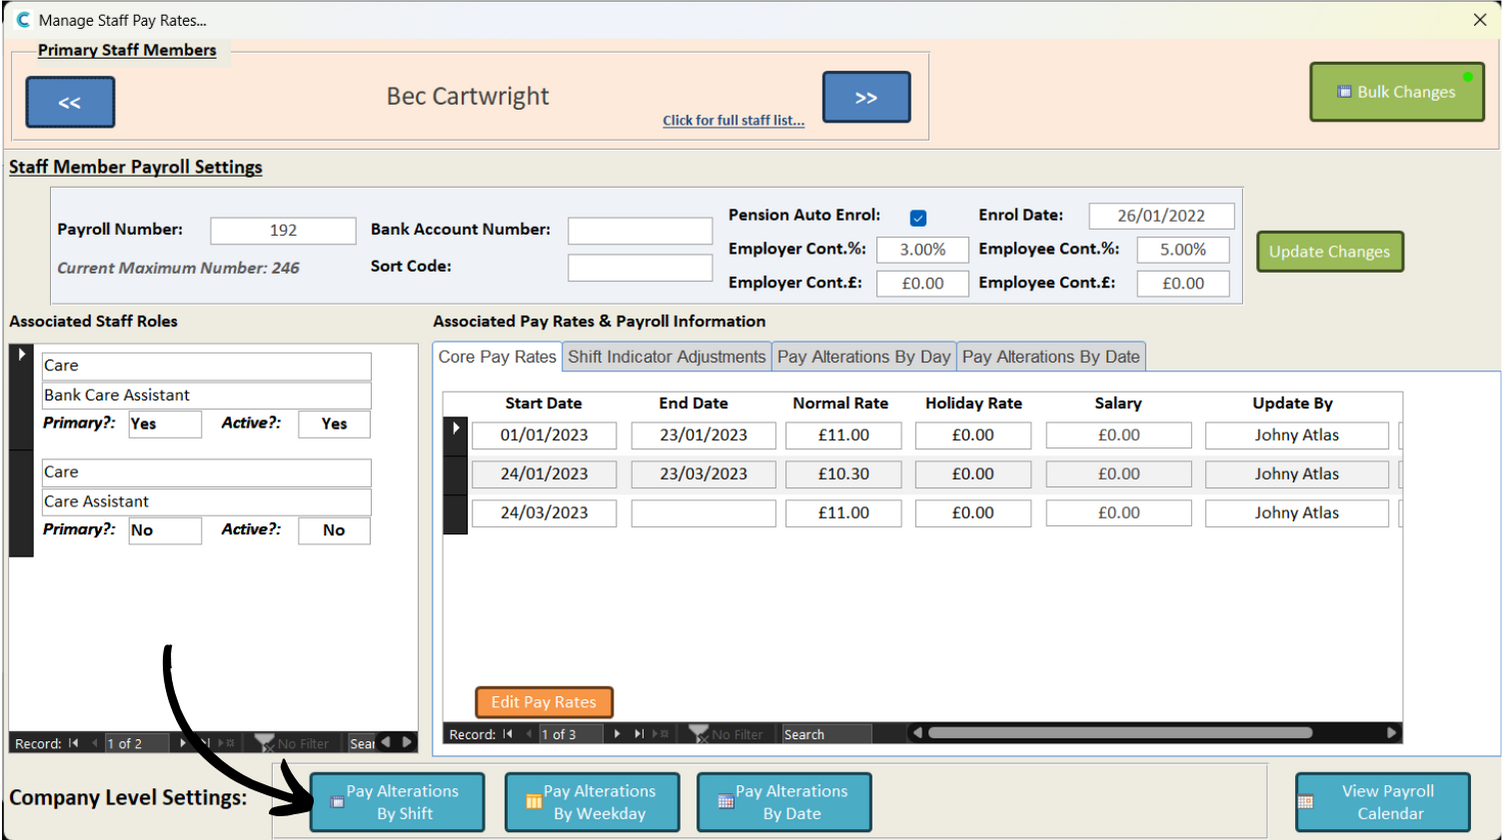
A new window will open. Here, a summary of pay rates for your staff members will be displayed.
At the bottom, select Pay Alterations by Shift.
3
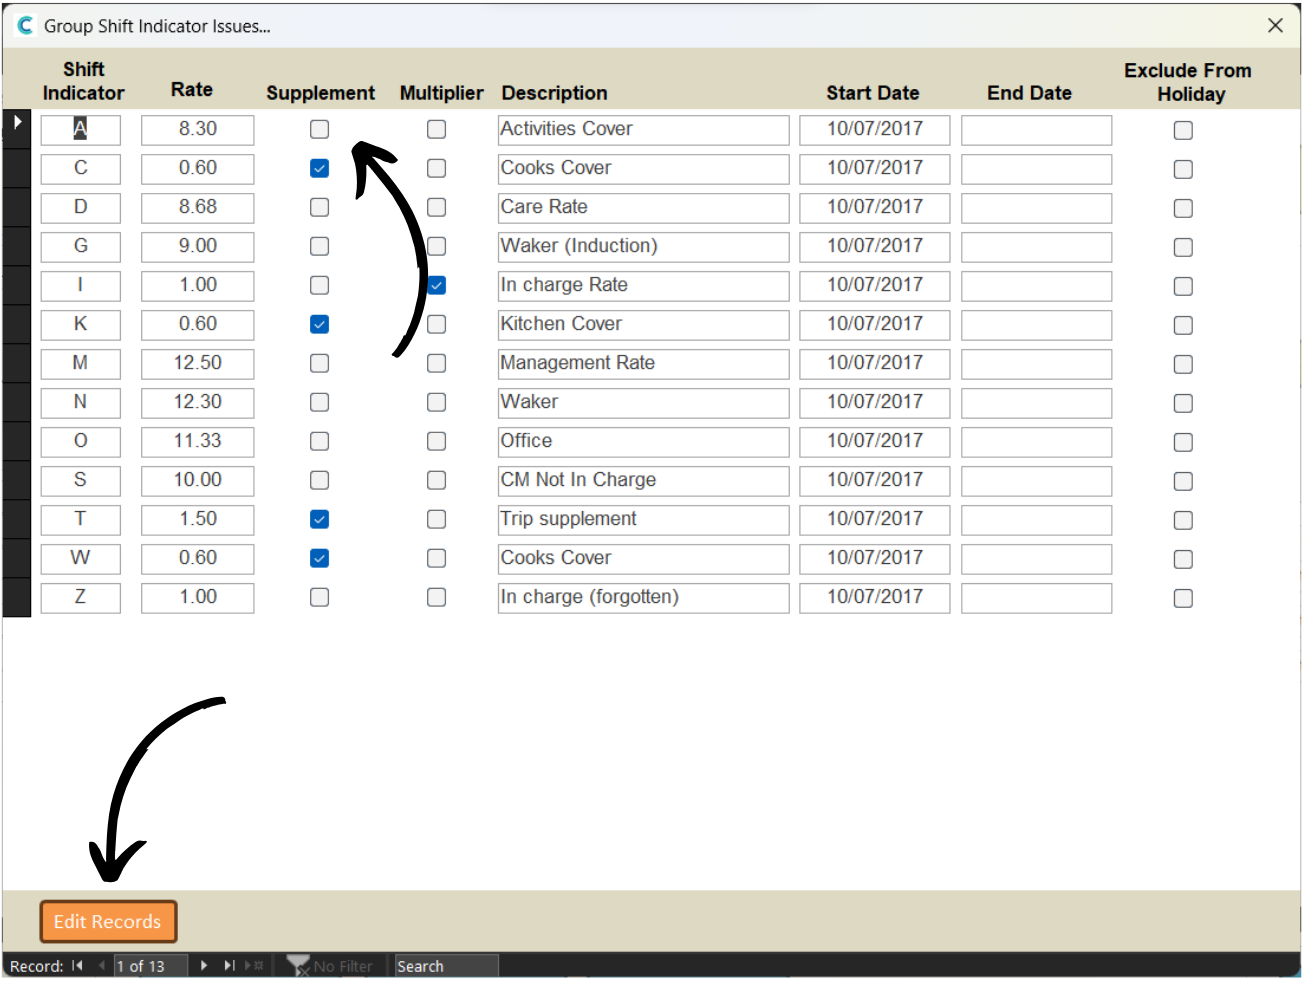
A list of active indicators will appear.
An explanation of each column can be seen below.
Press Edit Records to create a new one or amend an existing one.
Shift Indicator – a letter to identify the indicator.
Rate – this can be an hourly rate, supplement to a rate or a multiplier to a rate. Example below.
Supplement – if ticked, the rate will be added to the staff members wage.
Multiplier – if ticked, the rate will be multiplied by the staff members wage.
Description – a brief description of the indicator.
Start Date – when the indicator will become active on the system.
End Date – when the indicator will become inactive on the system (optional).
Exclude from Holiday – if ticked, the shift indicator will be ignored for the staff member who was meant to be working.
Example – if you enter 5 in the rate box – leaving multiplier and supplement un-ticked will result in the staff member being paid £5 per hour for the shift. If the supplement is ticked, £5 will be added onto their normal wage for the shift. If the multiplier is ticked, their normal wage will be multiplied by 5.
4
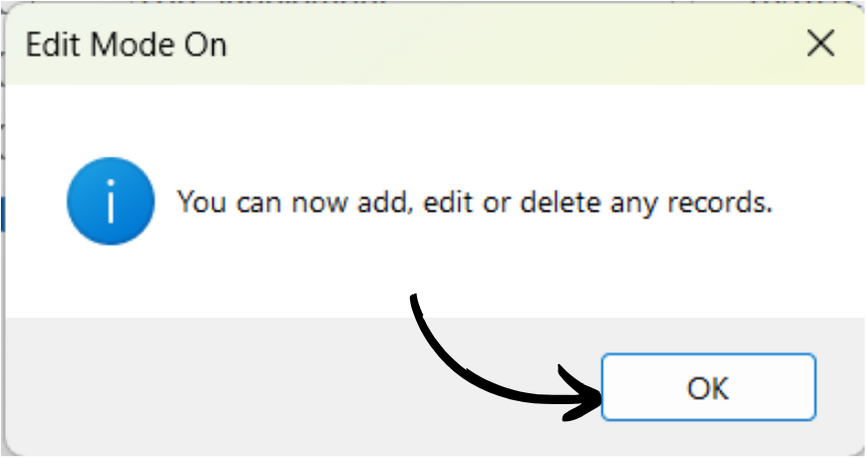
Press OK.
5
Enter a letter for the Shift Indicator. Next, enter the Rate and choose whether the figure is the wage, a supplement or a multiplier.
Then, enter a Description for the indicator, as well as a Start Date and End Date if required.
Finally, choose whether to Exclude the indicator from holiday and press Save Changes.