eMAR Administering Medication on eMAR
This guide will cover how to administer medication on the eMAR app
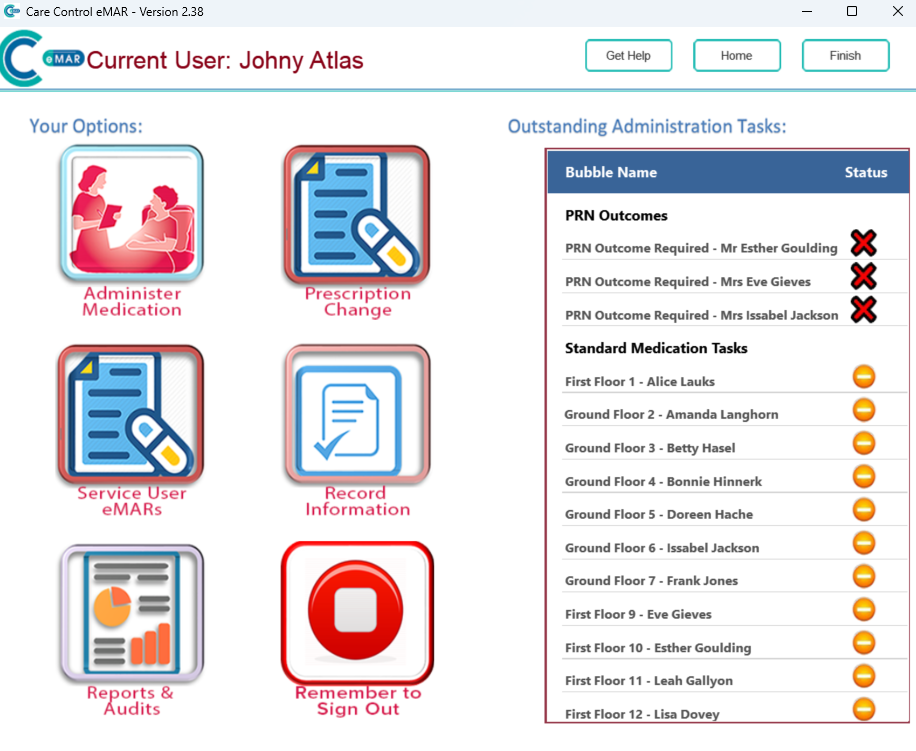
The purpose of this guide gives you a step by step tutorial on how to administer medication within Care Control’s eMAR app. Please note, the PRN Protocol Outcomes addition had been added to the the status page. Please follow the interactive guide below, a written guide is also available at the bottom of the page.

Written guide
1. This guide will cover how to Administer Medication and how to complete PRN Outcomes within Care Control’s eMAR.
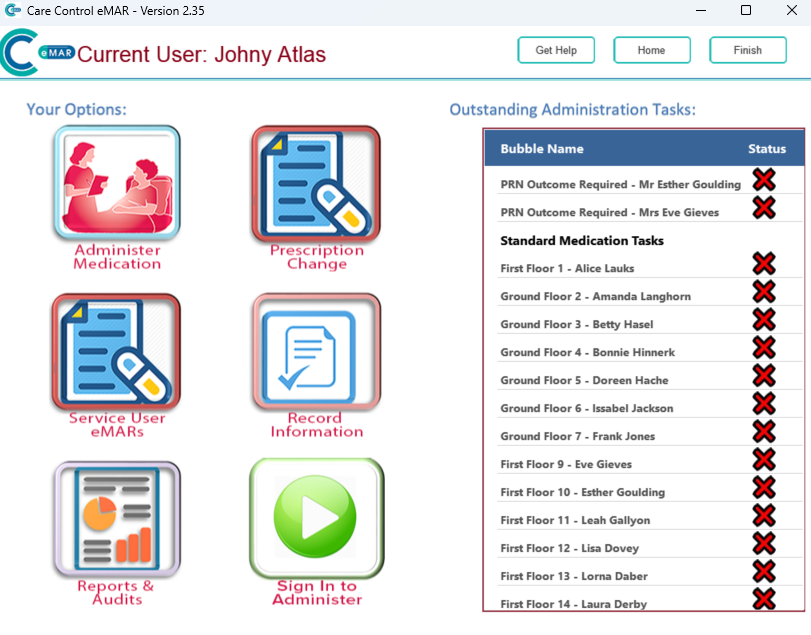
2. After signing into the Care Control eMAR (and selecting a drug trolley if set up), press the green ‘Sign In to Administer’ button to begin administering.

3. Next, press the ‘Okay’ button to return back to the status page.
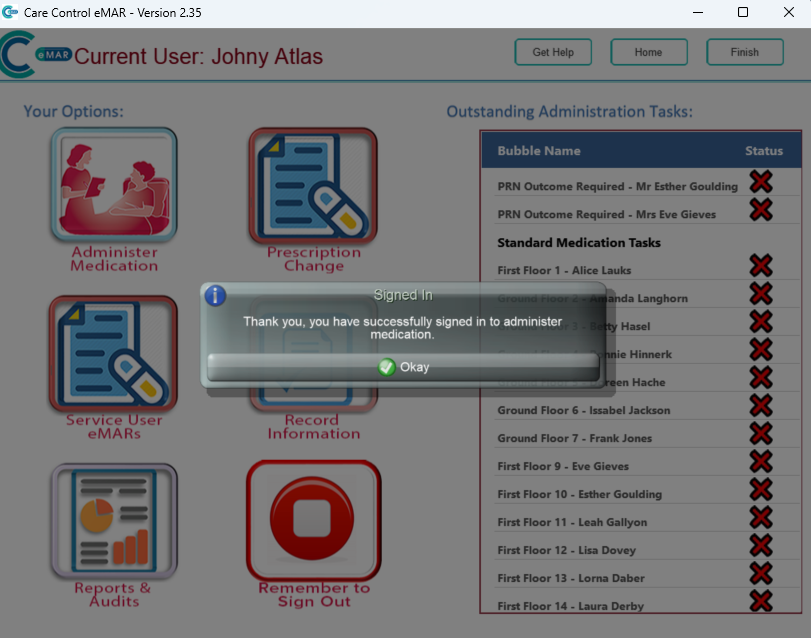
4. This button should now be red.
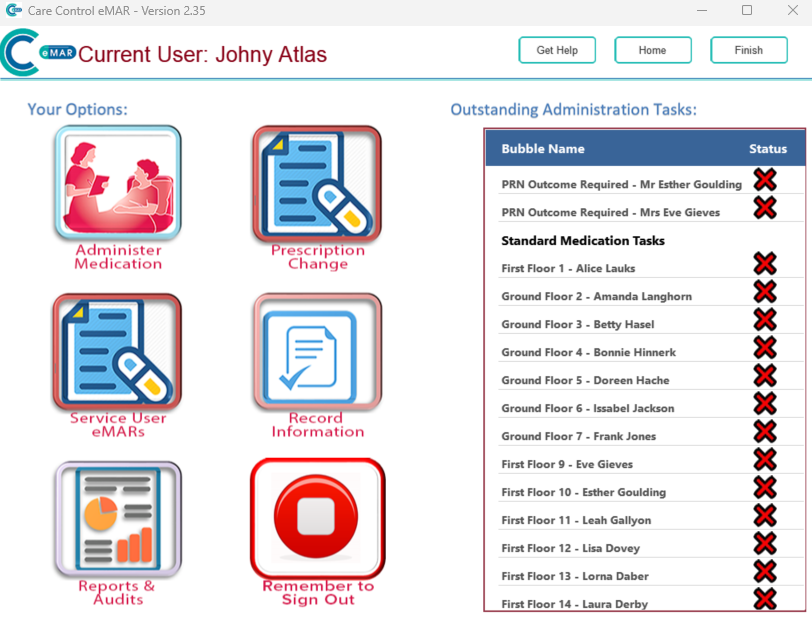
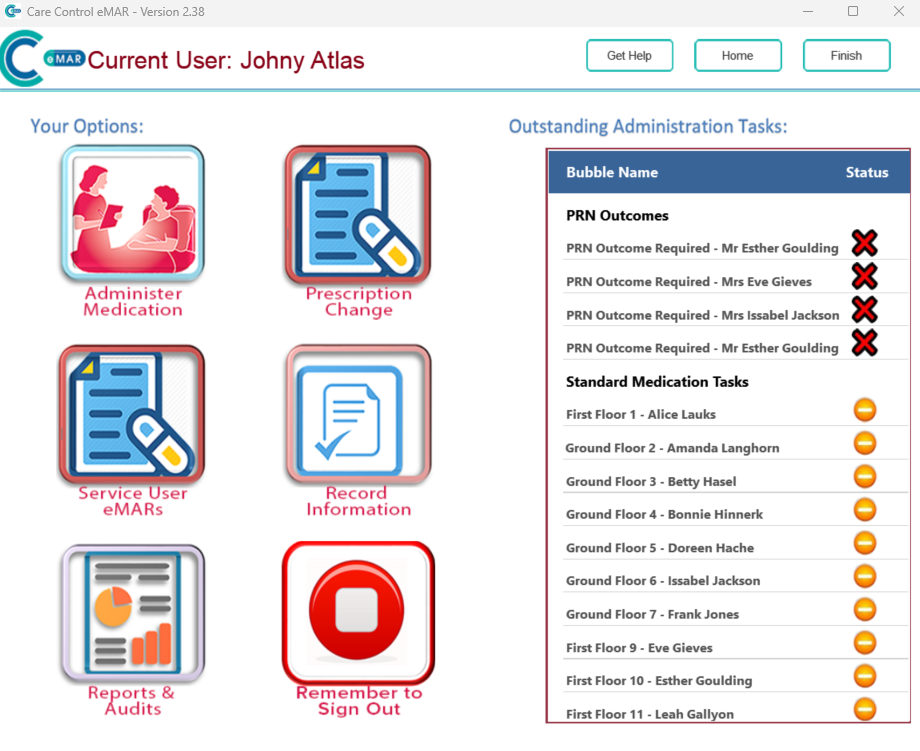
5. On the right-hand side of the screen is a list of the Outstanding Administration Tasks. This is where the scheduled medication will show when it is due to be given.

6. A new addition to this page is the PRN Protocol Outcomes and will allow you to complete.

7. The PRN outcomes on this task list will appear here after you have administered the medication.

8. Next, select a Service User from the list by clicking the name.

9. A new window will open, showing all the medication due for the selected Service User.
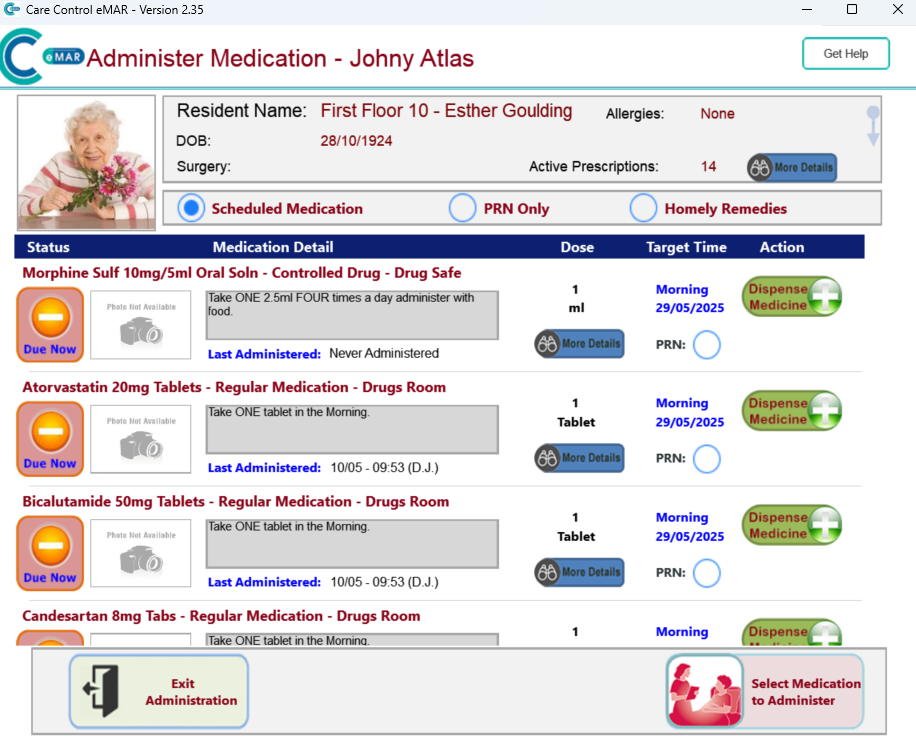
10. You can filter these by scheduled, PRN and homely remedy medications. You can also view information about active prescriptions.

11. As you can see from this example, you can administer regular medication and a controlled drug at the same time.

12. You can also view the PRN by scrolling down – this is up to you. For this example, I will use the PRN Only filter.

13. Here, you will be able to view ‘More Details’ and ‘View PRN Outcomes’.
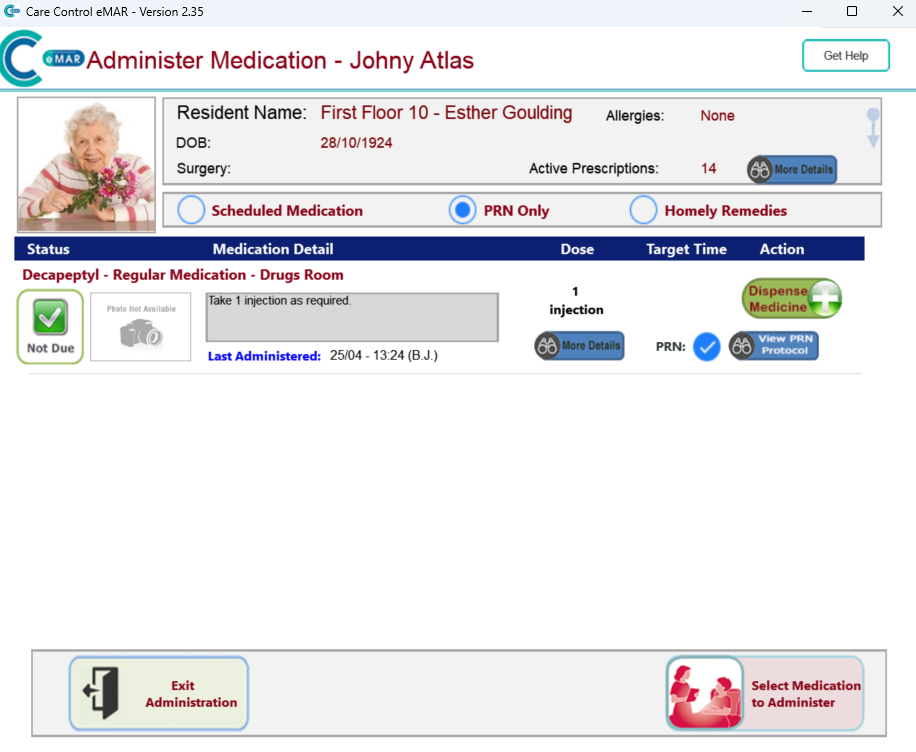
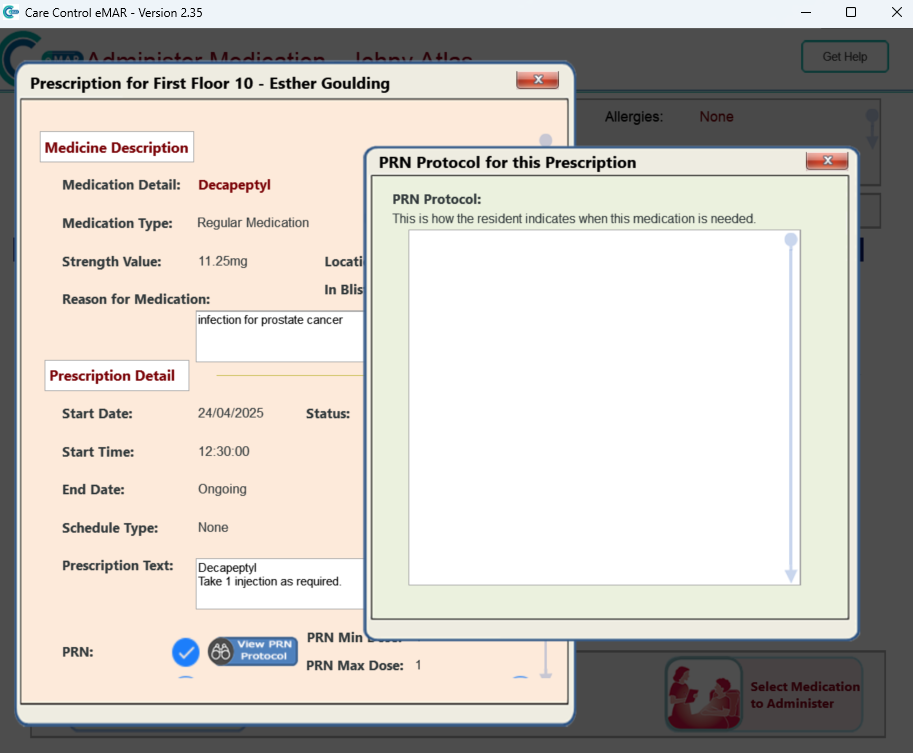
14. Click the ‘View PRN Protocol’ button.

15. A new window will open. Here you will be able to see the PRN Protocol for this prescription.
16. Now select the ‘Dispense Medicine’ button.

17. This window will open. Next, select the ‘Touch Here to Continue’ button.
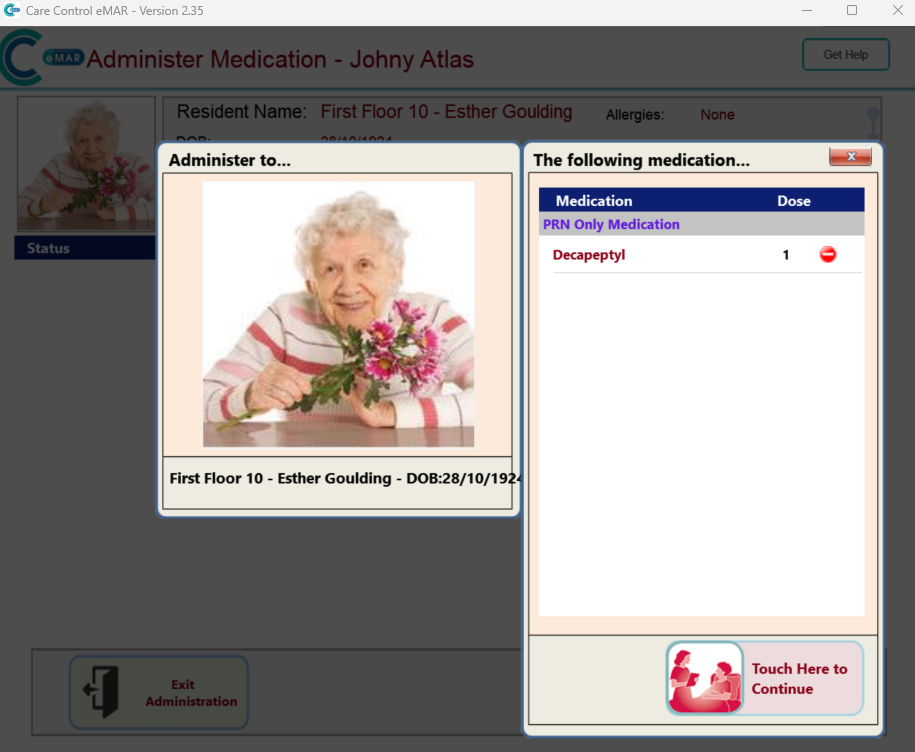
18. Another window will appear. The list of medications being administered will be displayed. For each, select a response from the drop down list at the top of the window.
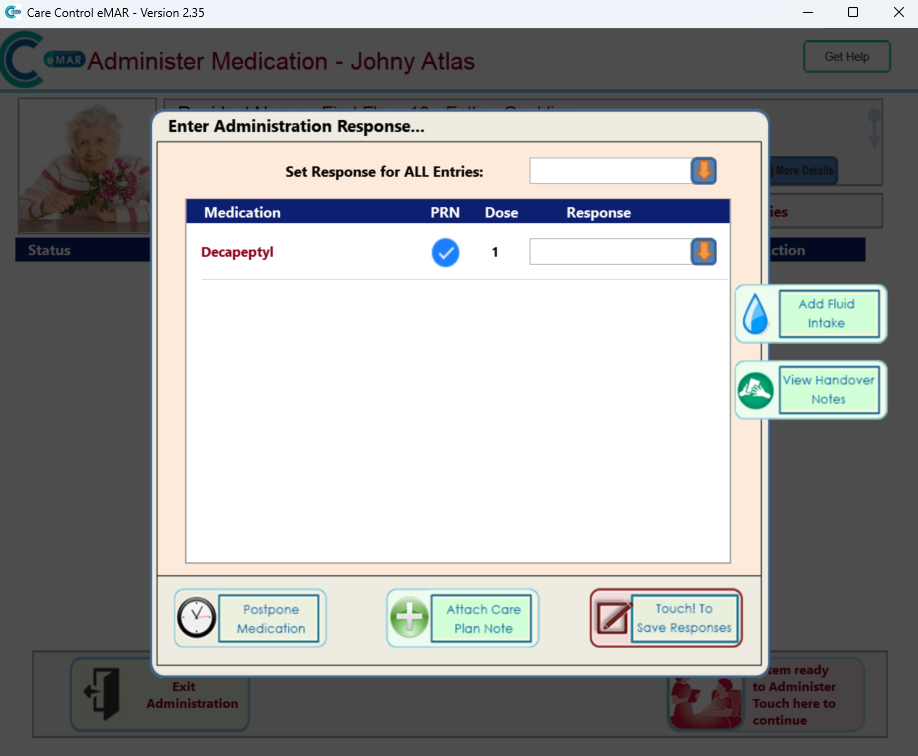
19. If you wanted to set a response for all entries, you can do this by selecting the arrow.

20. However, in a scenario where you have multiple medications to administer, you can select an individual response for each medication.
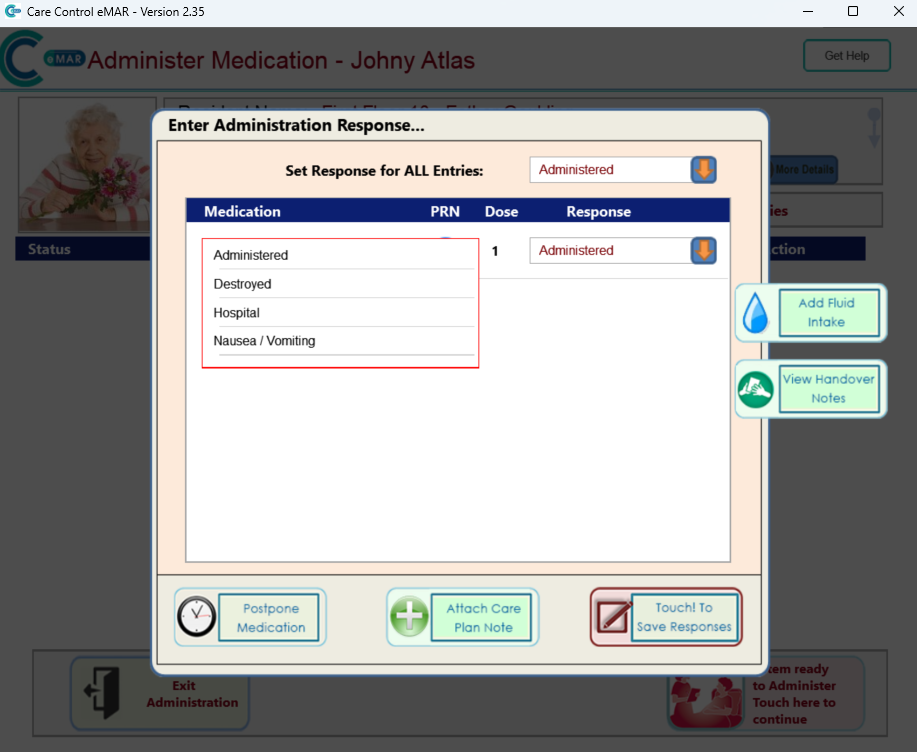
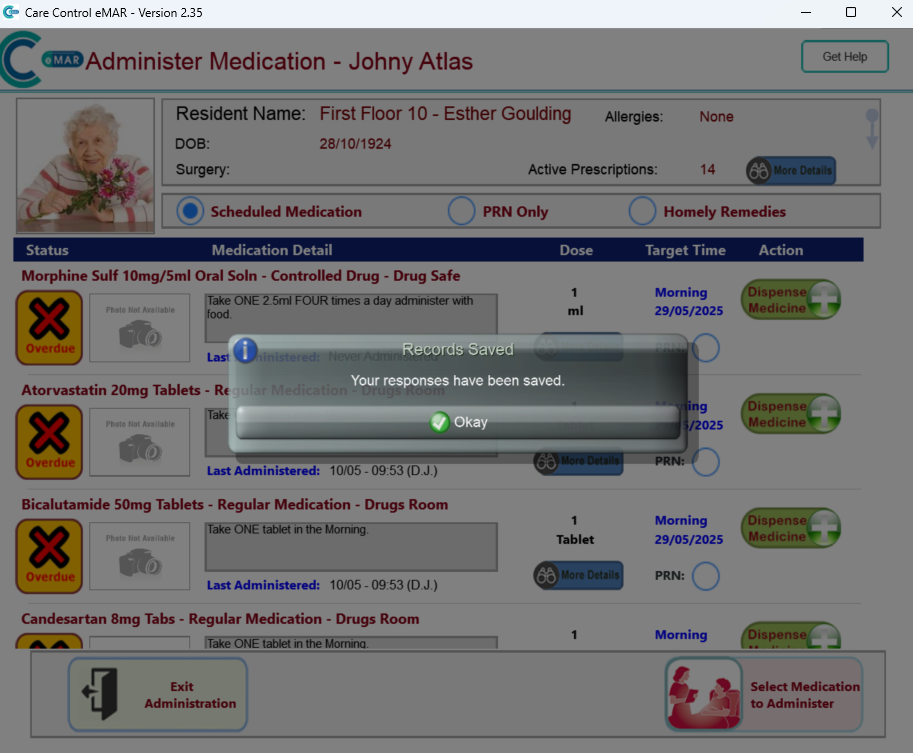
21. Once doing this – click the ‘Touch to Save Response’ button.

22. Select the ‘Okay’ button.
23. To add a PRN Outcome for a Service User, click the Service User from this list.
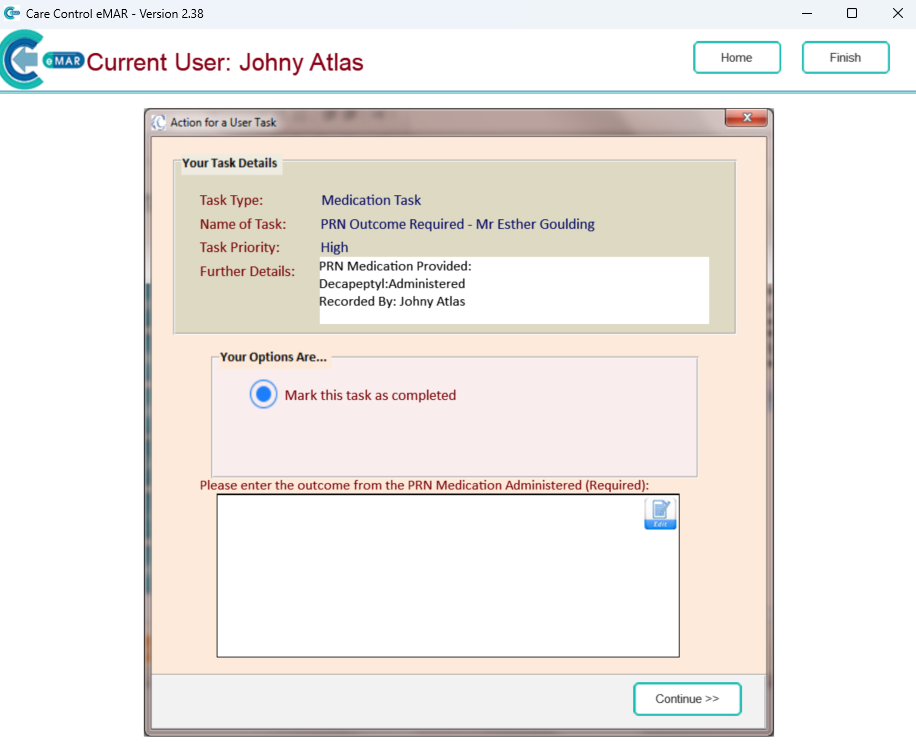
24. A new window will appear. Here, you will be able to enter the outcome from the PRN Medication Administered. You will need to select the ‘Edit’ button to enter the outcome.
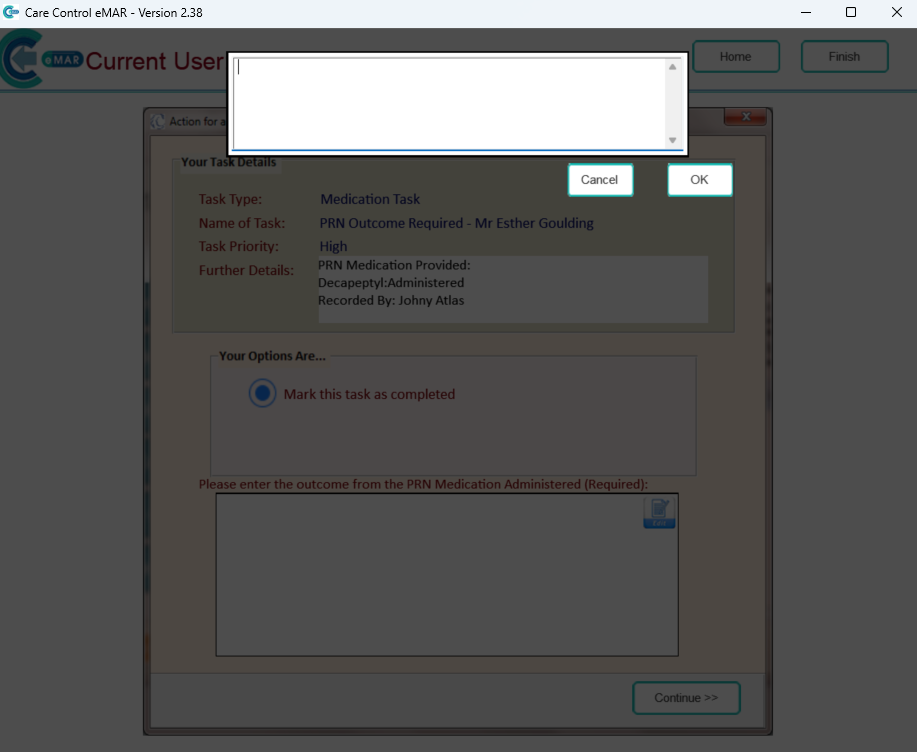
25. Enter the outcome here and press the ‘OK’ button once completed.
26. The outcome will then disappear from the PRN Outcomes box once this has been completed.
