View Categories

How to Create a Custom Handover Area

Learn how to create a Custom Area within Formal Handover Configuration. This guide explains how to name the area, choose the information it should include, adjust its filters, and add it to future handovers.

Takes 3 minutes
For: Managers
Updated: 22nd Sept 2026

Introduction

Custom Areas allow you to tailor Formal Handovers to suit the information your team needs to review. You can create a new handover section, give it a clear name, choose which information should appear within it, and apply filters to control what is included.

You can also choose whether the Custom Area should be automatically included in future handovers, helping you build a handover process that is relevant to your service.

In this guide you'll learn how to:

  • Open Formal Handover Configuration
  • Create a new Custom Area
  • Name the handover area
  • Choose the information and filters it should use
  • Add the area to future handovers
  • Save the new Custom Area

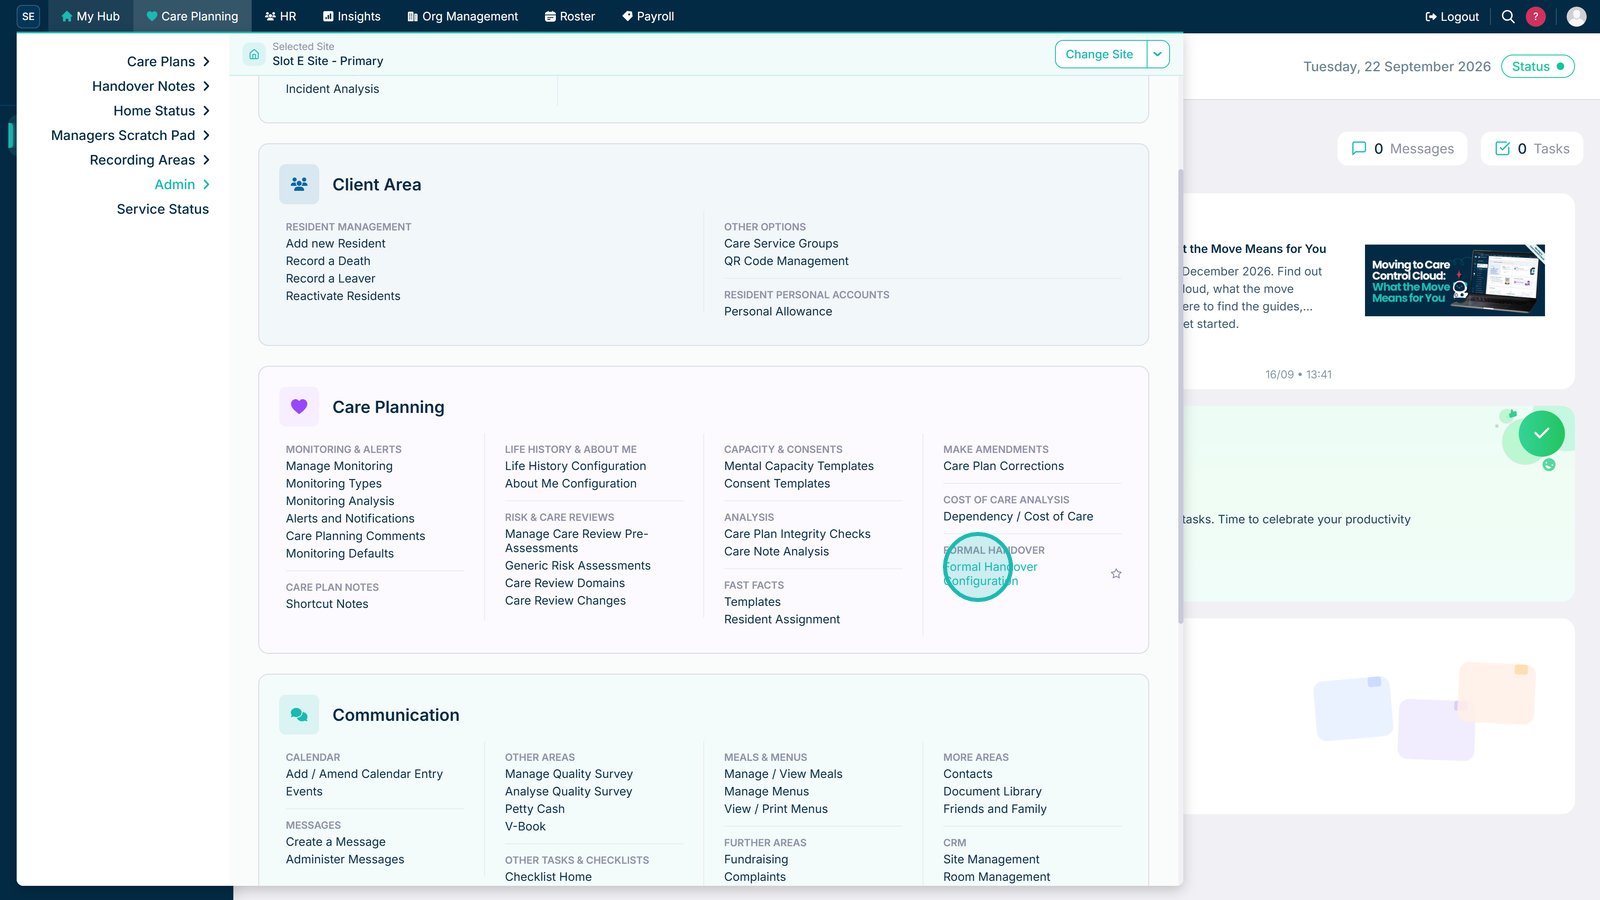
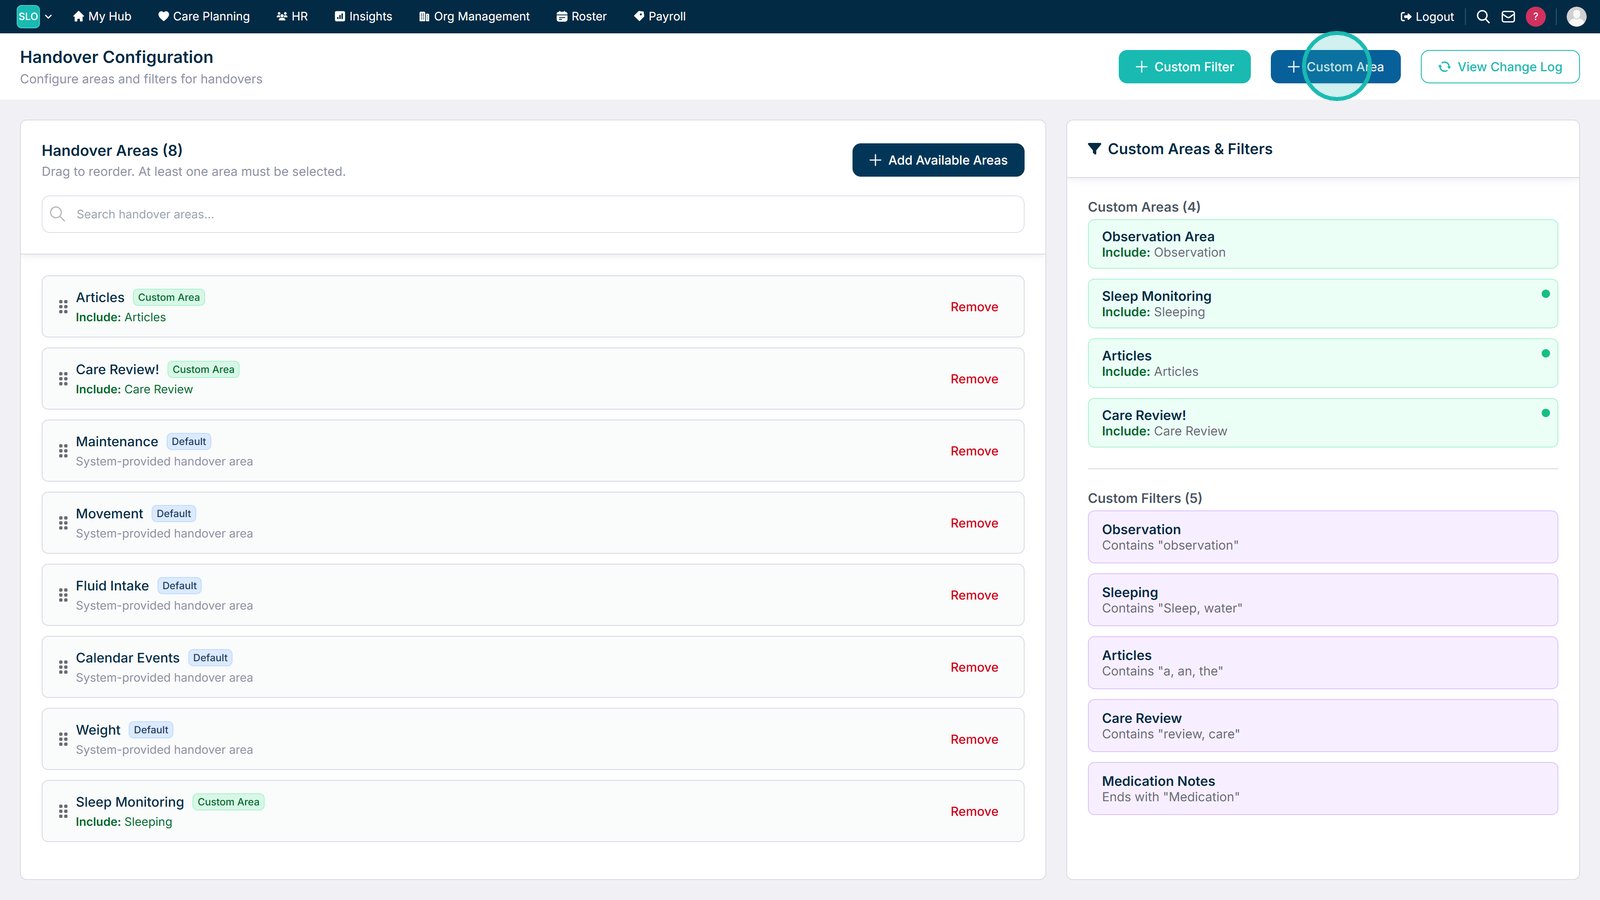
Open Formal Handover Configuration.

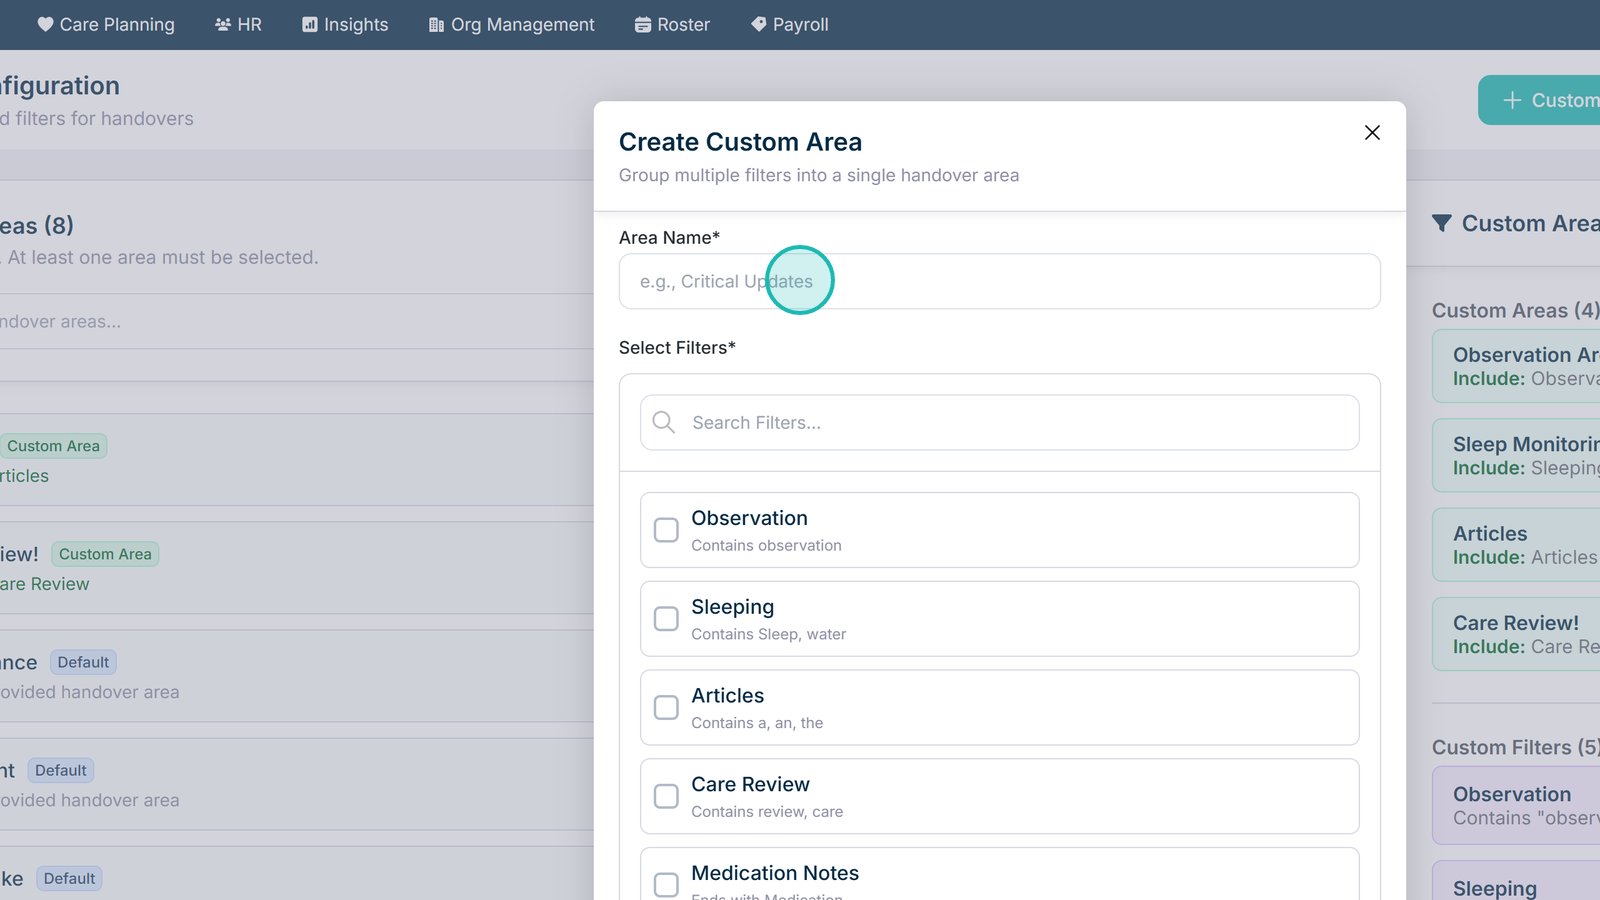
Select Custom Area to create a new handover area.

Enter a clear name for the new Custom Area.

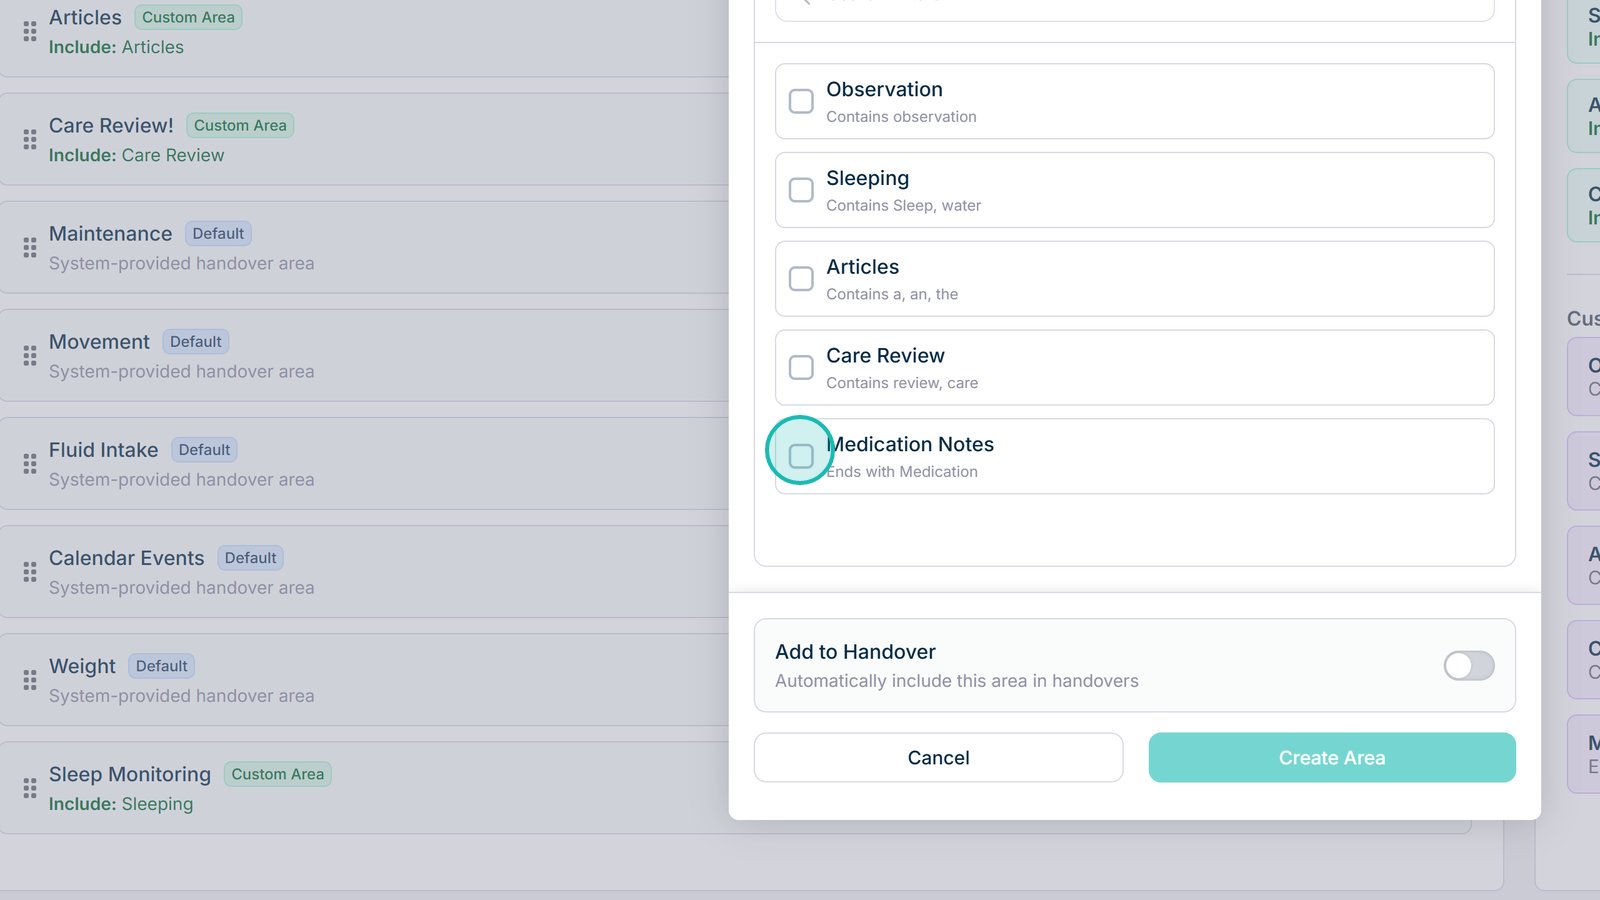
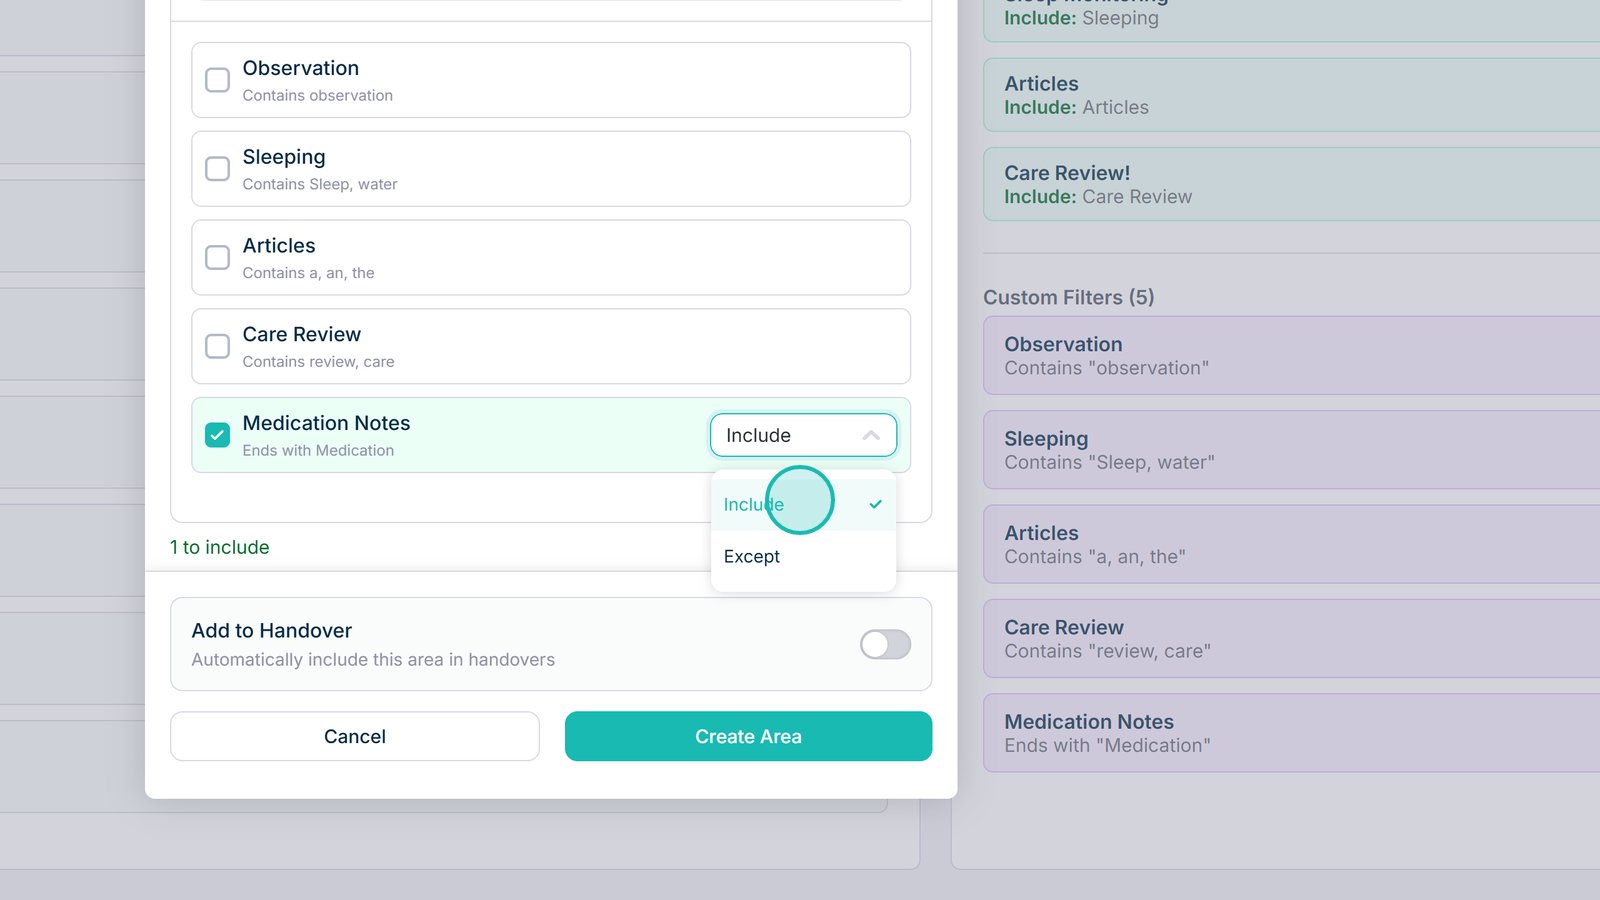
Select Medication Notes to include medication-related information in the Custom Area.

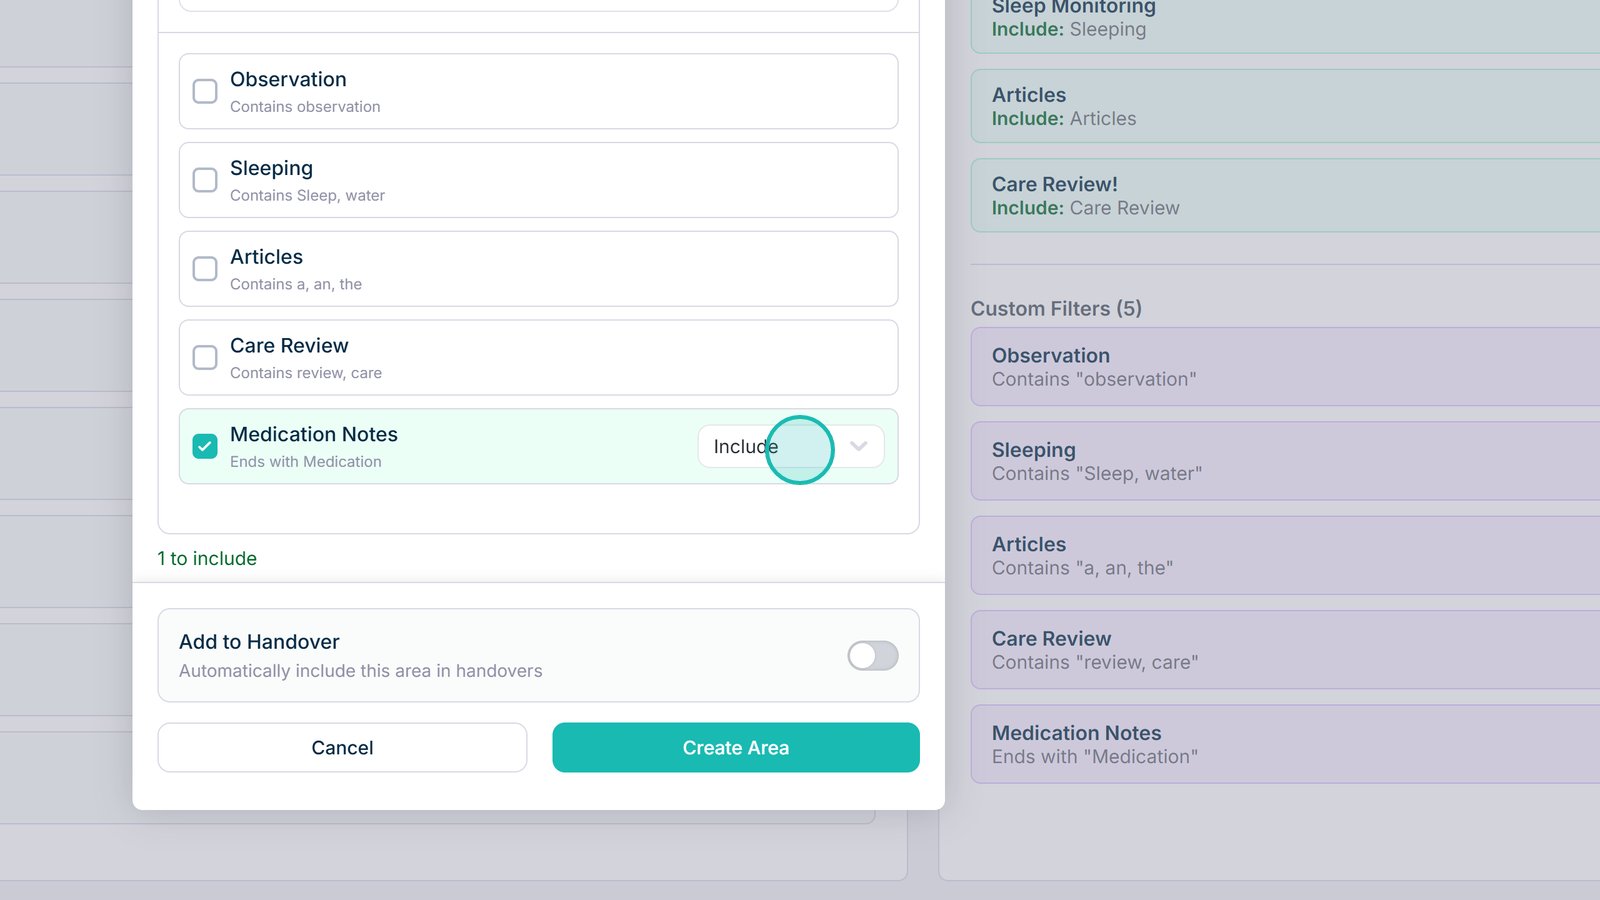
Choose how Medication Notes should be included within the Custom Area.

Adjust the available filter options to control which information is included.

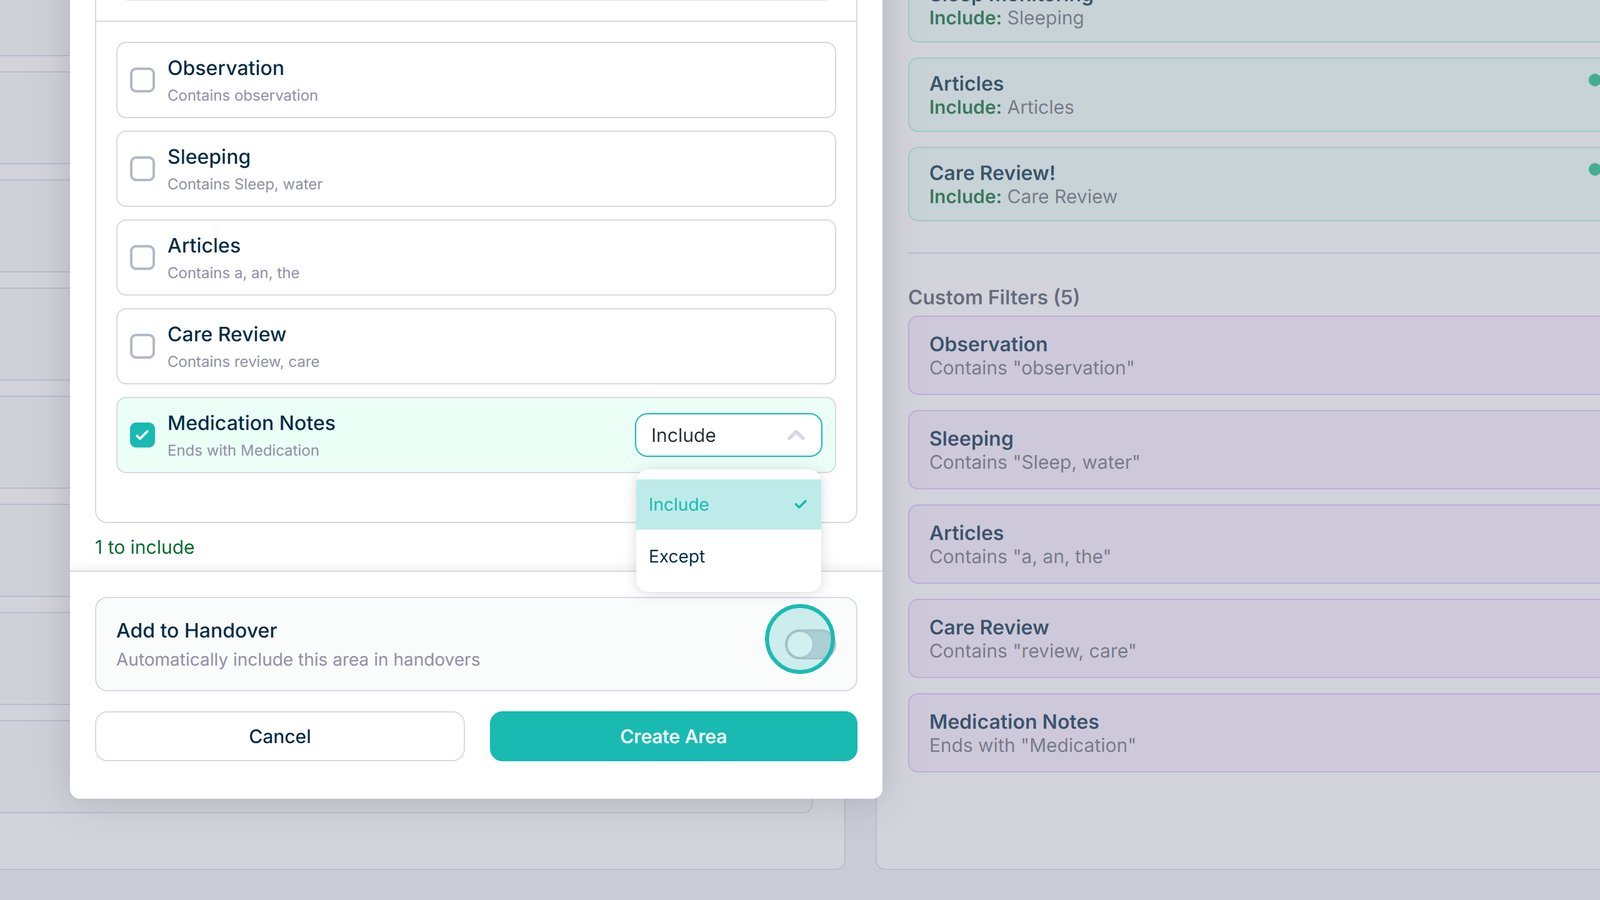
Enable Add to Handover if the area should be included in future handovers.

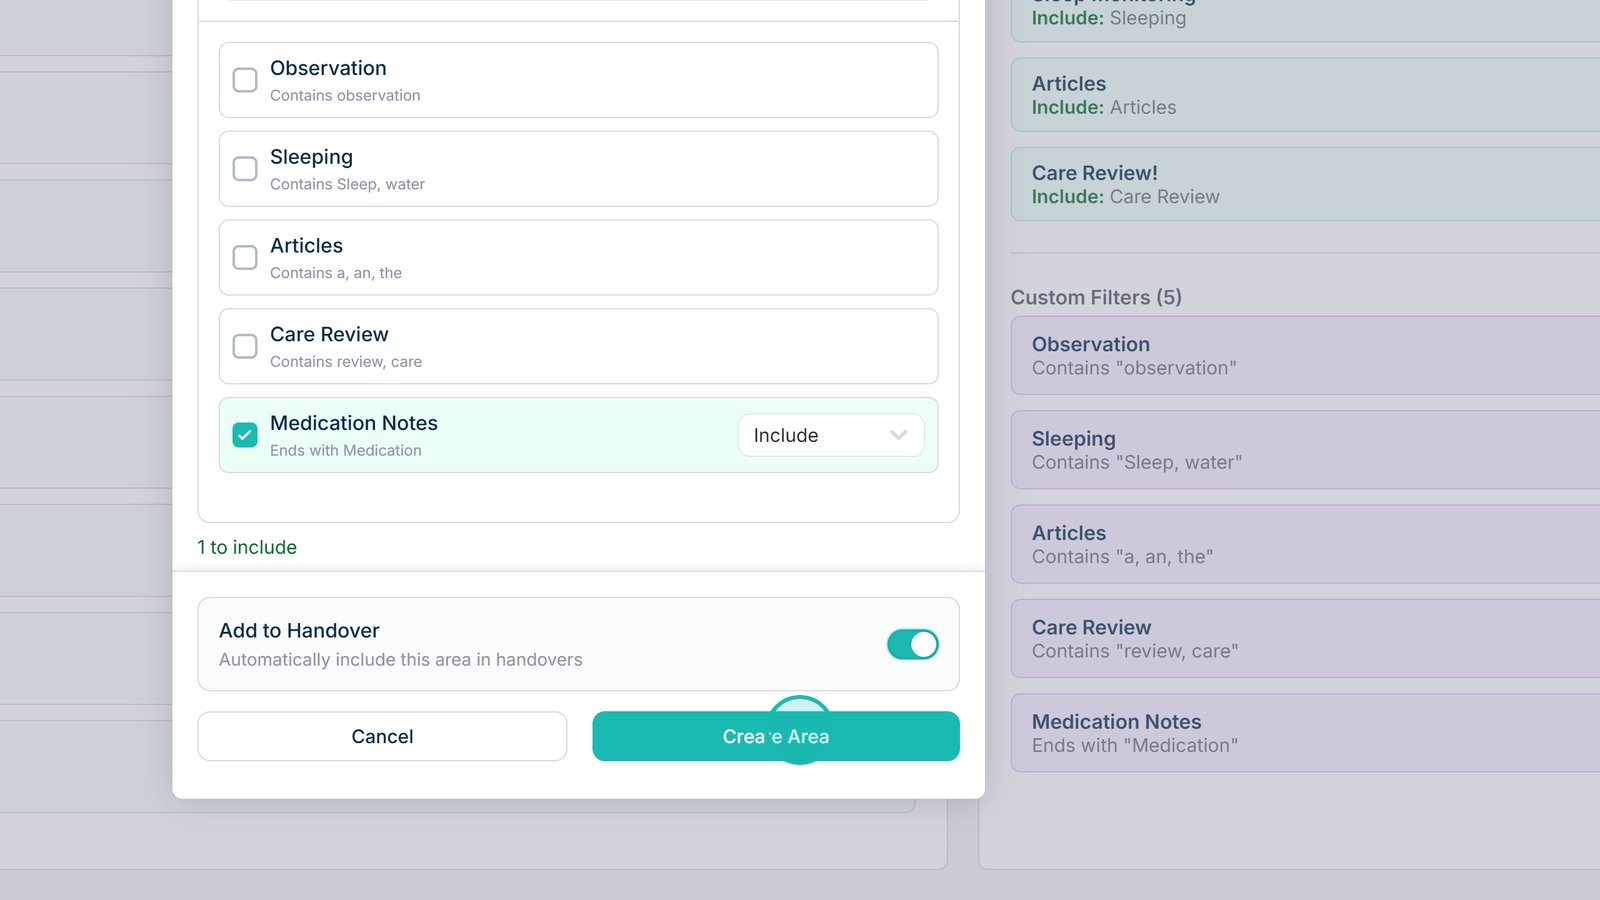
Select Create Area to save the new Custom Area.

Top tip

Keep Custom Areas focused on a clear purpose. Choosing only the information and filters your team actually needs will make handovers easier to review.

Was this guide helpful?

Need more help?

Can't find what you're looking for? Our support team is here to help.

Contact Support

Or call us on

On this page